What is a Mobile Standalone App?
Usually, all Simplifier Apps are mobile-ready and can be opened directly with the Simplifier Mobile Client.
If you don’t want to use the Simplifier Mobile Client App, you can build a “Standalone” Distribution for Android and iOS/iPadOS Mobile Devices.
When do I need “Standalone”?
- If you want to publish your App into the Google Play Store or Apple Store with your Company as Issuer, as well as with your own logo and name
- Your customers should not use the App-in-App-Concept / Simplifier Mobile App
Use our self-service to build and deploy standalone applications
Starting with MAKERS CHOICE 25-05/Simplifier 10, you can also use our self-service to build and deploy your standalone applications. Currently, the feature is in the Preview Feature Lifecycle stage.
Prerequisites
To build and deploy a Mobile Standalone Application for Android or iOS, you need
- An active Subscription on our Standalone Application Service.
- A Google and/or Apple Developer Account
- To maintain your App Details in the Store Account (e.g., Screenshots, descriptions, Import/export regulations, etc.) (Read more in Google Documentation and Apple Documentation)
- Certificates and Keystore files for your Google/Apple accounts
- Check your Server Environment. The configured URL for the active instance is used as the target instance for the Standalone Application. Make sure the URL is only the base URL without a slash (/) at the end (e.g. https://demo.simplifier.io)
Restrictions
Based on the usage of Mobile Actions, all required Cordova Plugins are automatically added to the Apps. Let us know if you need further Plugins.
Keep in mind that your configuration will not be persisted yet.
Google Play Store
To publish an Android App to the Google Play Store from App Editor, it has to be imported once manually to the store first. Otherwise, the publishing process will fail.
Apple App Store
Currently, just building the file without publishing it to the Apple App Store is not possible.
Deploy and publish to the Google Play Store and/or Apple App Store
To deploy and publish a Mobile Standalone Application, you need to activate the Feature in the Feature Settings.
As soon as the feature is activated, the Deploy button in the Application Editor is now a Menu Button. Press the down arrow and select the target store, the App should be built for.
Step 1 – Basic configuration
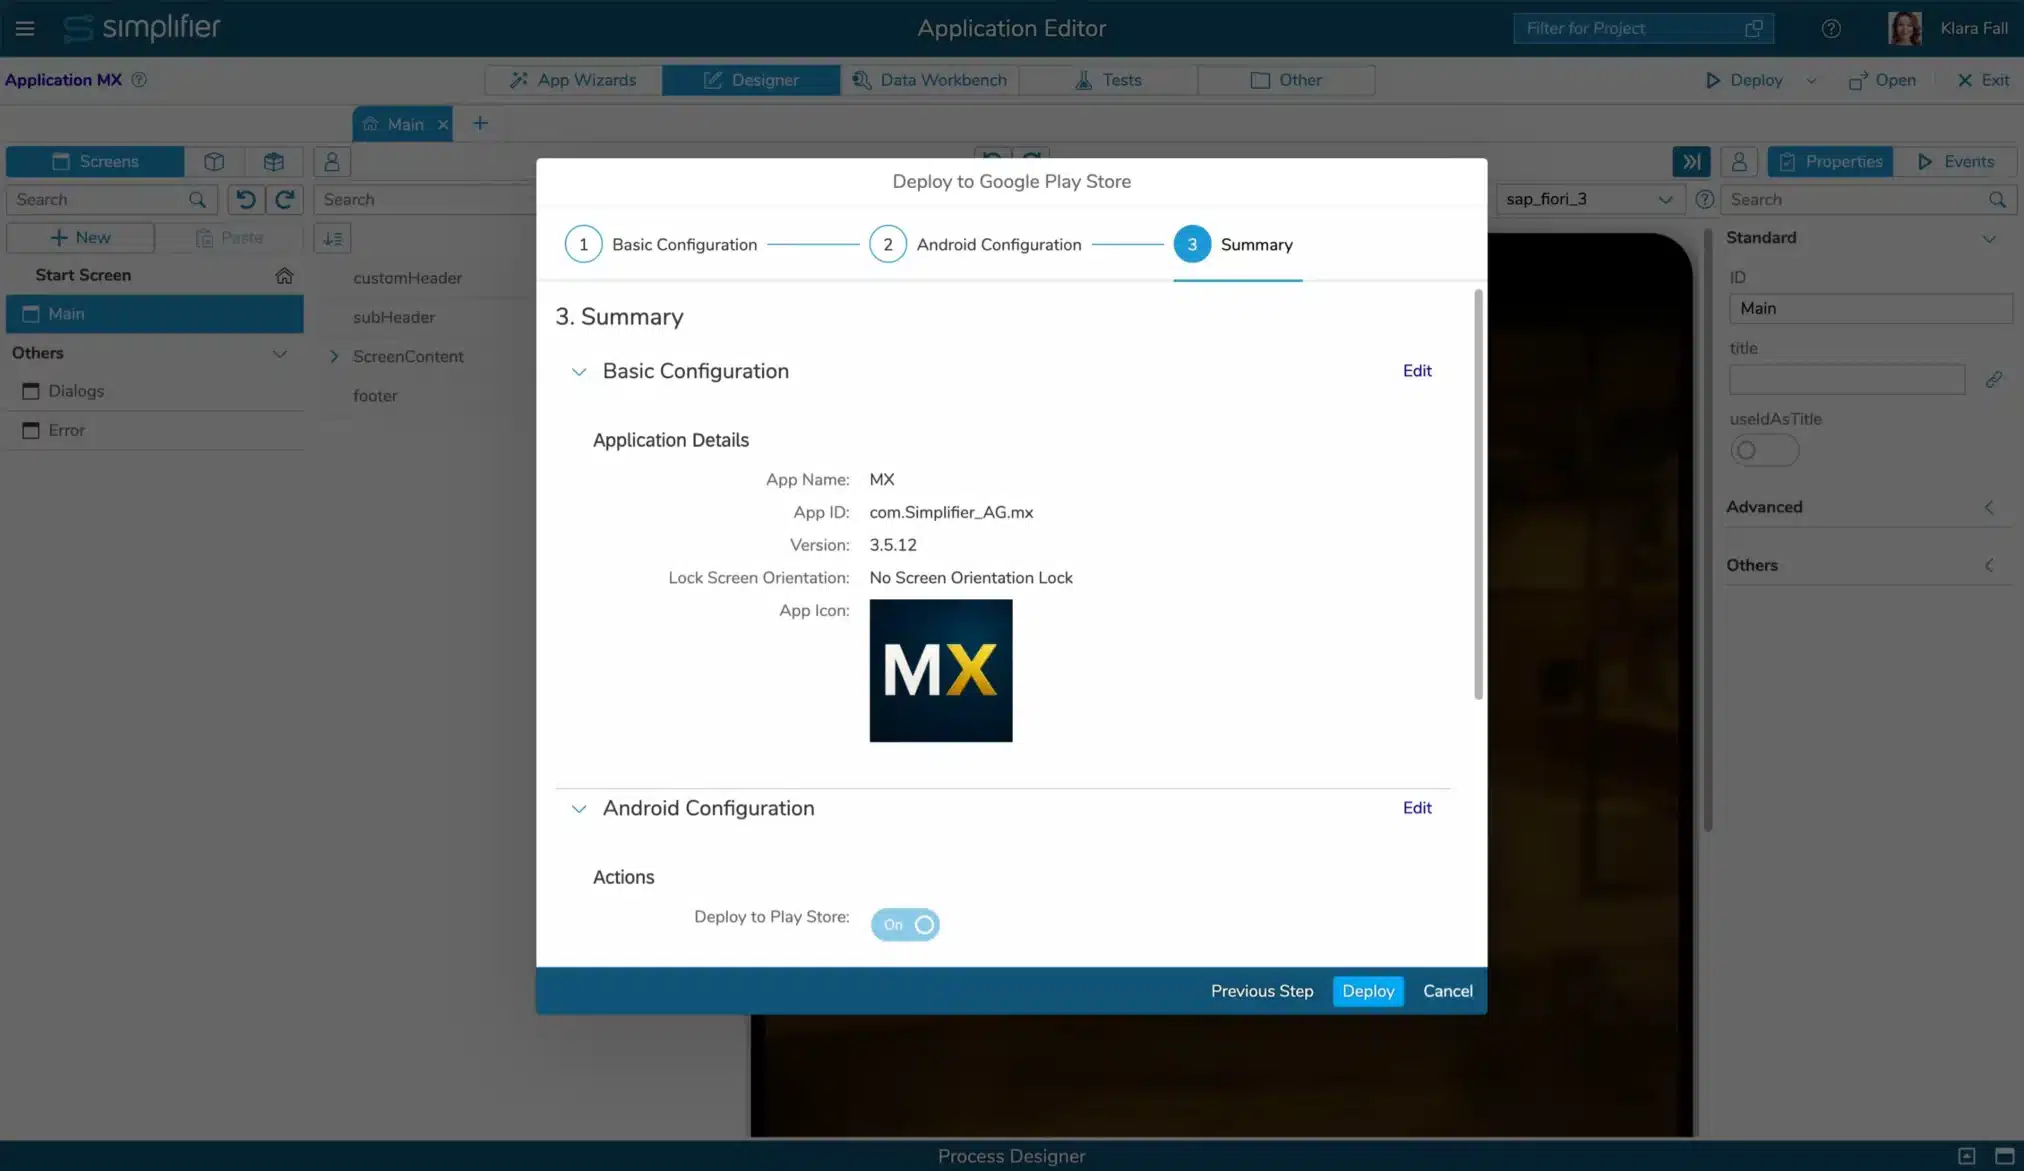
Edit your application details. Your input will not be persisted yet.
| Property | Description |
|---|---|
| App Name | Mandatory. Display name of your Application. Default: Name of Simplifier Application |
| App ID | Mandatory. Unique ID. It is used to identify the app in the App Stores Default: com.{yourCompanyName}.{SimplifierAppName}Read more in Google Documentation and Apple Documentation |
| Version | Mandatory. A commonly used format is the Semantic Versioning: MAJOR.MINOR.PATCH (e.g., 3.5.12) Default: None |
| Lock Screen Orientation | Define whether the app should change its orientation if the device orientation is changed, or if it should be locked in portrait or landscape mode |
| App Icon | The App Icon of your Simplifier App is used. To change it, please upload a new icon in the Application Overview Hint: Use squared icons with at least a 1024px*1024px resolution |
Step 2 – Store configuration
Step 2 depends on the chosen target store. Proceed with your required store configuration.
Android configuration
Edit your configuration to build, deploy, and publish your App for Android in the Google Play Store.
Deploy to Store
For Google Play Store, choose if your App should be directly deployed to your Google Developers Account, or if you just want the App Files to be created.
In each case, Simplifier will create a Debug APK, a Release APK, and a Release AAB file. You’ll receive an email with the download links as soon as the files are built.
App Signing
Provide the required keystore information (Read more in Google Documentation)
| Property | Description |
|---|---|
| Keystore File | Mandatory. Your keystore file (.jks) |
| Keystore File Password | Mandatory. Password of your Keystore File |
| Alias | Mandatory. Alias of your application in the Keystore File |
| Alias Password | Mandatory. Password for your Alias |
Store Connection
The store connection data is only required when deploying your App to the Google Play Store.
| Property | Description |
|---|---|
| Account Mail | Mandatory. Email of your Developer Account |
| Private Key | Mandatory. Private Key for your Developer Account |
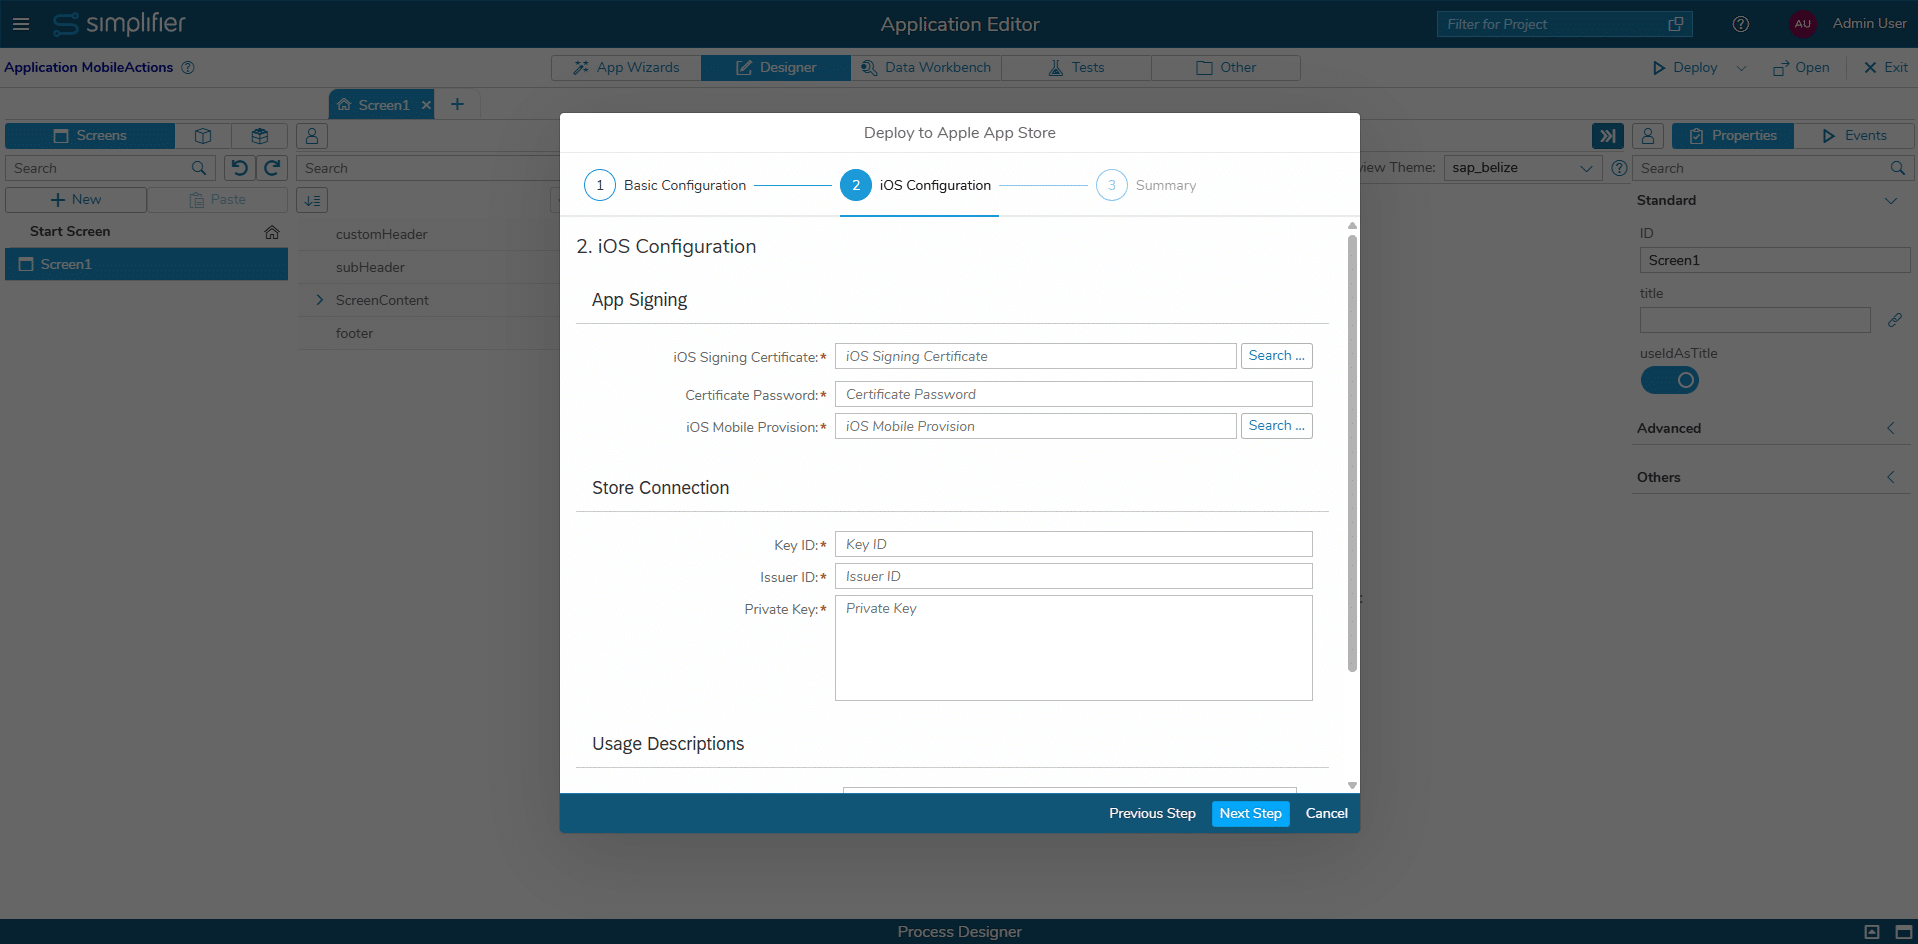
Apple Store configuration
Edit your configuration to build, deploy, and publish your App for iOS/iPadOS in the Apple App Store.
App Signing
Provide the required keystore information (Read more in the Apple Documentation)
| Property | Description |
|---|---|
| Mobile Provisioning Profile | Mandatory. Select your Mobile Provisioning Profile file |
| .p12 File | Mandatory. Select your iOS-Distribution-Certificate |
| .p12 File Password | Mandatory. Password for your your iOS-Distribution-Certificate file |
Store Connection
The store connection data is required to deploy your App to the Apple App Store. (Learn where to find the required data in the Apple Developer Documentation)
| Property | Description |
|---|---|
| Key ID | Mandatory. Your private key ID from App Store Connect |
| Issuer ID | Mandatory. Your Issuer ID |
| Private Key | Mandatory. Private Key for your Developer Account |
Usage Description
When publishing an App in the Apple App Store, you need to declare the purpose of using the dedicated device features (e.g., camera, geo-location, etc.).. In step 2 of deploying your App for the Apple App Store, you are asked to add the usage description for each device feature used. The required device features are identified by analyzing the used Mobile Actions in the Process Editor.
Step 3 – Deploy and publish the Mobile Standalone App
Check the summary and initiate the process by pressing the ‘Deploy’ Button. You will be informed about each result (Build finished and Deployment finished) via email.


