Quick Overview
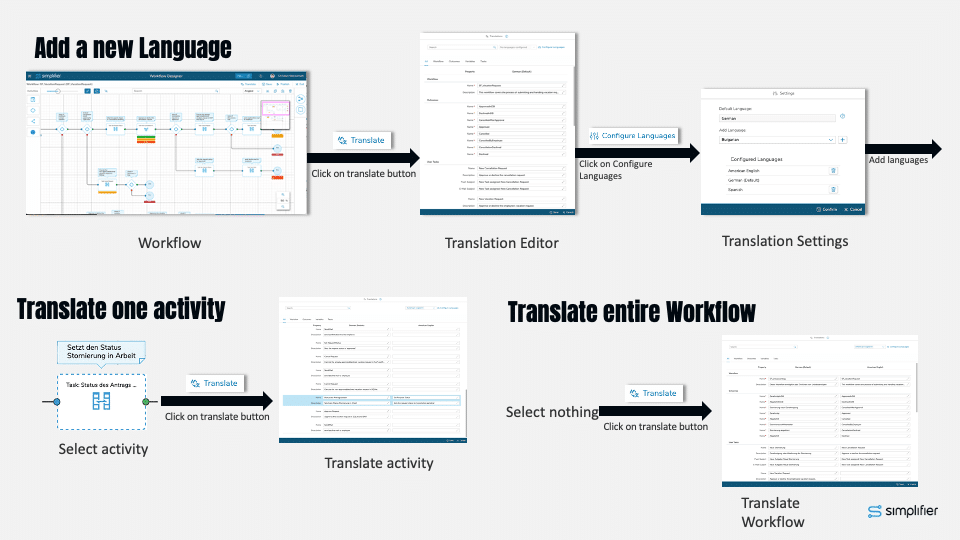
Below all common click paths for using our translation feature are visualized in one graphic:
Edit an existing Workflow
Go to the Workflow Overview and open an existing Workflow
2. Add a new Language / Change the default Language
In the Workflow Editor, click on the Translate Button. Then open the Language Configuration Dialog by clicking on Configure Language – here you can add several new Languages. You can now either translate a single activity or the complete workflow.
You can also change the default language of the workflow in case the configuration language isn’t set right.
3. Translate the complete Workflow
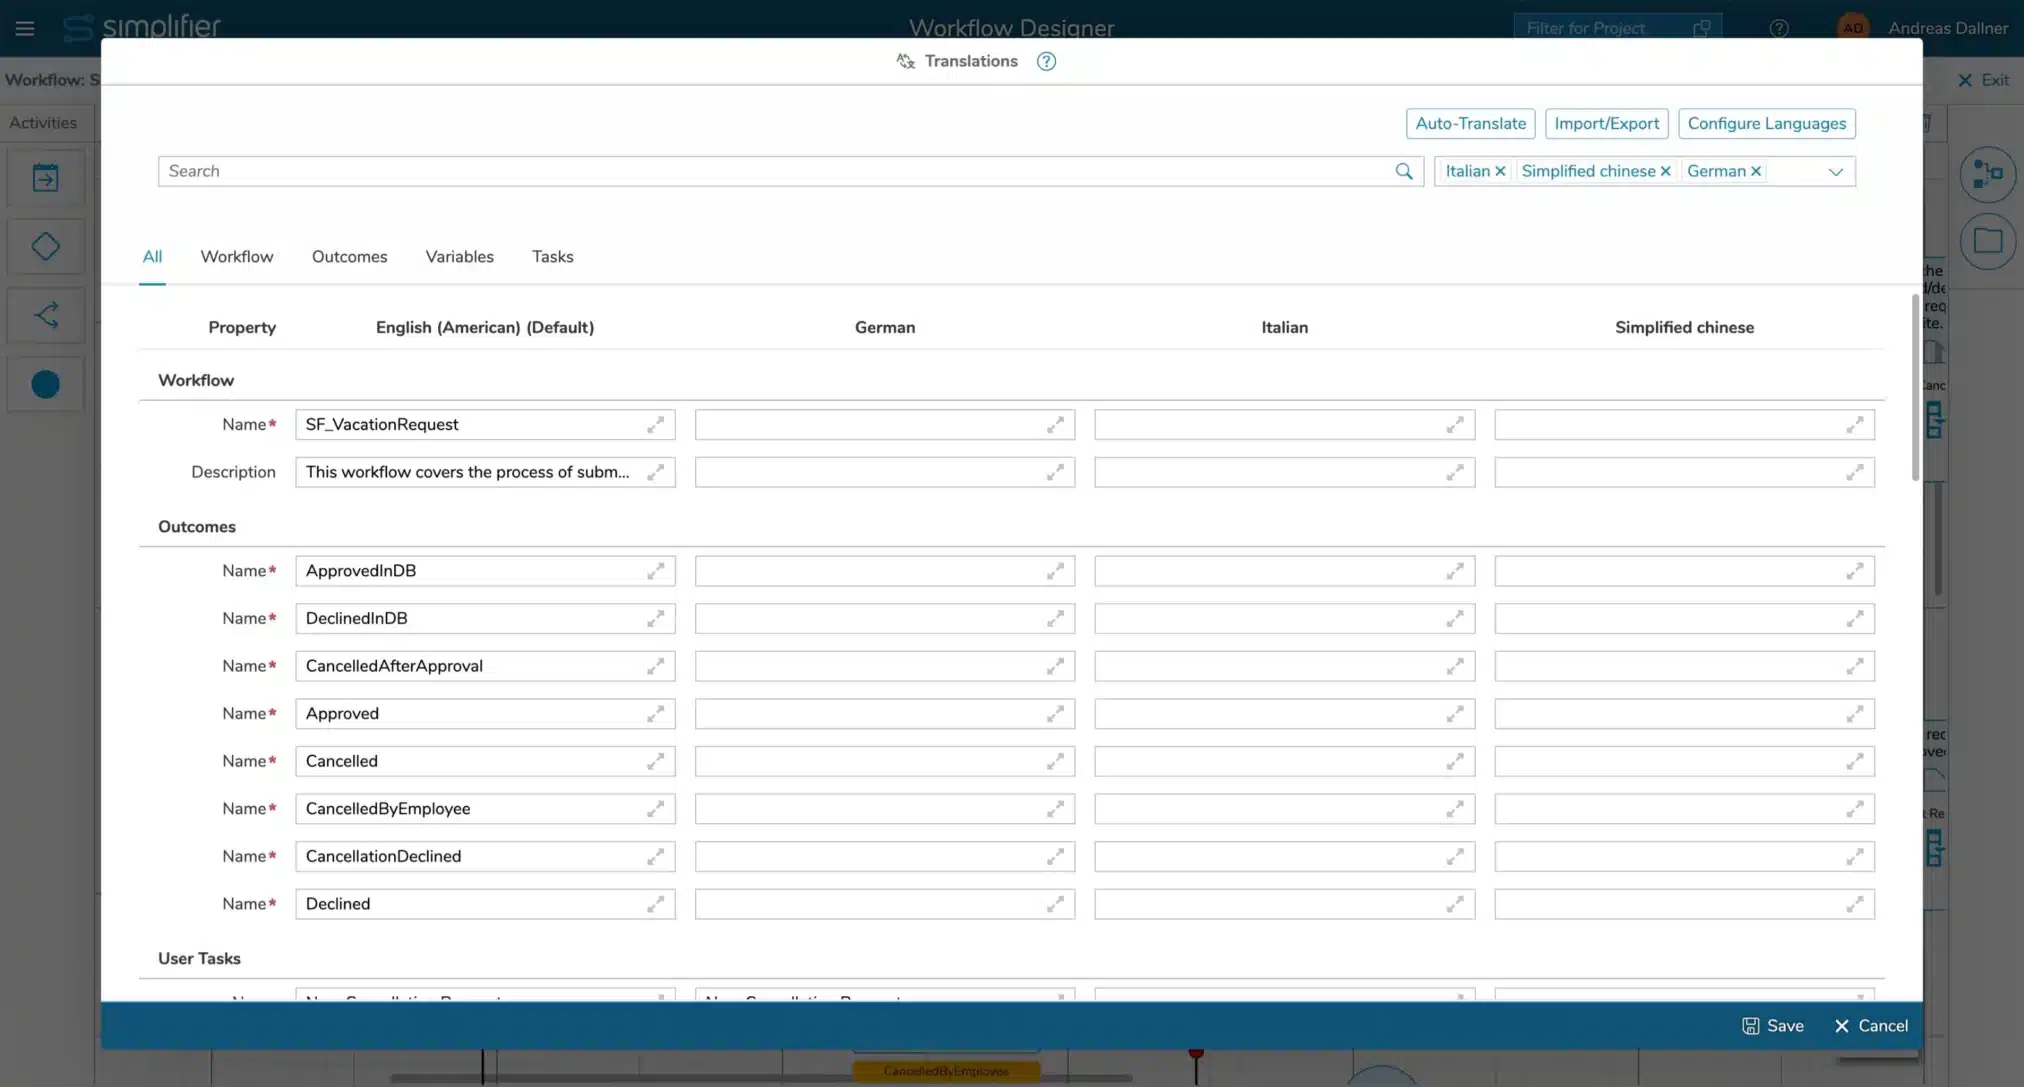
Click on Translate to see the complete translation editor of all activities grouped by types like workflow, outcomes, tasks, etc.. Now, either translate each text manually or just use our AI-based automatic translation.
To use our AI Cloud Service, click on the button ‘Auto-Translate’, select the target languages, and select if already translated texts should be translated again. After pressing the ‘Translate’ button, all texts that should be translated are sent to our Simplifier AI Cloud service and translated to the configured languages. Do not forget to save the translations to persist them.
The automatic translation requires a subscription. See our FAQ on how to purchase the subscription to be able to use our Simplifier AI Cloud service. For pricing information, see the AI Translation offering in our Makers Club.
Each automatic translation is billed, even if the result is not saved.
4. Translate a single activity
As an alternative, you can only translate a single activity. Select an activity like a task and click on translate. The translation editor opens, and you see a blue area specific to the properties of the selected single activity.

