Prerequisites:
Simplifier SSO mechanism uses the SAP standard authorizations and already assigned SAP roles.
- read access to data, i.e., it must be ensured that the caller has the necessary authorizations, and
- changes must be auditable, i.e., it must be possible to trace who initiated changes to data.
Working Identity Provider
This SAP Single Sign-On scenario works with all SAML 2.0 supported Identity Providers, like:
- onPremise Azure Active Directory over ADFS
- Azure Active Directory
- Google over SAML
- and many more
Single Sign-On with SAML Sender Vouches between Simplifier and SAP Application Server ABAP 7.x
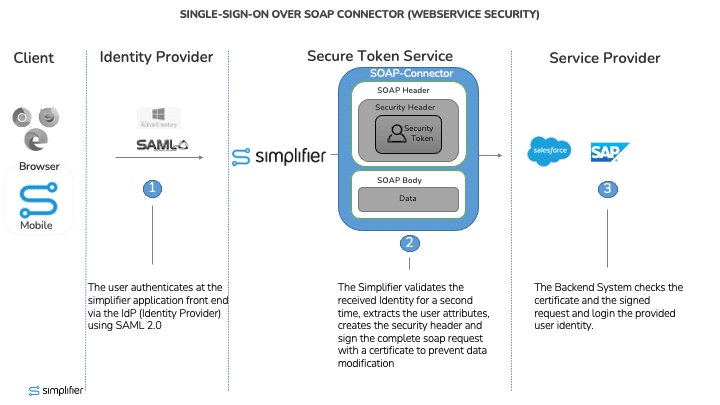
The following picture demonstrates the Single Sign-On mechanism:
How does it work?
The user requests the login with a client (Browser, or Simplifier Mobile Client App) into a Simplifier application using the preconfigured Identity Provider over SAML 2.0.
The Identity Provider shows its login page and the user can be authenticated. After authorization the user will be forwarded back to Simplifier application and the Simplifier saves the provided Security Key into a secured key vault storage (SAML Assertion).
If a SOAP request will be executed by the Simplifier application, the Simplifier itself adds the Security Key, signs the complete request – including the data – with a certificate, and sends it to SAP backend. Simplifier therefore acts in the role as Security Token Service.
SAP Enterprise Webservices, addressed by Simplifier SOAP Connector, receive messages using the Internet Communication Framework (ICF), which receives the HTTP requests and assigns an AS ABAP work process to process them. All authentication methods supported by the ICF are based on transmissions at the SSL protocol level or as HTTP headers. In case of message-based logon, e.g., via username token, SAML token, or X.509 certificate, the data is not part of a HTTP header, but is in a SOAP header, to which the ICF has no access. Therefore, no direct login is possible, but the ICF first performs a login with a technical user (e.g., DELAY_LOGON). After successful security processing, a user change is performed according to the configured authentication.
Step 1 – Check SAP Cryptographic Library
The RSA signatures and encryption functions required for WS-Security are available in a separate library, the SAP Cryptographic Library, which can be obtained from the SAP Service Marketplace. For information on how to get this library see SAP Note 397175.
The library must be available in version “SSFLIB Version 1.555.24 ; SECUDE(tm) SAPCRYPTOLIB”, or higher.
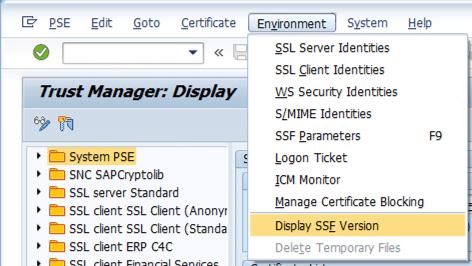
Go to transaction STRUST and choose the menu Environment -> Display SSF Version
Step 2 – Check Webservice Security Setup
Every message-based authentication is technically performed by changing the user DELAY_L_<SID> (releases 7.0X) or DELAY_LOGON (releases 7.10 and later) to the user authenticated by the security header.
The DELAY_L_<SID>/DELAY_LOGON user is created by report wss_setup, and the user name and password are stored in the system’s secure storage. To create the user, the following prerequisites must be met:
- The system must allow logon with user name and password. If password-based logon is generally disabled in the system, the user DELAY_LOGON must be included in a group that allows password-based logon.
- For systems which are part of a central user administration (ZBV), it must be ensured that the generation of users in ZBV child systems is permitted.
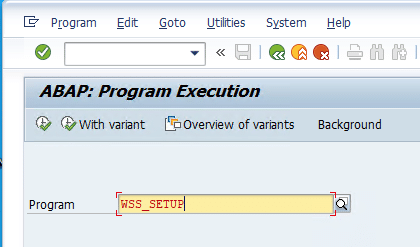
To generate the DELAY_LOGON user, please execute the Report WSS_SETUP via Transaction SA38.
Please be aware that the TEST mode is not active.
To execute the report, press F8.
Step 3- Setup SAP Webservice
The SAP Webservices are configured by transaction SOAMANAGER. Perform the following steps to create a configuration for SAML authentication for every single Websevice:
Step 3-1 – Open SOA Manager
Execute transaction SOAMANAGER, whereupon the system starts a new browser tab. Now select Web Service Configuration in the Service Administration Tab.
Step 3-2 Select affected Webservice
Search for the web service and select this by click on the link see step 2 below:
Step 3-3 Create Service Endpoint
Choose Create Service to create a new configuration.
Step 3-4 Configure Binding Name
Configure a Technical Name and Binding Name (can be the same) for the Webservice definition
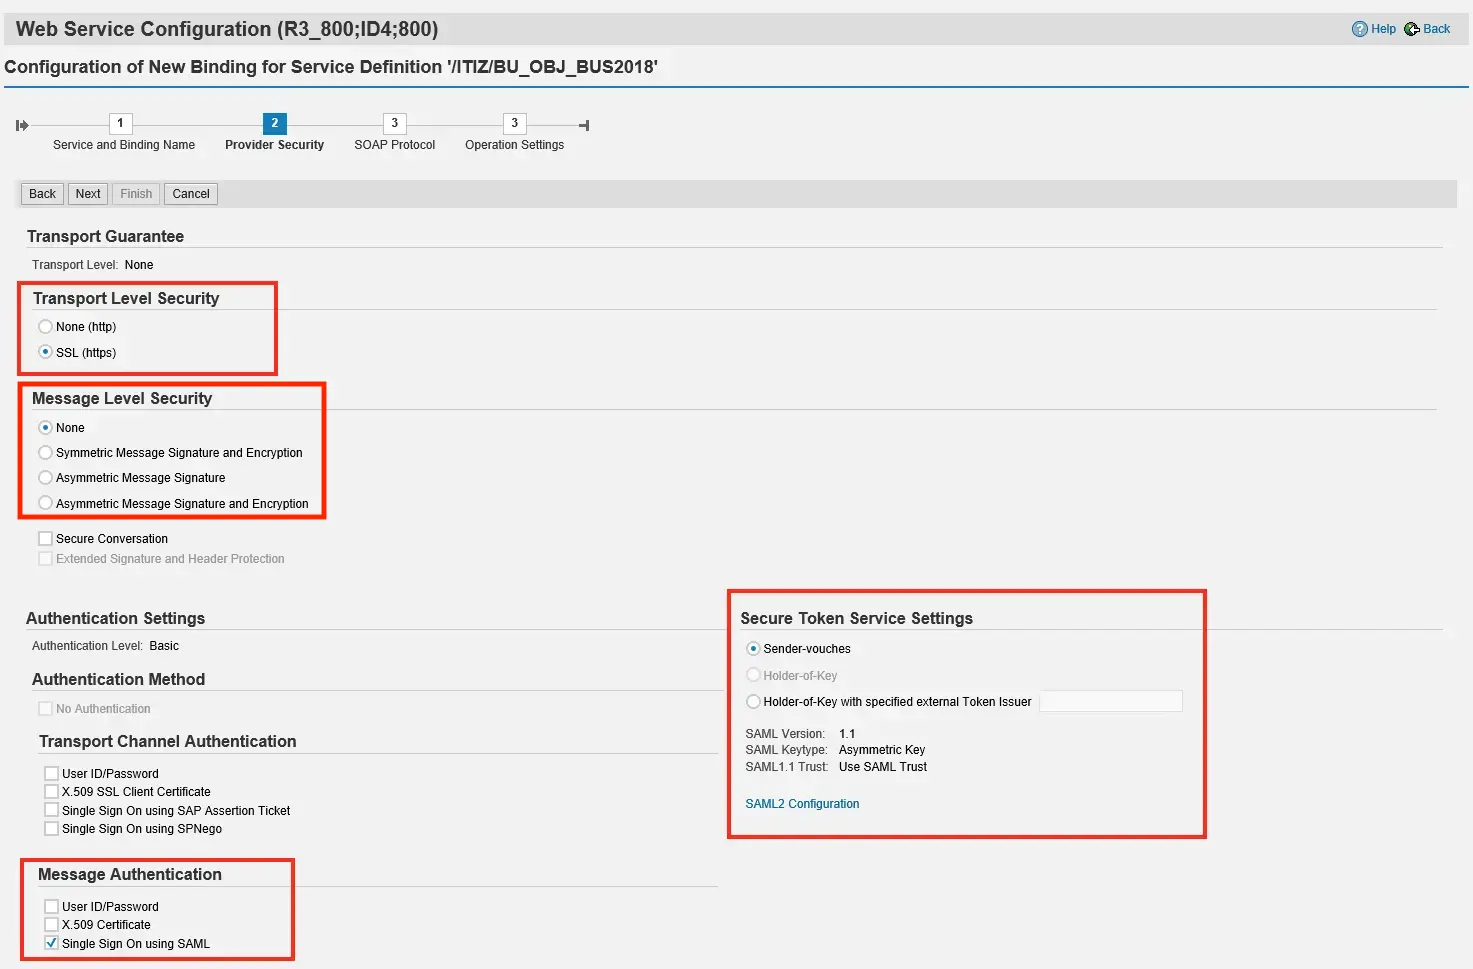
Step 3-5 Configure Provider Security
To encrypt the message for transport security, select HTTPS as the transport guarantee type. Set Message Level Security to “None”. For Single Sign-On via SAML Sender Vouches select Single Sign-On with SAML as the authentication method.
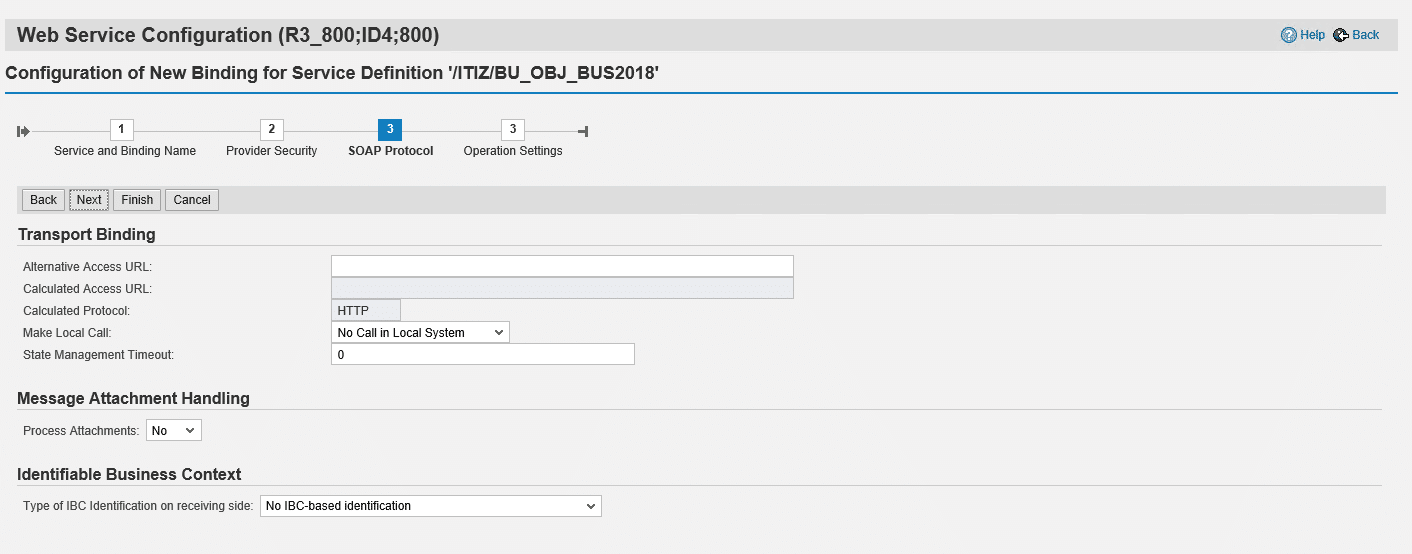
Step 3-7 Configure SOAP Protocol
In this step you can keep the default settings as described below
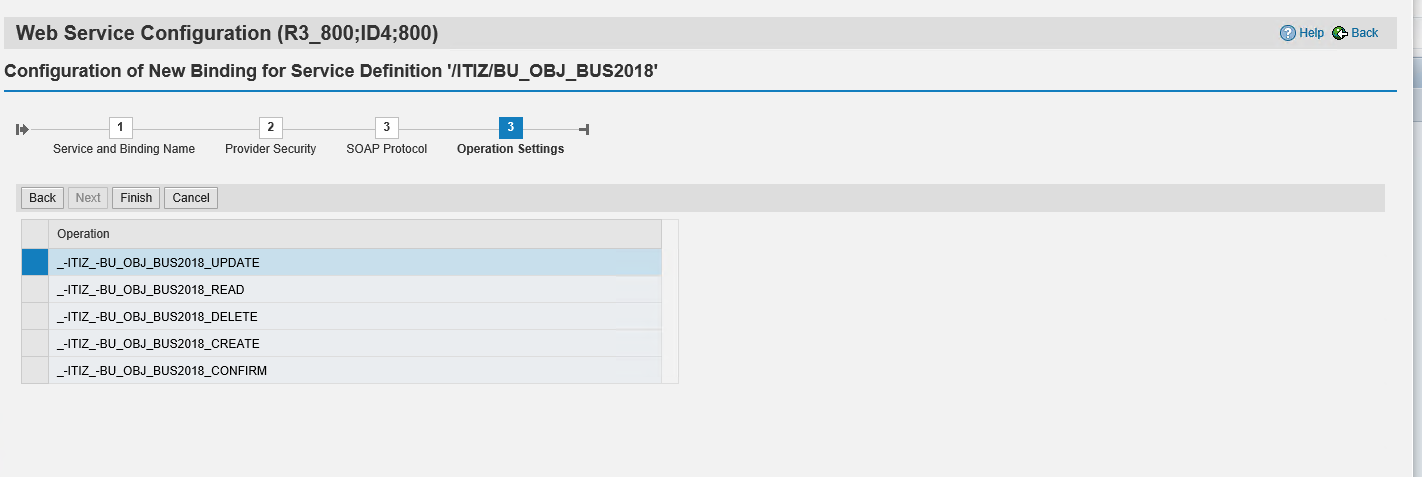
Step 3-8 Configure Operation Settings
In this step you can keep the default settings as described below and finish the setup of the webservice
Step 4 Install Certificate for Security Token Service
For the signing process of the SOAP request, the Simplifier and SAP need a trusted relation.
Therefore, you need a valid certificate with a signing feature that is known by both systems (Simplifier and SAP).
Step 4-1 Generate Self-Sign Certificate
In this article, we will use a helper tool named mkcert to simplify the process. You can download mkcert here.
After installing the mkcert tool, generate a new certificate:
mkcert simplifier@myenterprise.com
Step 4-2 Verify the generated Certificate
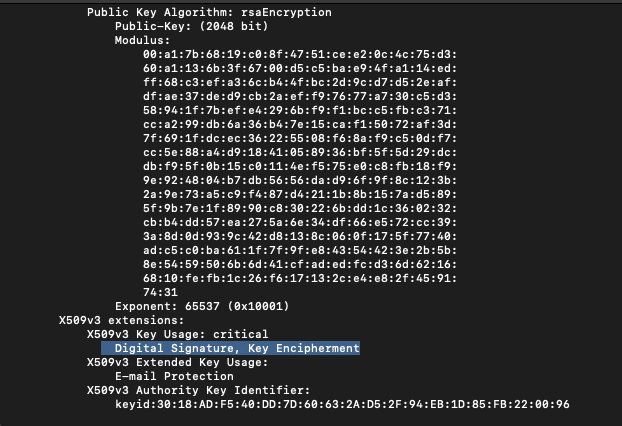
Before you upload the certificate to Simplifier and SAP, you should check if the certificate is being able to sign digital entities.
openssl x509 -in simplifier@myenterprise.com.pem -noout -text
The validation result should show the option “Digital Signature” .
Step 4-3 Upload generated Certficate to SAP
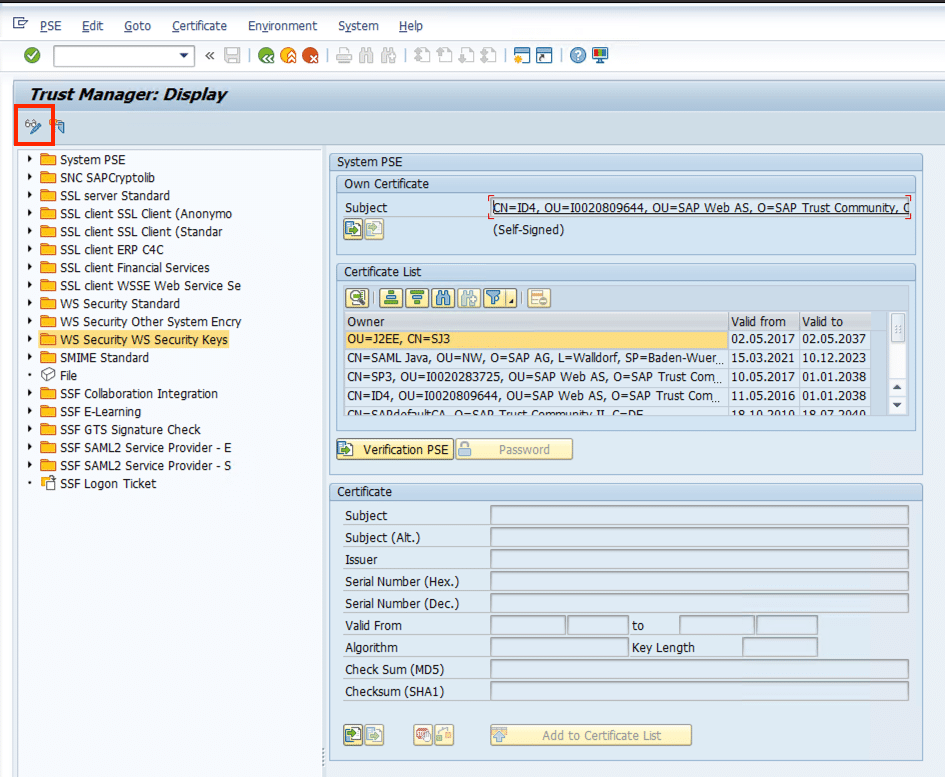
To upload your Certficate, you have to be permit for Transaction STRUST. Start Transaction STRUST and switch to Change Mode
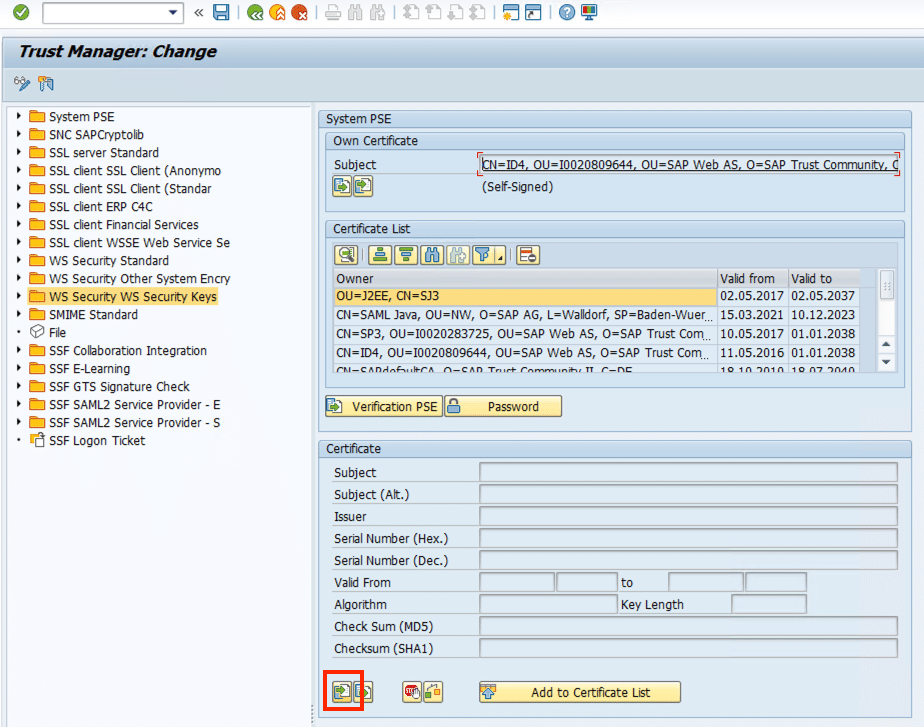
Click on the Folder WS Security WS Security Keys on the left side and Import the Certificate Public Key File (*.pem) from your local Client
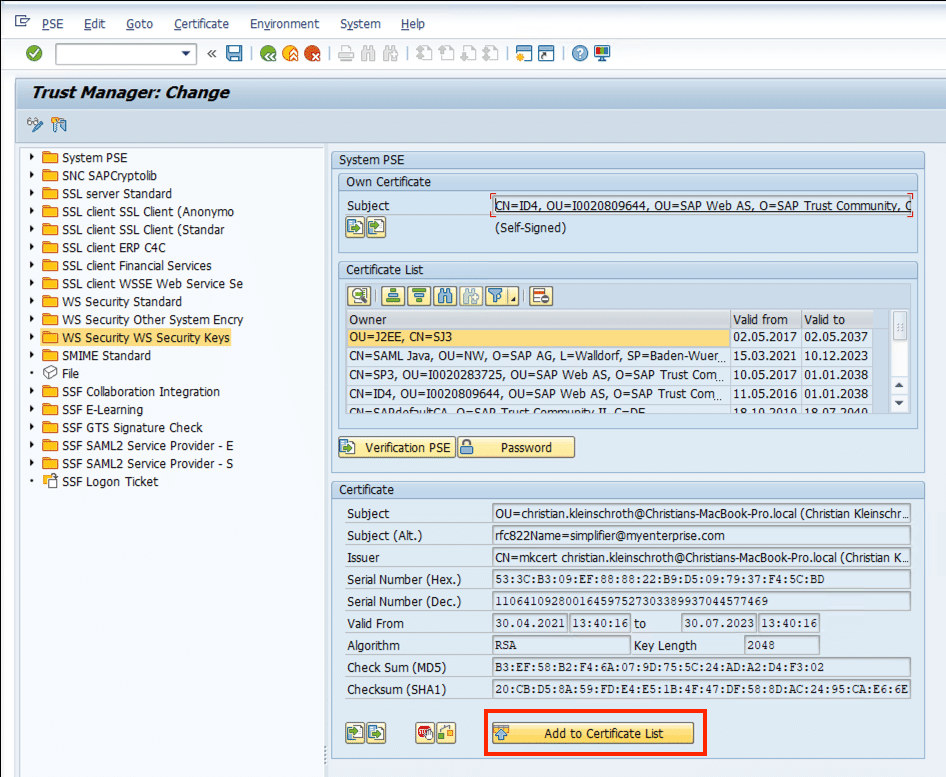
After reviewing the Certificate Information, you have to add the Certificate to Certificate List
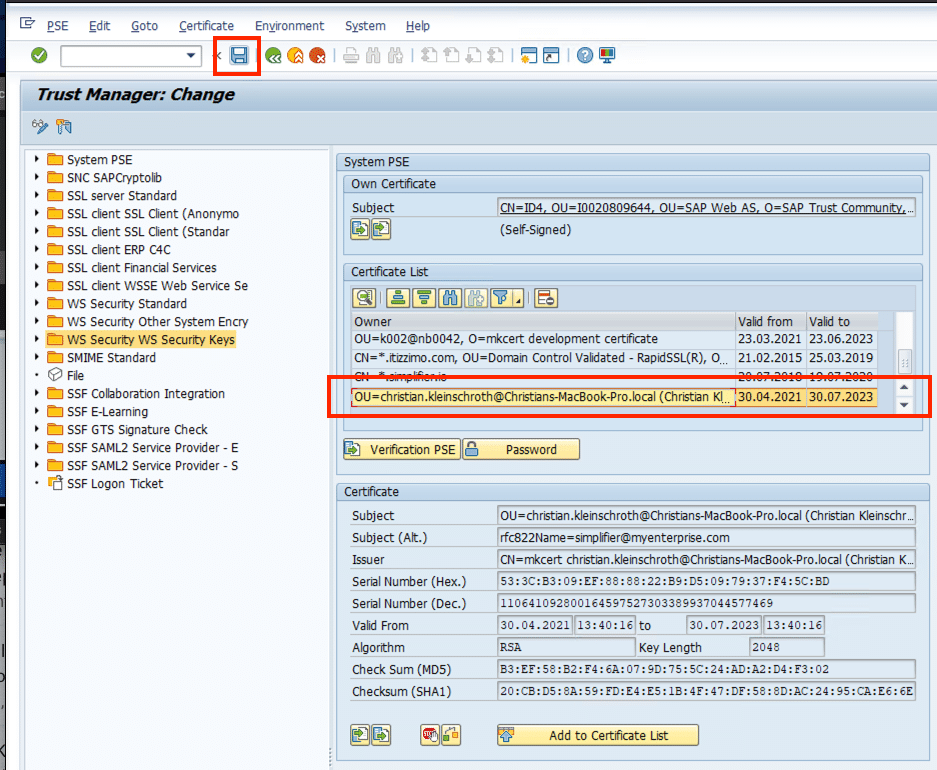
Click on Save Button to finish the upload process.
Step 5 Establish Trusted Relationship
The authentication of a SAML assertion requires a trusted relationship between the Simplifier and SAP. Therefore, you have to register Simplifier as Security Token Service in your SAP system. This is done by uploading a metadata file generated by Simplifier containing all relevant information.
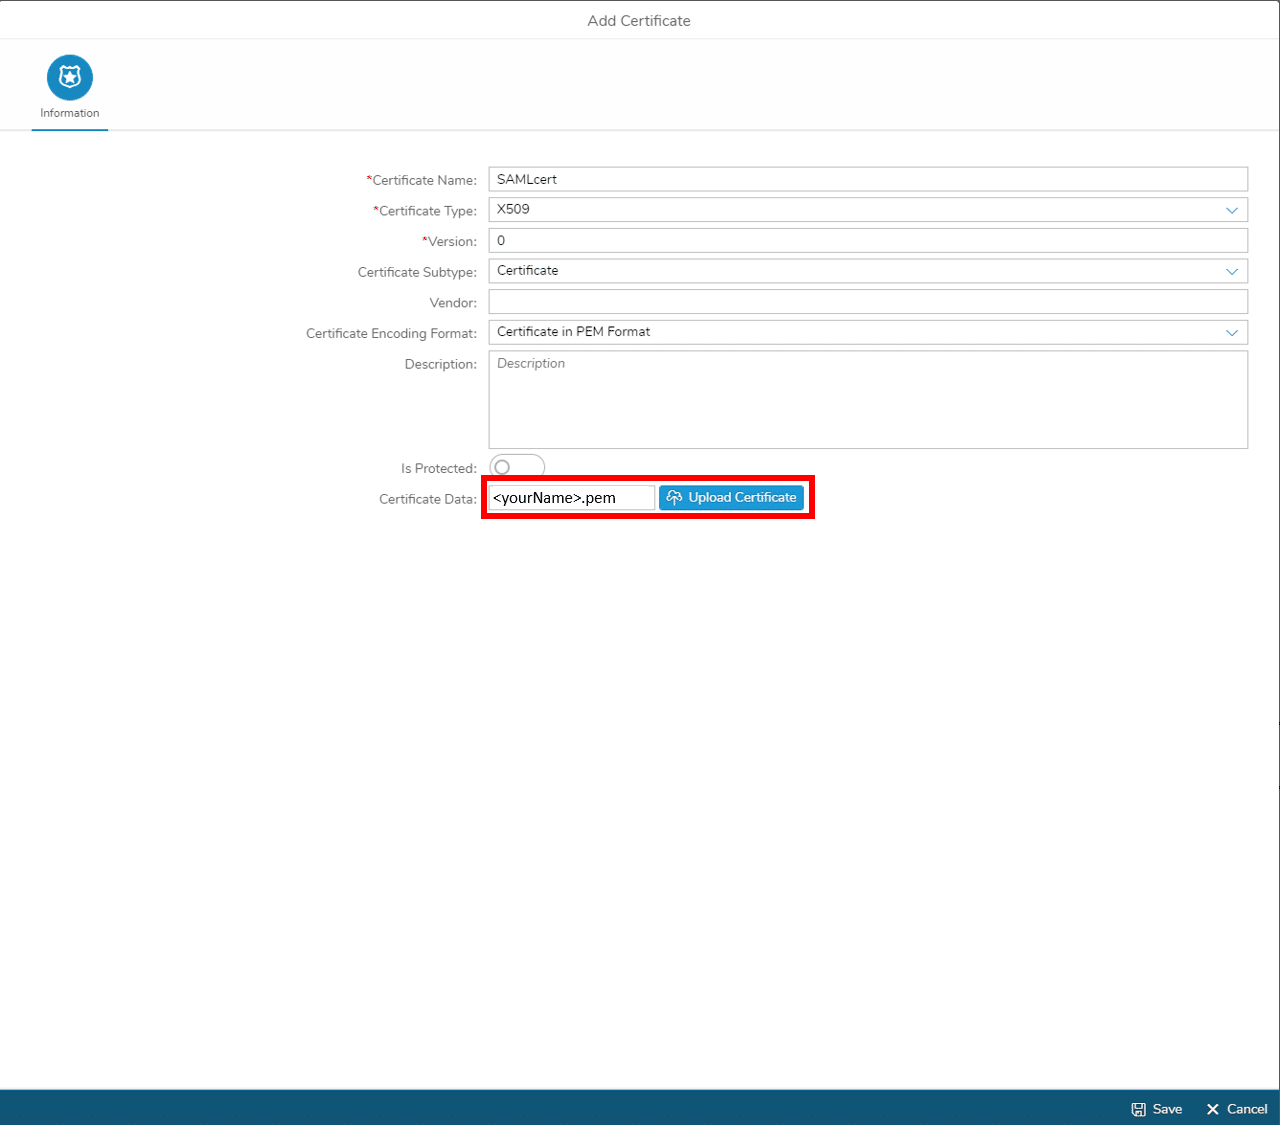
Step 5-1 Upload Certificate to Simplifier
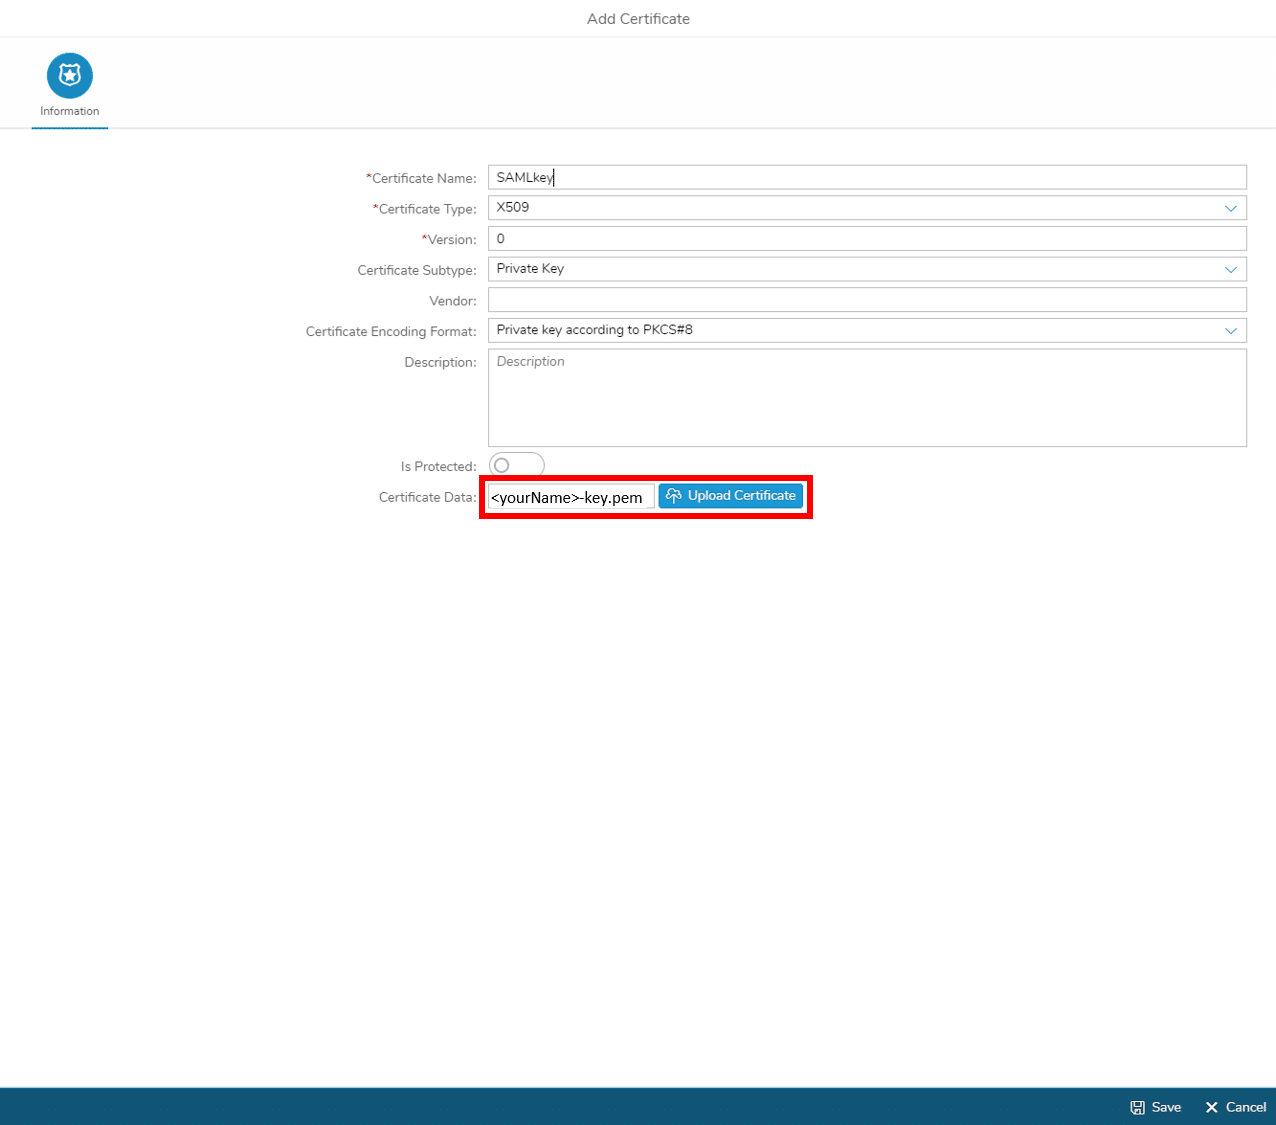
Upload the certificate files – generated in Step 4 – to Simplifier:
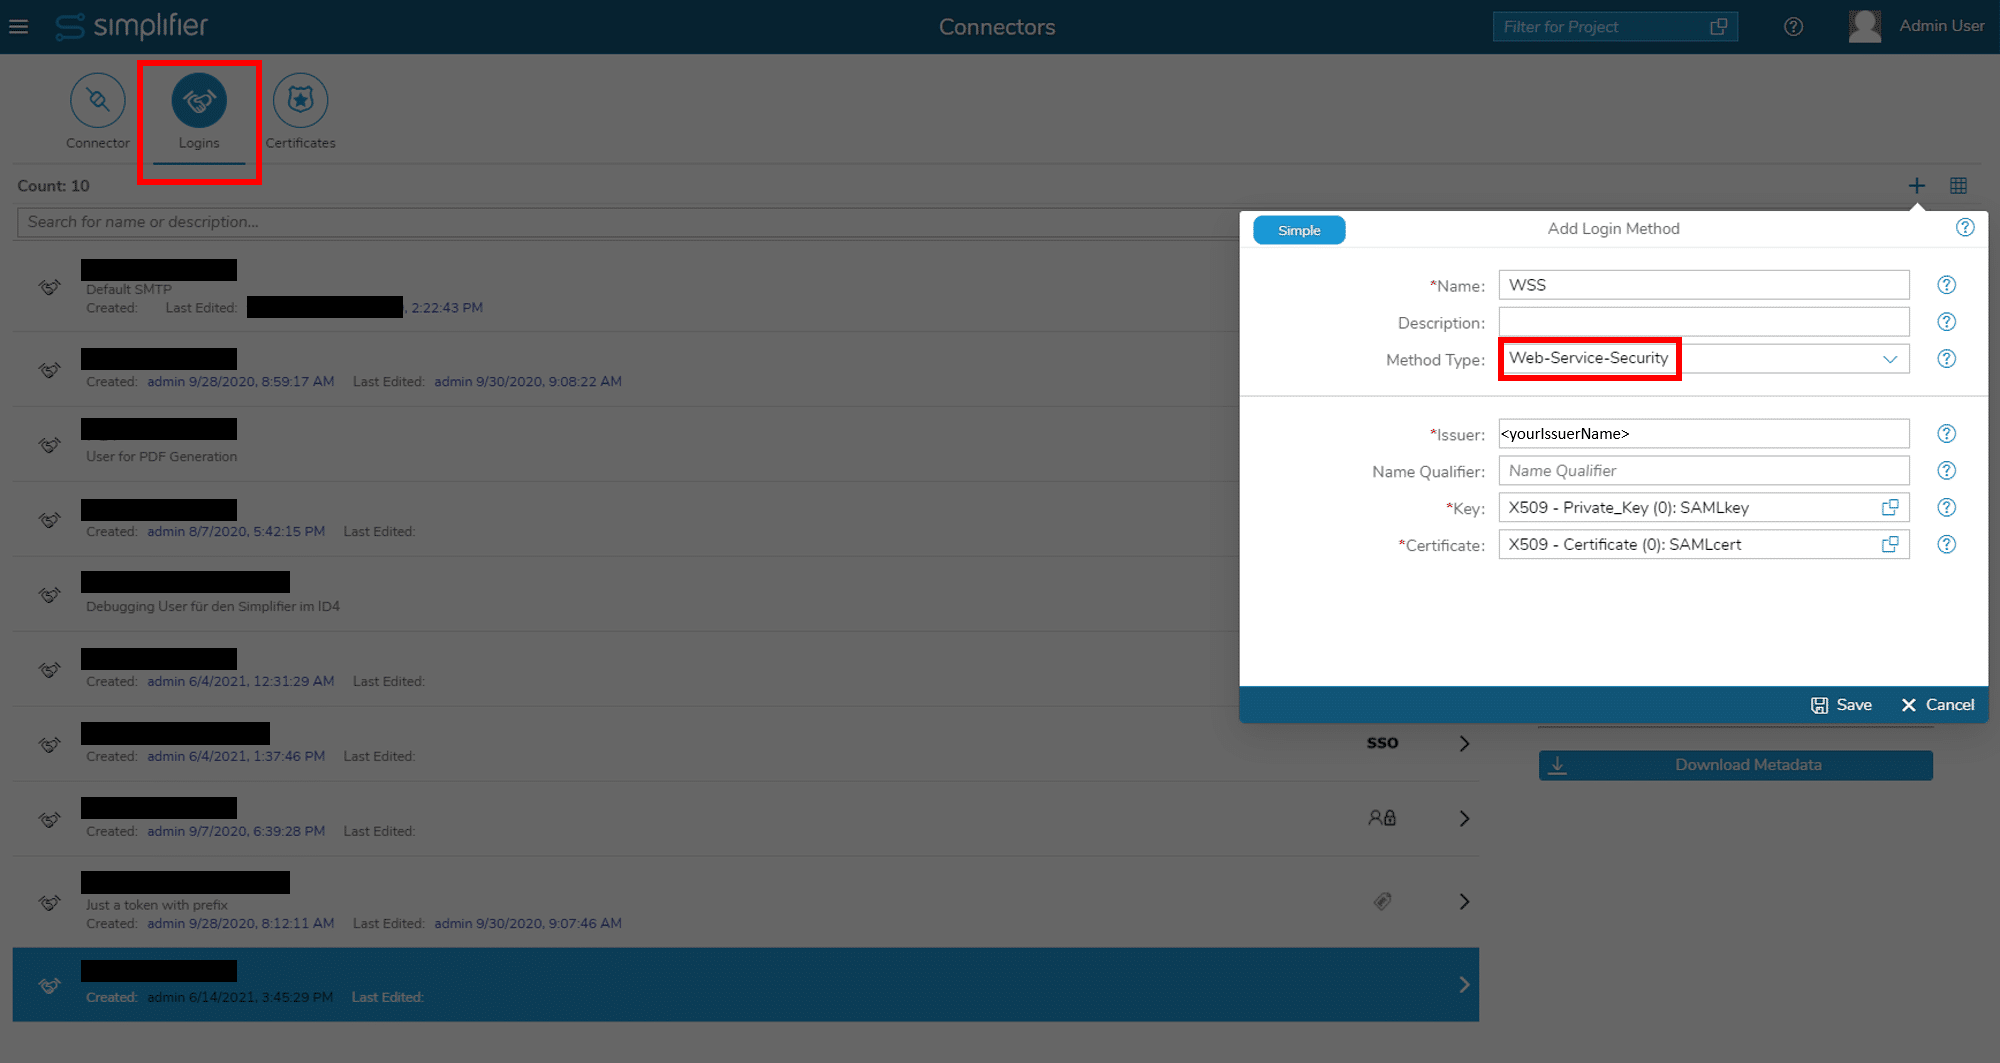
Step 5-2 Generate Metadata
For generating the metadata create a login method of type WSS:
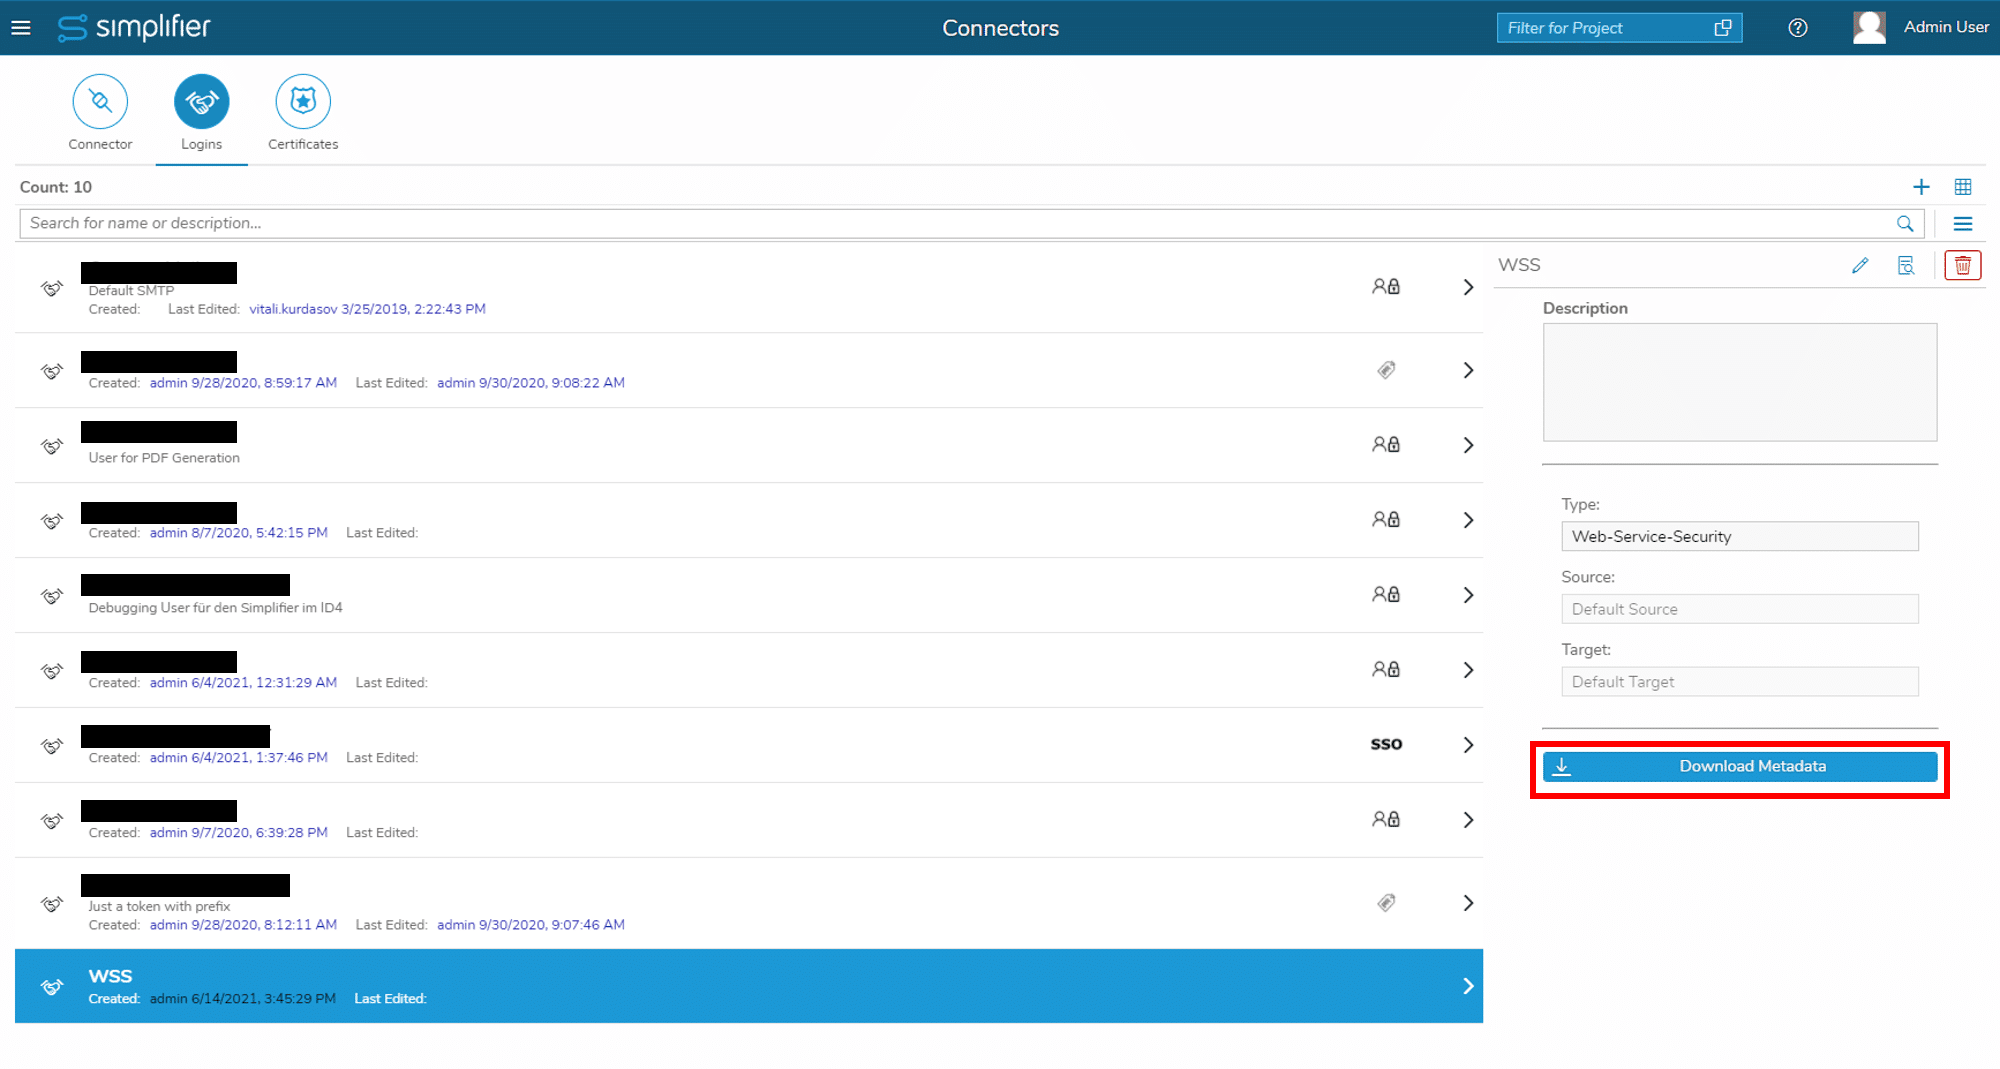
After saving the login method, you can download the metadata file:
Step 5-3 Upload Metadata to SAP
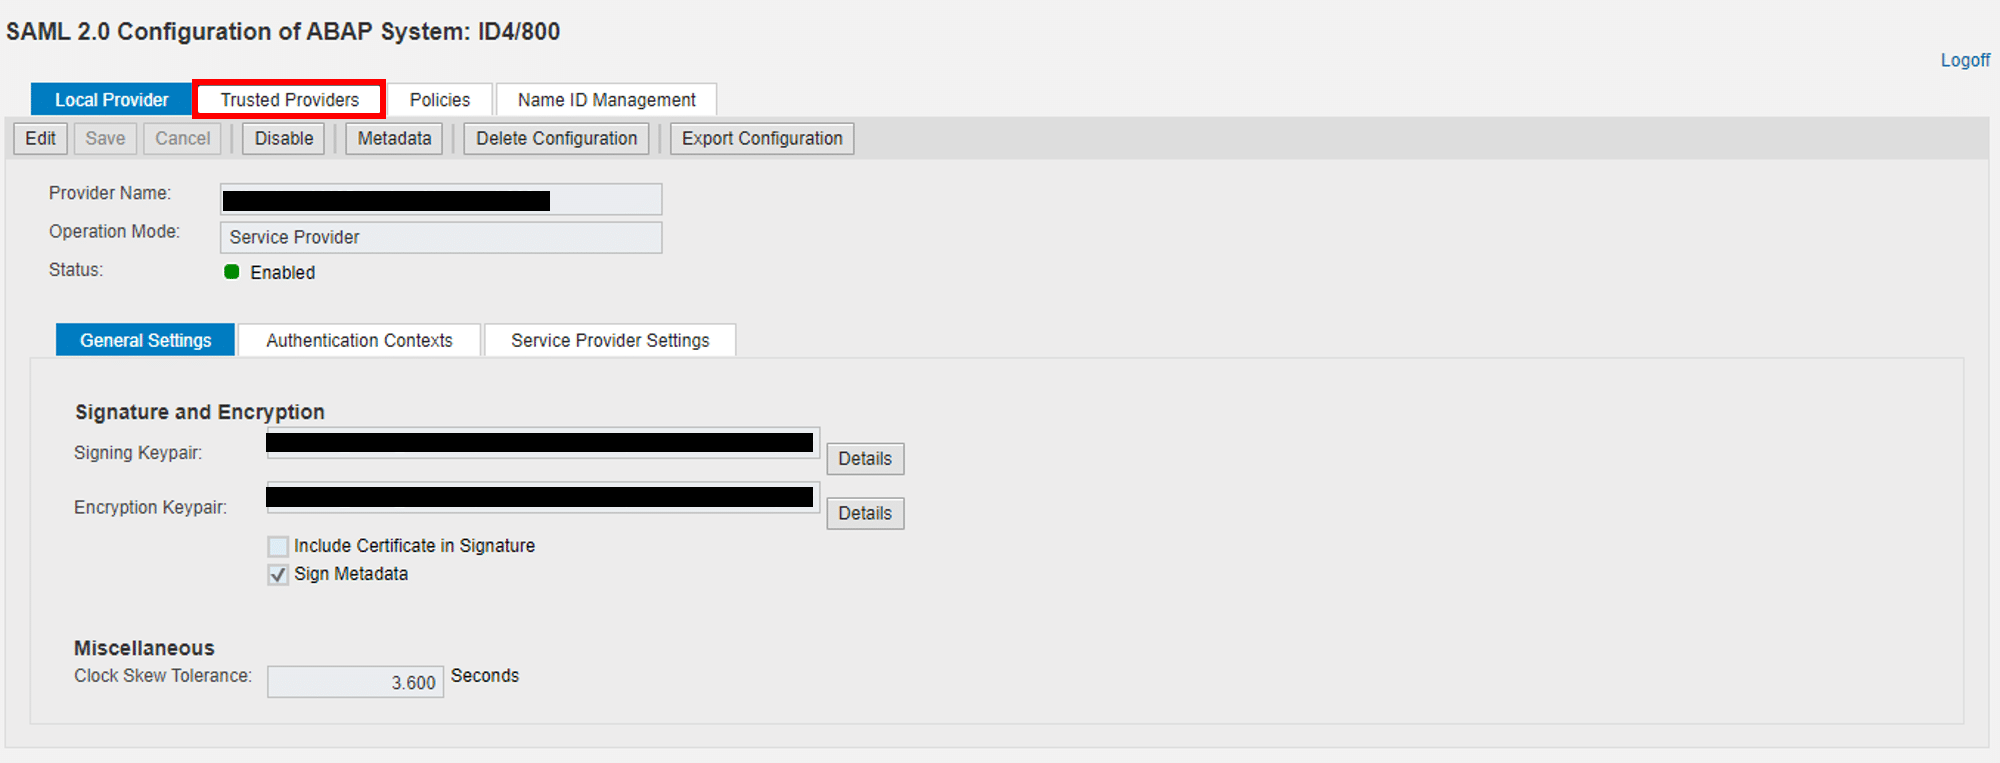
1.Start transaction SAML2 and open browser tab TRUSTED PROVIDERS:
2. Select SECURITY TOKEN SERVICES, click ADD, and select UPLOAD METADATA FILE:
2. Upload Simplifier metadata file
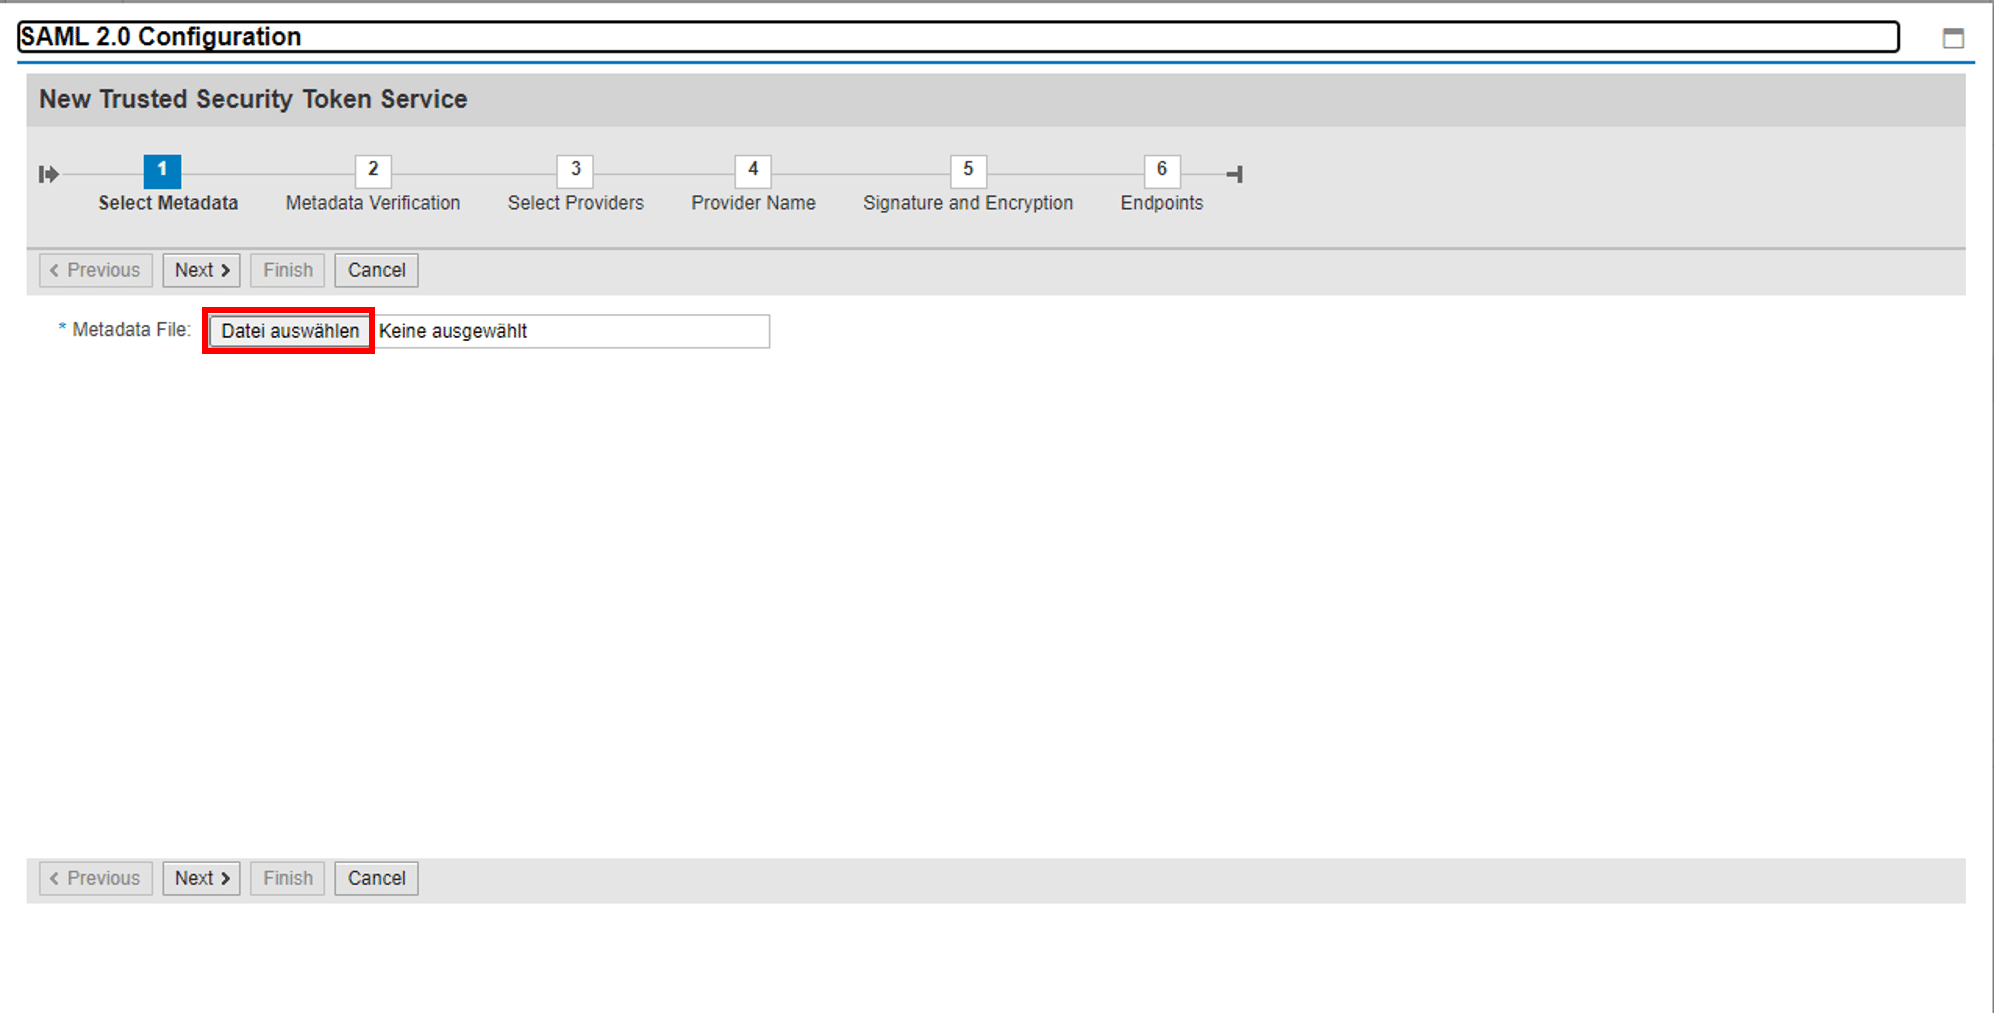
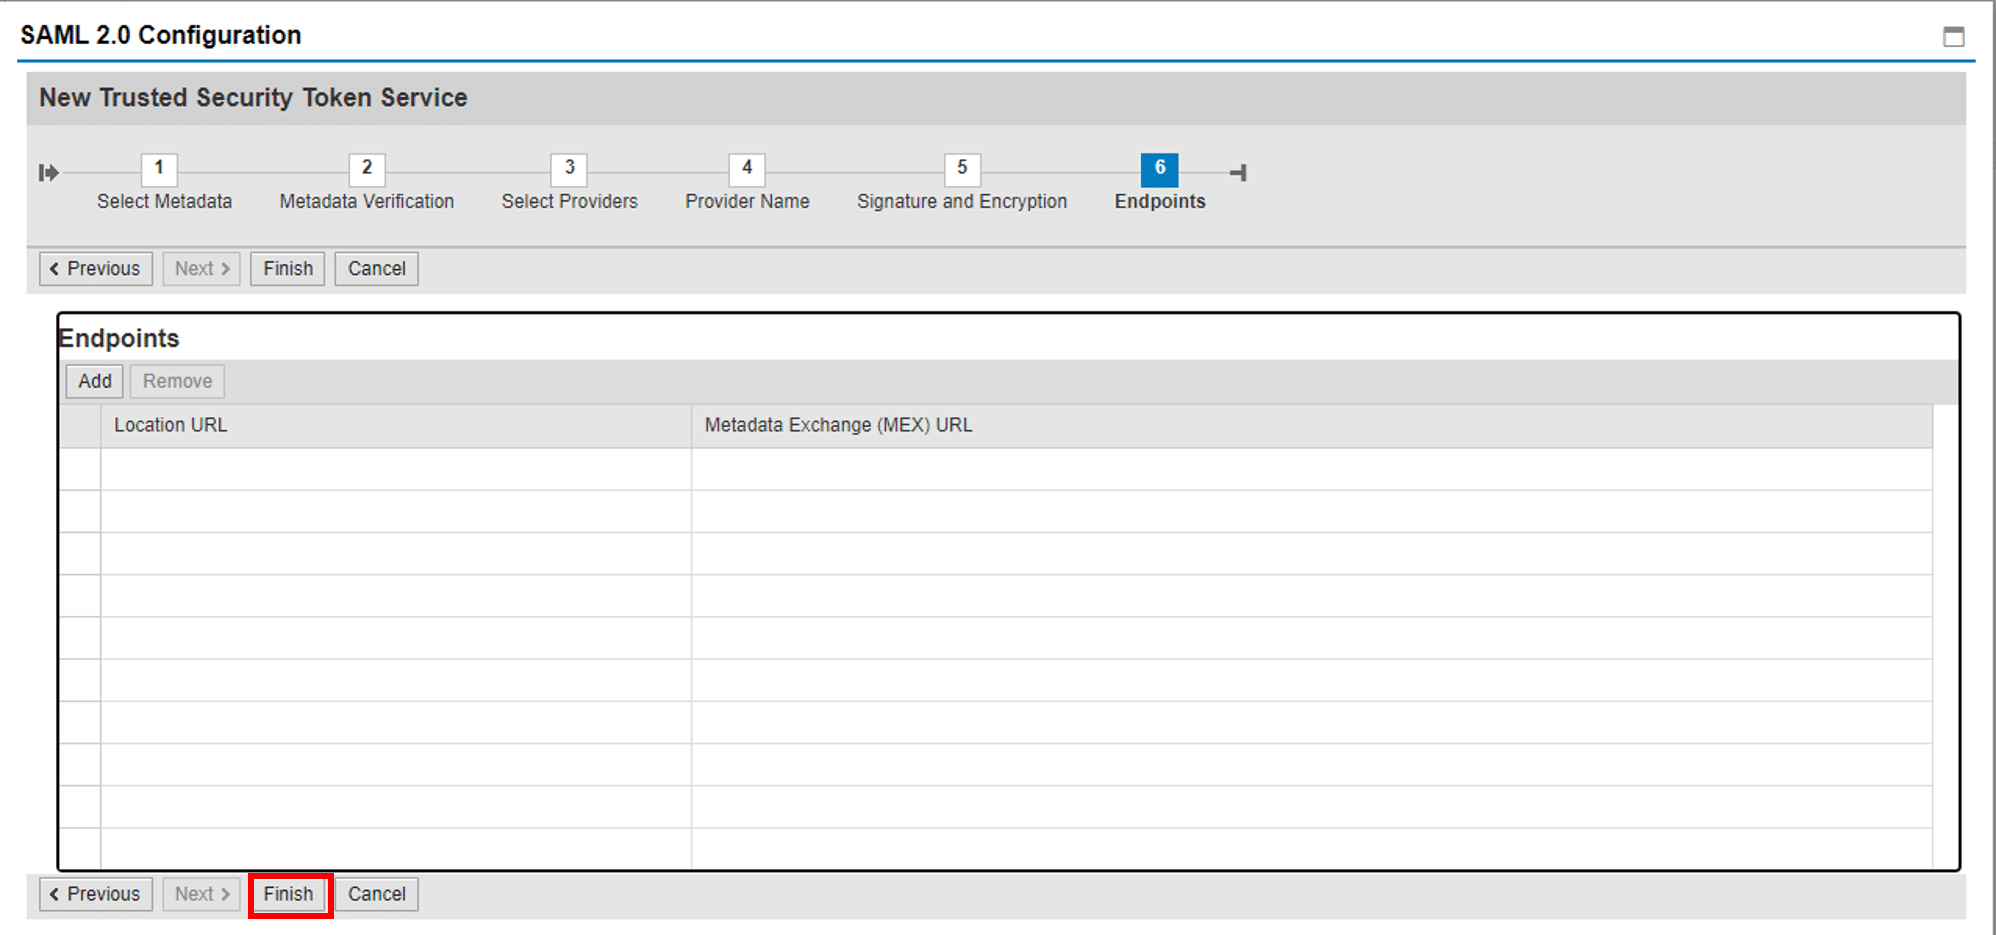
3. Check auto-filled entries for Step 2-6 and click FINISH.
5. EDIT the newly created Trusted Provider to configure the supported SAML version:
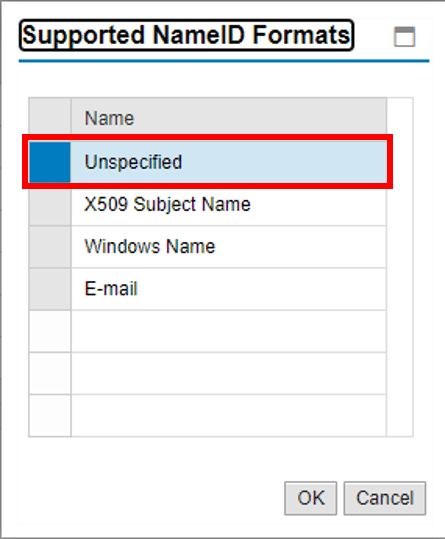
6. Go to IDENTITY FEDERATION browser tab and add supported NAME ID FORMATS:
6.0 Add type unspecified:
6.1 If your Username within your central identity management is the same as sap username, you can choose LOGIN ID:
6.2 If your username is not the same as your sap username you have to choose the user mapping mode ASSIGNMENT IN USREXTID TABLE, TYPE SA:
7. Click SAVE and activate the newly created Security Token Service (STS) using the ENABLE button.
Step 5-4 User Mapping in SAP (optional)
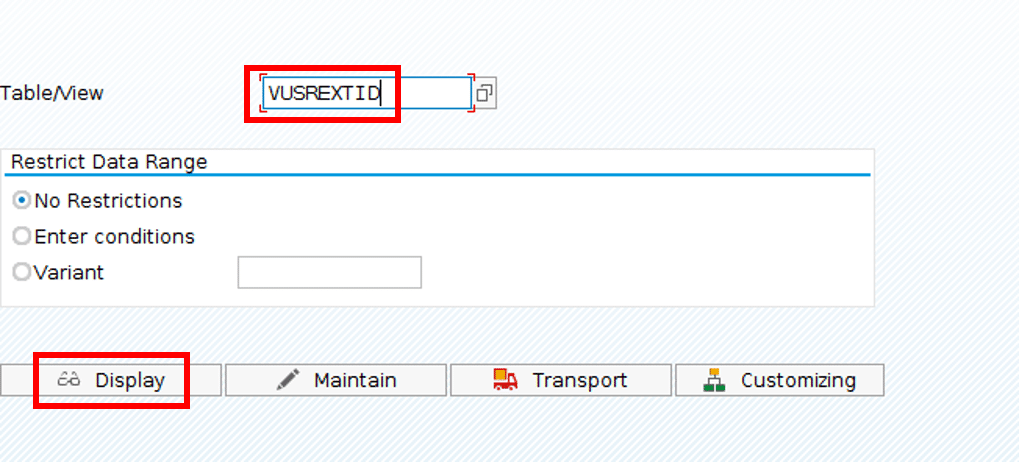
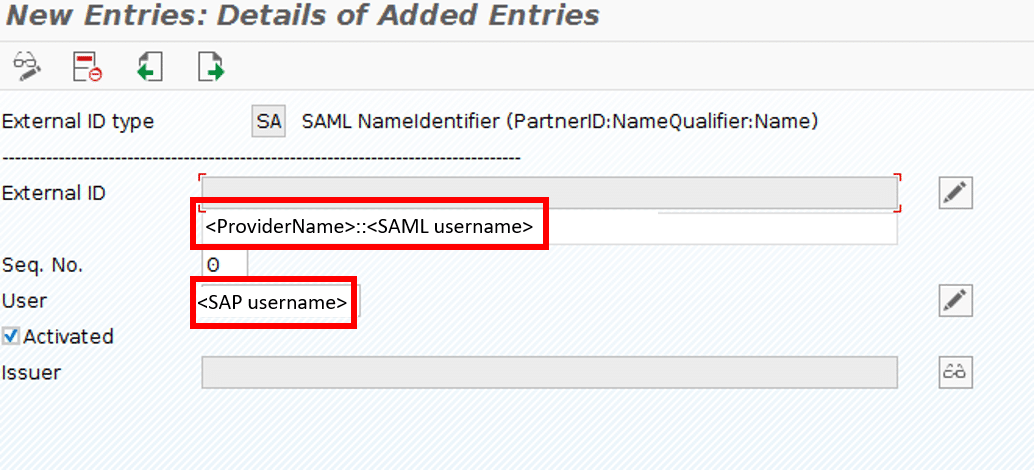
If your Unique Identifier of your Central Identity Provider is not the same as sap username – you have to maintain the mapping via <SAML user> to <SAP user> by maintaining the table VUSREXTID.
If the SAML owner is identical to the ABAP user name, the assignment can be made directly with the report RSUSREXT.
Else, start transaction SM30 and display Table VUSREXTID:
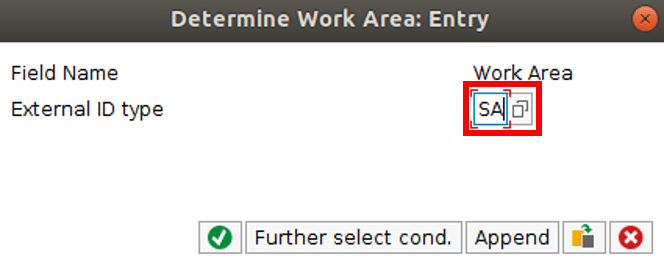
Select SA as external ID type:
Add entries:
Step 6 Use WSS Login for SOAP Connectors
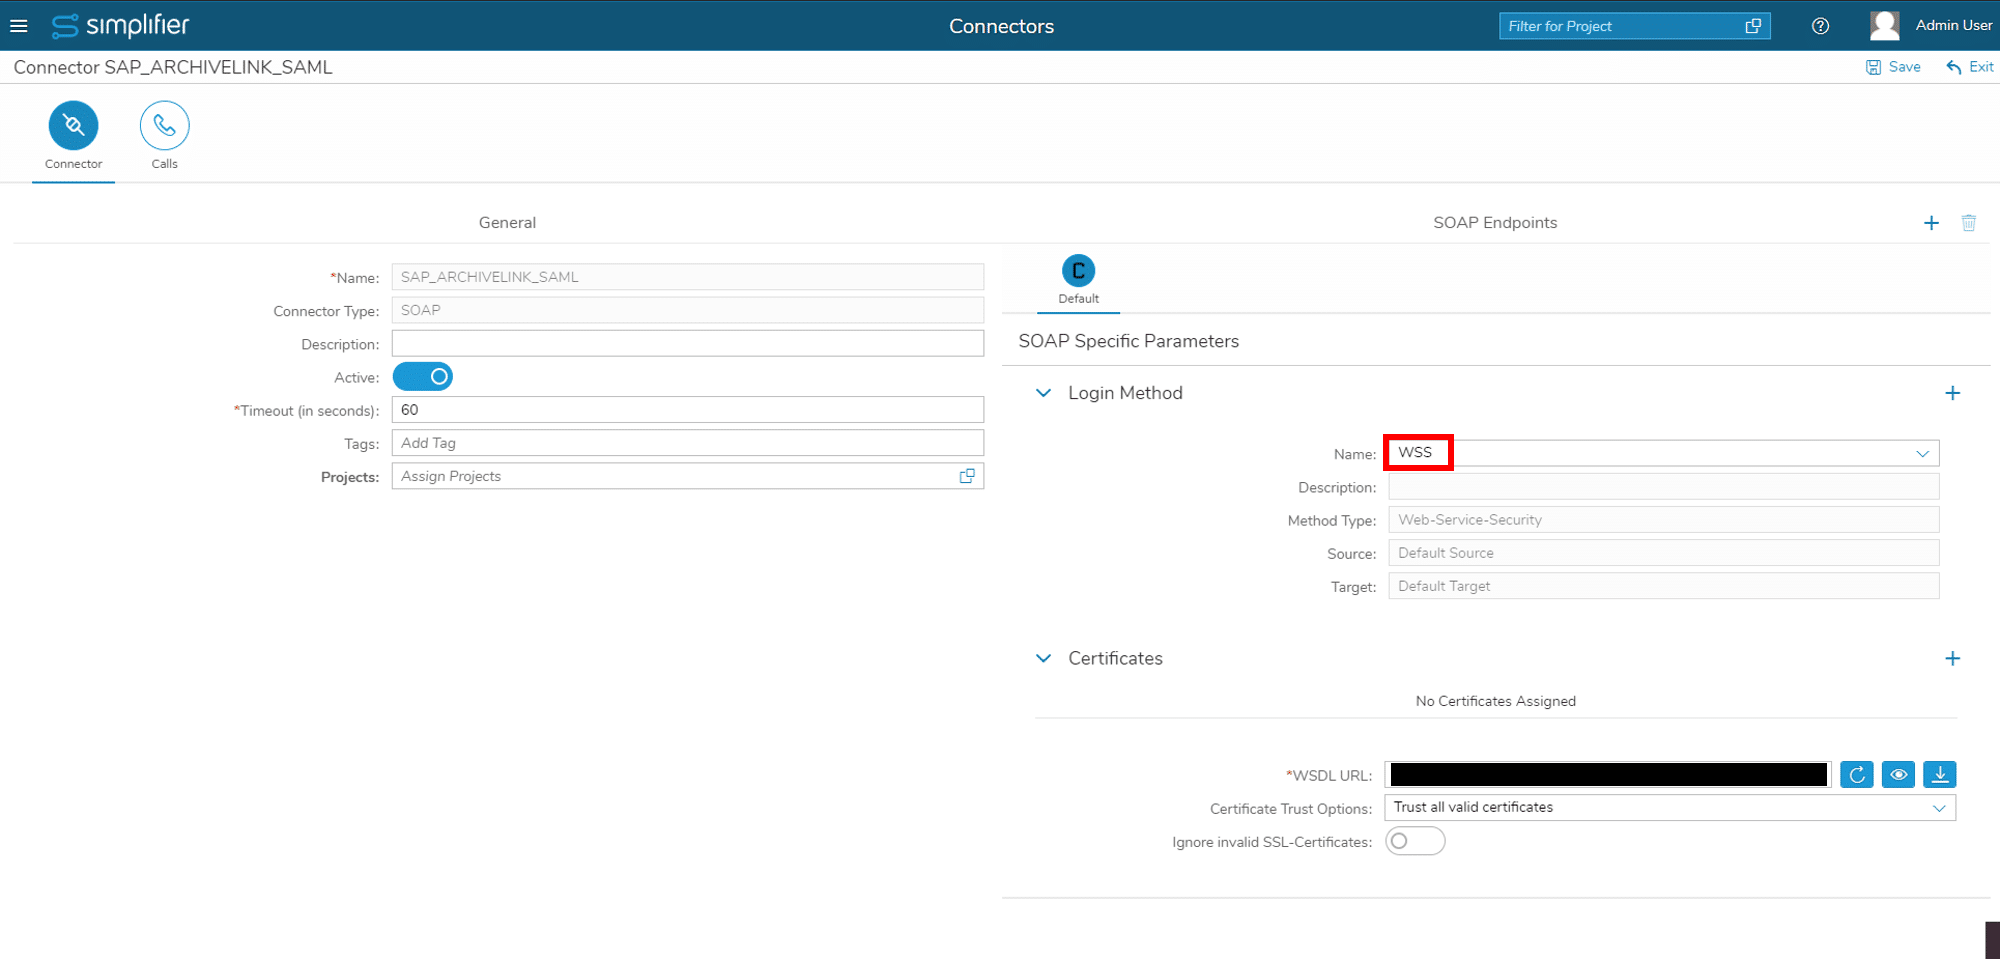
You can now select the WSS login mechanism from Step 5 as login method for your SOAP Connectors:
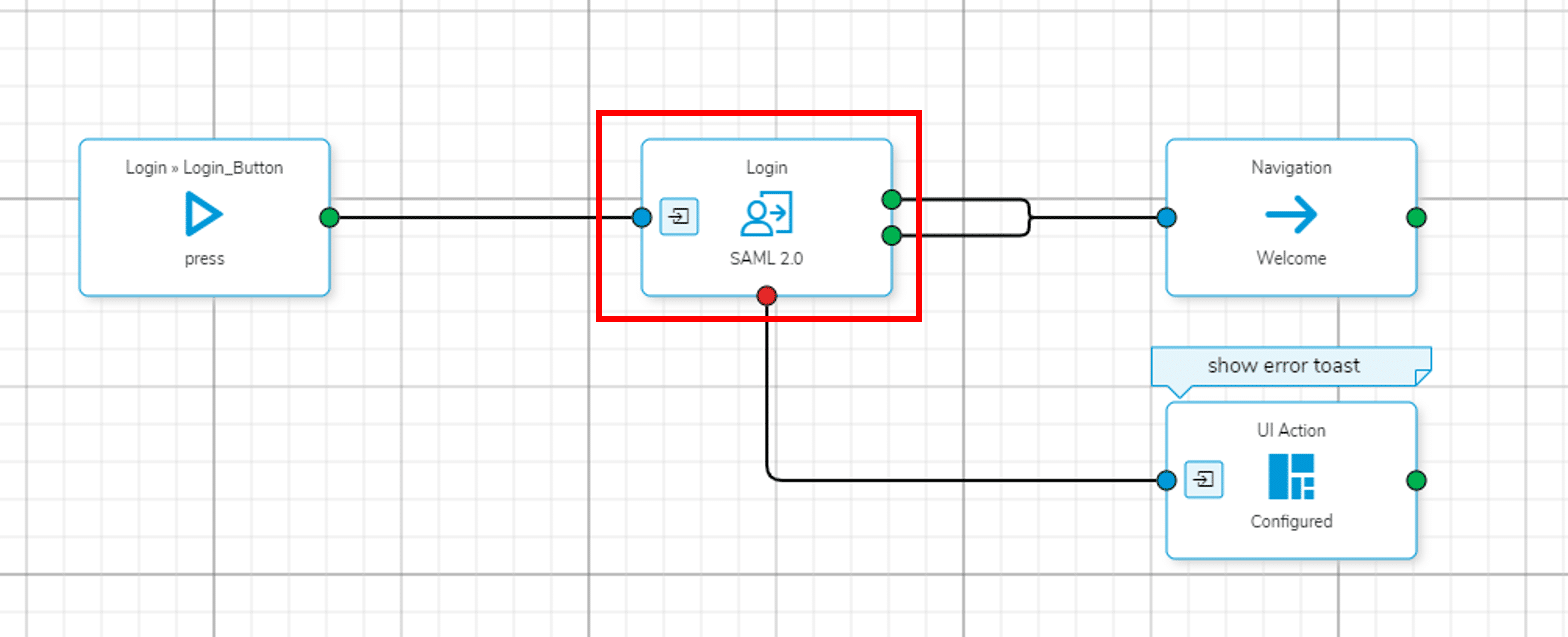
For the app login run the Login App Wizard for SAML authentication. The resulting Process story should look like this:
