Prerequisites
You have to be Azure Administrator as well as Simplifier Administrator
Step 1 – Logon to Azure Portal
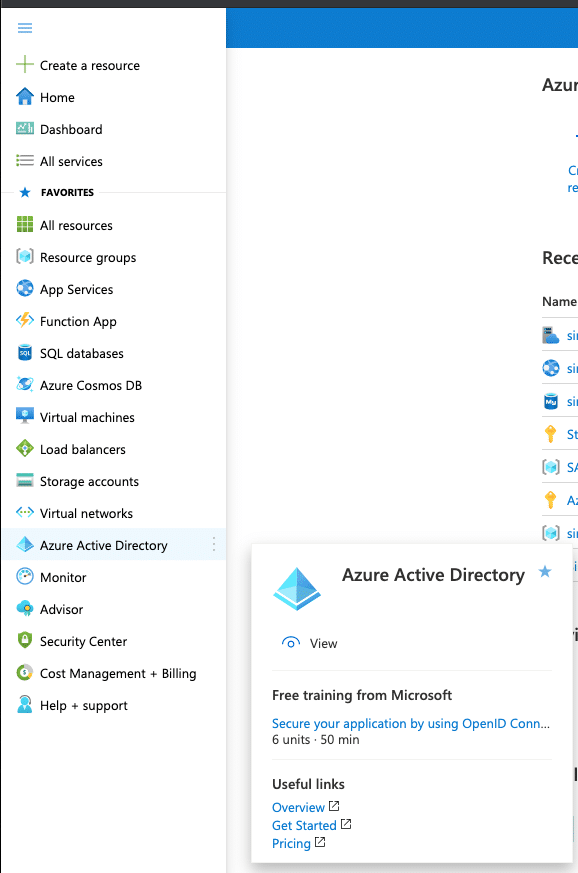
Logon to portal.azure.com and click on the Active Directory Service
Step 2 – Create a new Enterprise Application
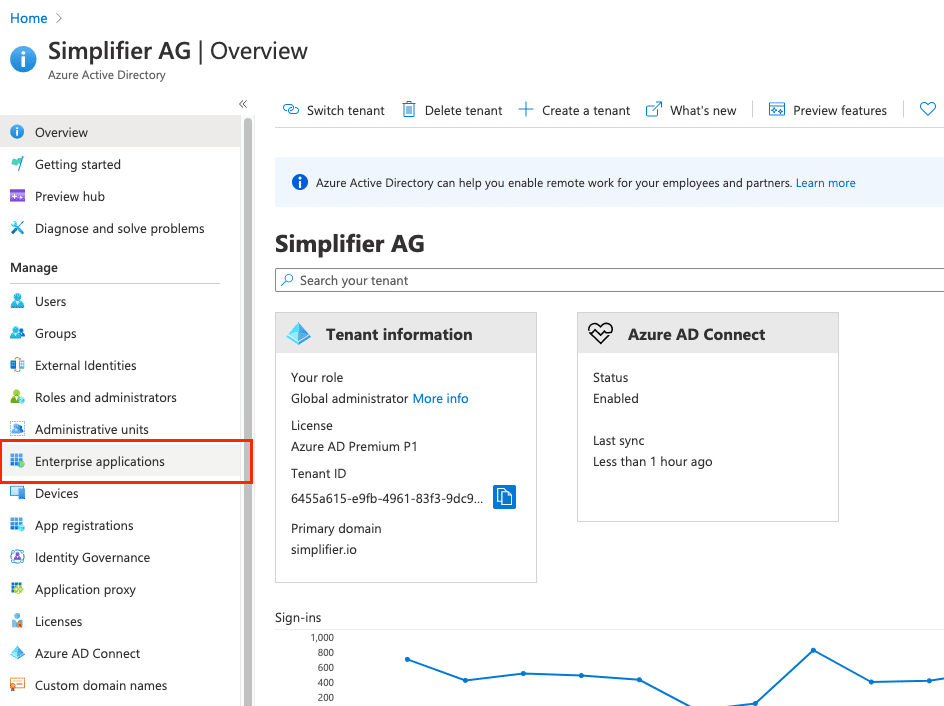
Switch to Enterprise Application Section
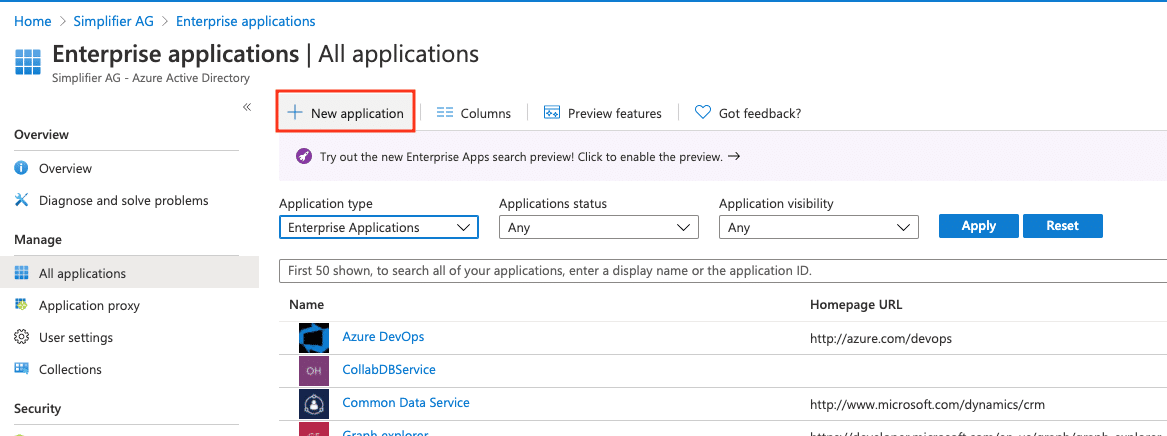
Create new Enterprise Application
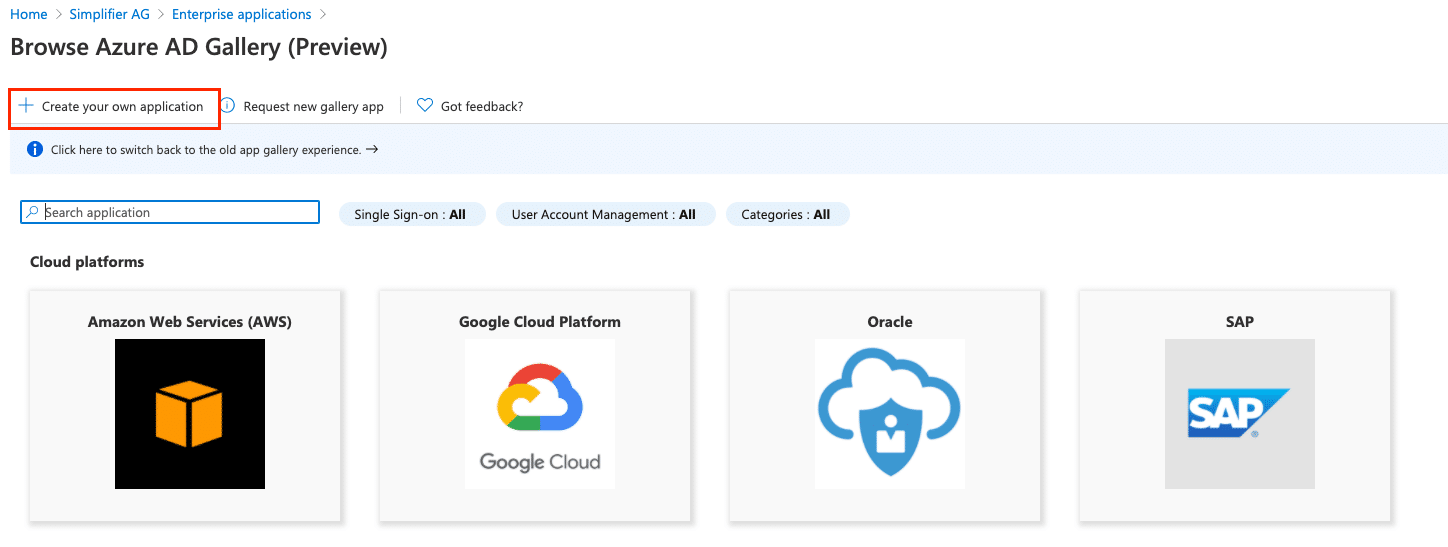
Select Create own Application
Enter a unique Name like the URL of your Simplifier instance and choose the option
Integrate any other application you don’t find in the gallery
Click the Create Button below
After creating the App, you will be redirect to the App Settings.
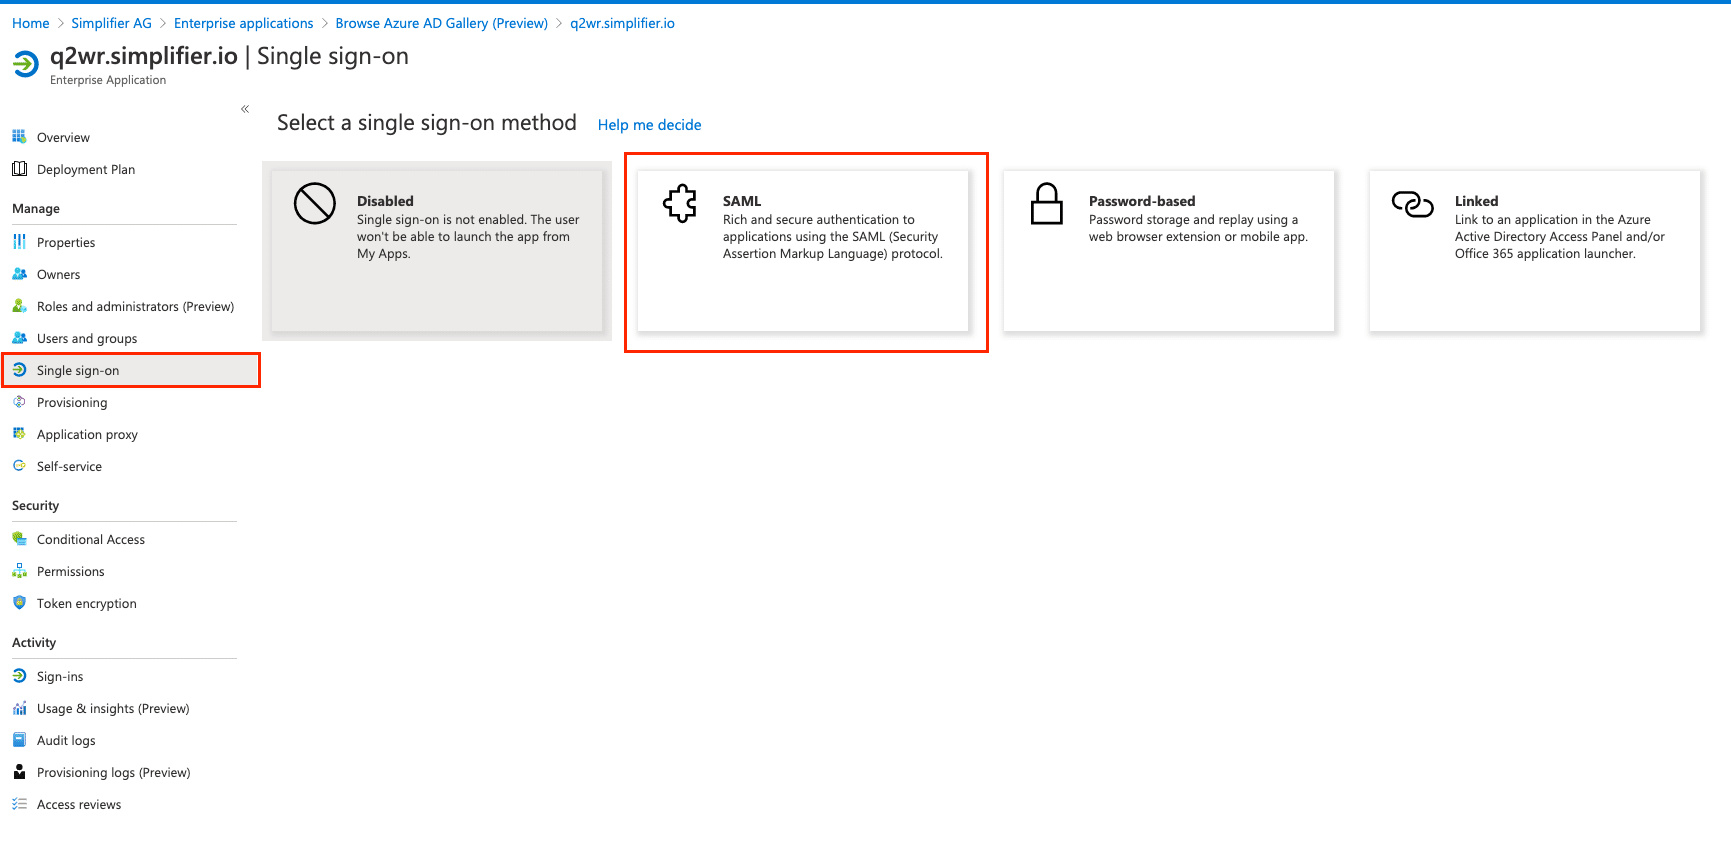
Choose Single-Sign-On in the left menu and then click on the SAML Tile
Step 3 – Configure Simplifier Service Provider
Go to Settings – Authentication and create an new Identity Provider
Mechanism settings
The following settings are needed for SAML Authorization against Azure.
| Service Provider Endpoint | The endpoint url which needs to be configured in the SAML IDP Provider |
| Service Provider Metadata URL | The Metadata Document URL for upload or exchange into the Identity Provider |
| Display Name | The display name is shown on the login button. |
| Sign Assertions | If set, also the assertions within the SAML Response will be signed. This should be activated for Azure Active Directory |
| Maximum Lifetime (in seconds) | Used to determine whether a user login request is sent within a valid time period of the user’s last login. If yes, the user is automatically logged in without the need to enter a user name and password again.Recommended Default Value 28800 |
| Service Provider Entity ID | Unique ID for registering Simplifier within the external Identity Provider
This ID will be also exchanged by Metadata URL |
| Get IDP Metadata via URL | You should switch this on (Recommended) for exchanging the metadata directly with the Identity Provider |
| URL for IDP Metadata | Url for Metadata provided by Azure Active Directory |
| Icon | Optional Icon for Display in the Logon Button |
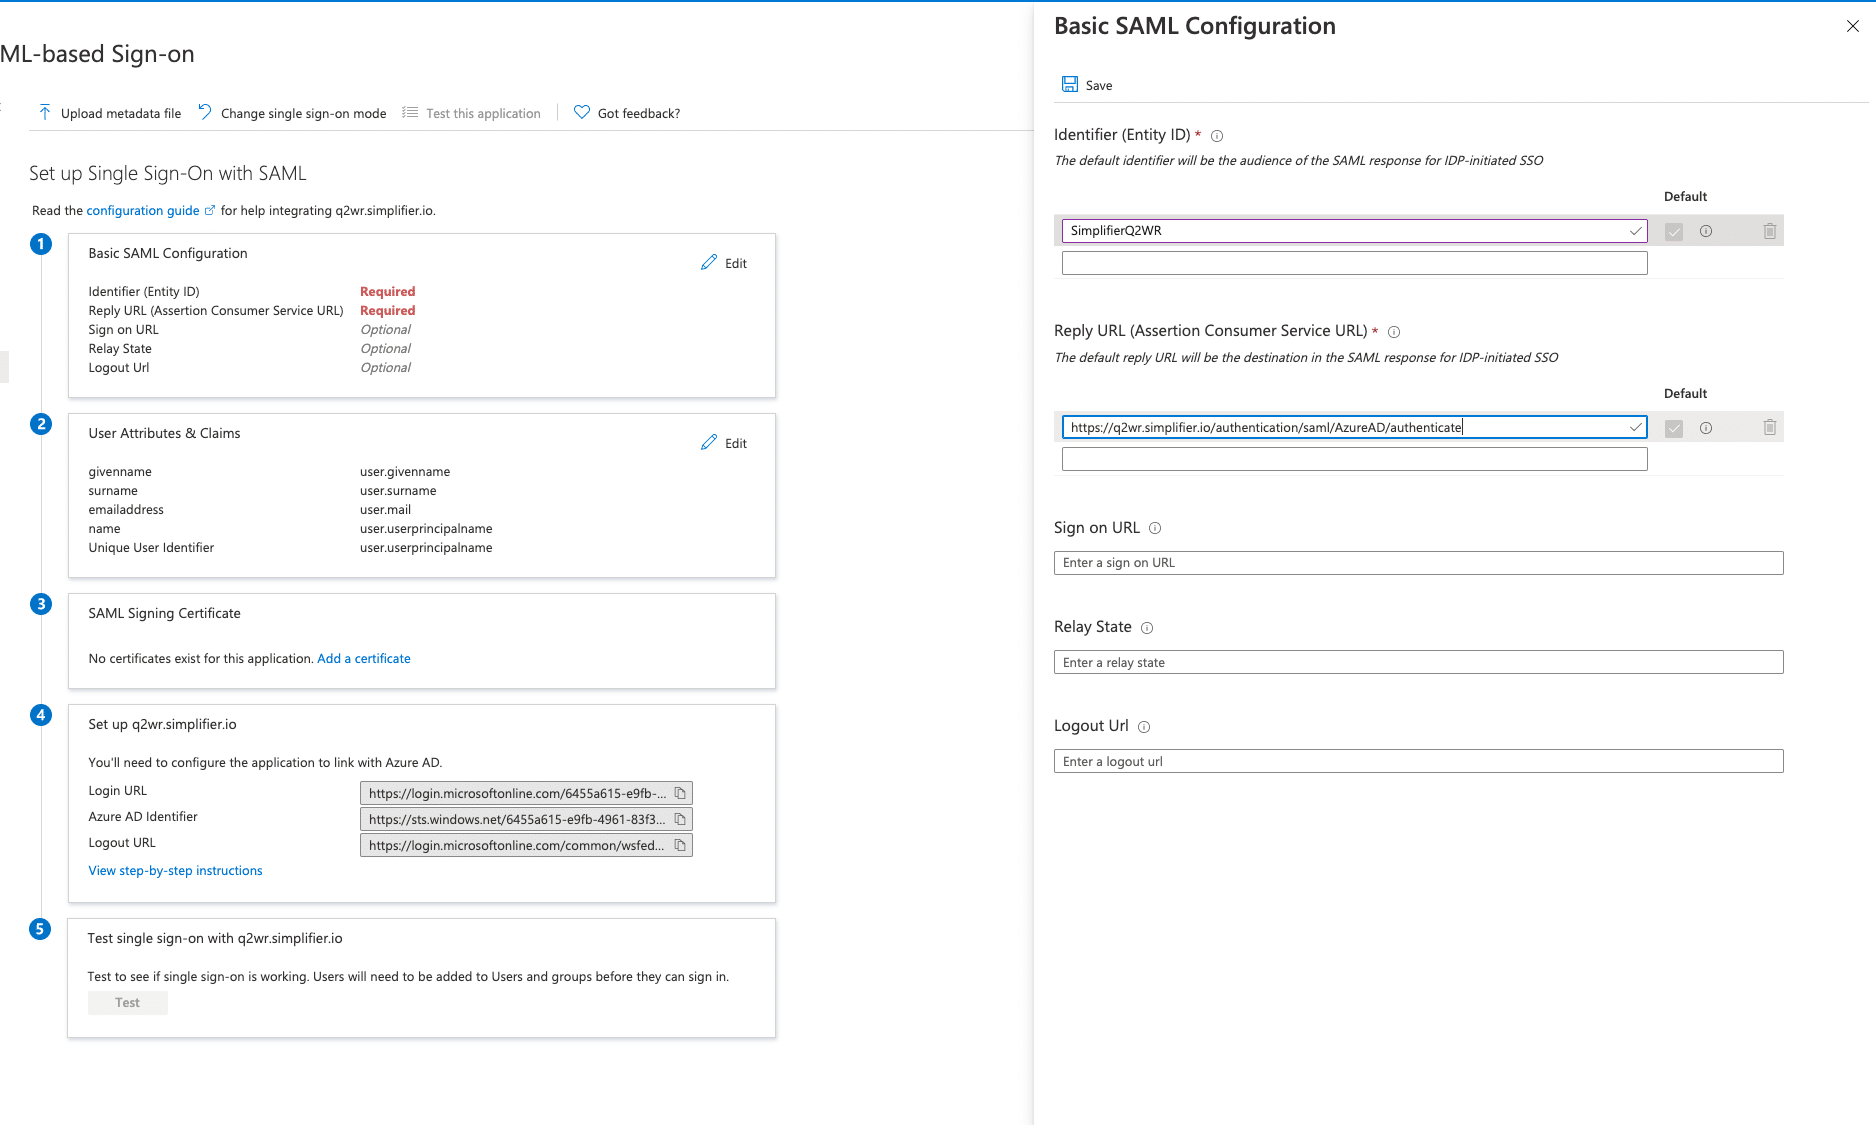
Copy the Service Provider Endpoint URL and Service Provider Metadata URL into Azure SAML Configuration
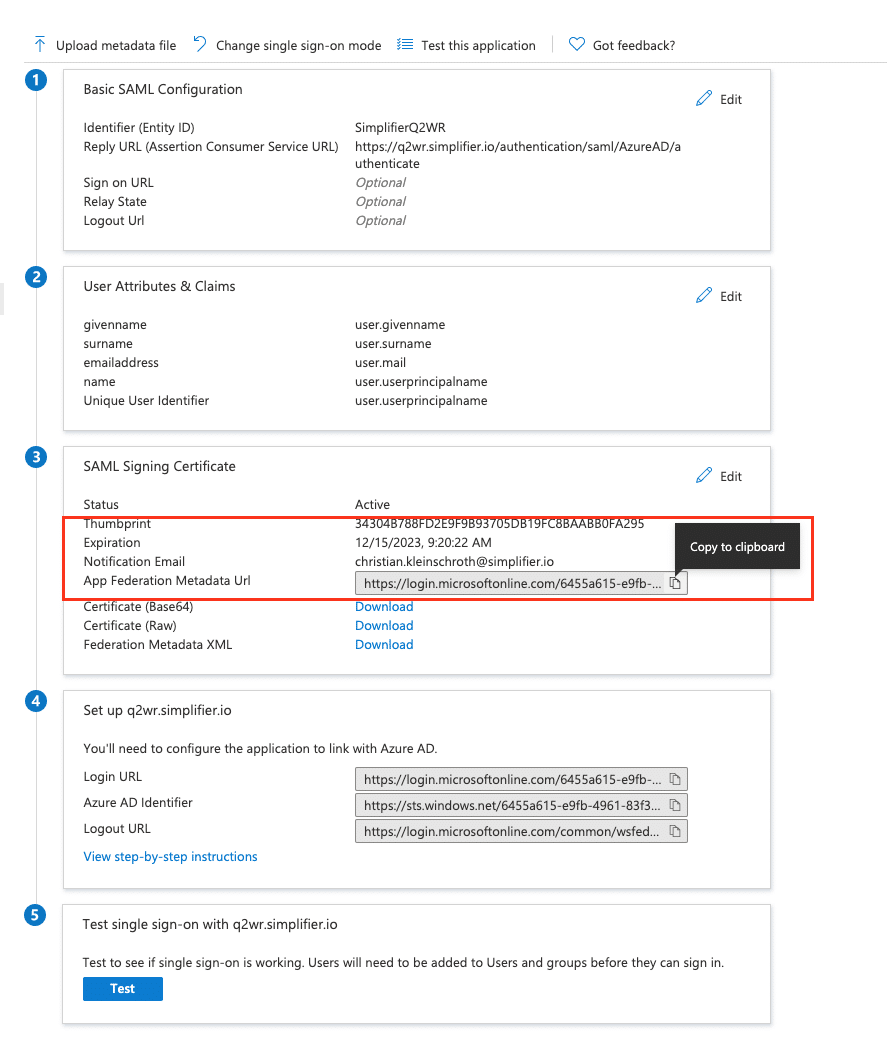
After saving the configuration, copy the App Federation Metadata URL below back to the Simplifier in URL for IDP Metadata
Proceed with Click on User Detail (Claim Setting)
| Username | Unique Username (Name-ID) for Simplifier User
Default Value: http://schemas.xmlsoap.org/ws/2005/05/identity/claims/name |
| First Name | The path which points to the entry of the user profile containing the first name.
Default Value: http://schemas.xmlsoap.org/ws/2005/05/identity/claims/givenname |
| Last Name | The path which points to the entry of the user profile containing the last name.
Default Value: http://schemas.xmlsoap.org/ws/2005/05/identity/claims/surname |
| E-Mail Address | The path which points to the entry of the user profile containing the email
Default Value: http://schemas.xmlsoap.org/ws/2005/05/identity/claims/emailaddress |
| Mobile Phone Number | The path which points to the entry of the user profile containing the mobile phone number. |
Save the Configuration
Step 4 – Assign User and/or Groups to Enterprise Application
In the Azure portal , you have to assign single users or groups to login into simplifier successfuly
Step 5 Single-Sign-On for Connector / Integration
If you have successfully authenticated against you external identity provider, you can setup your connector endpoints for passing through the SAML Token.
Optional Group Syncing
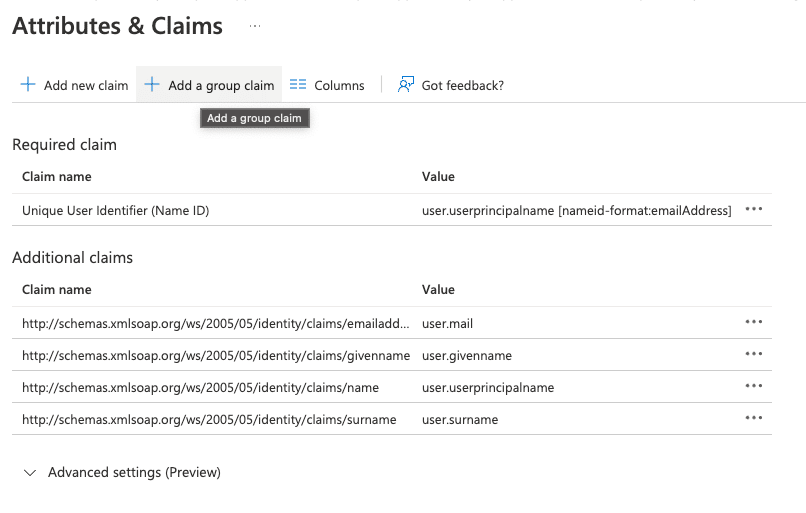
If you want to synchronize Azure Active Directory Groups within Simplifier, you have to add additional Group Claim in Azure Active Directory first.
For further Information you can read more in the official Azure AD Documentation.
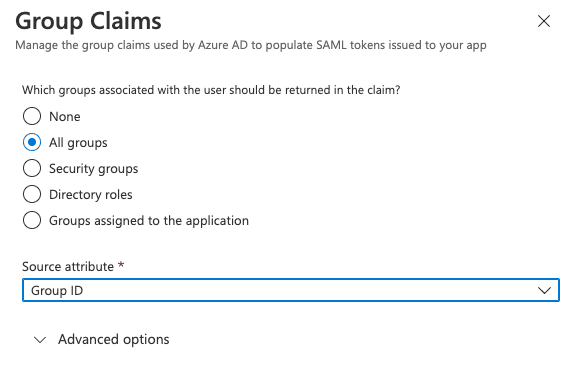
Add Group Claim
Add the new Group Claim in the SAML 2.0 Settings of the registered Simplifier Application.
In the Group Claim Configuration, you can set the transfered attribute to simplifier identity management like Group ID.
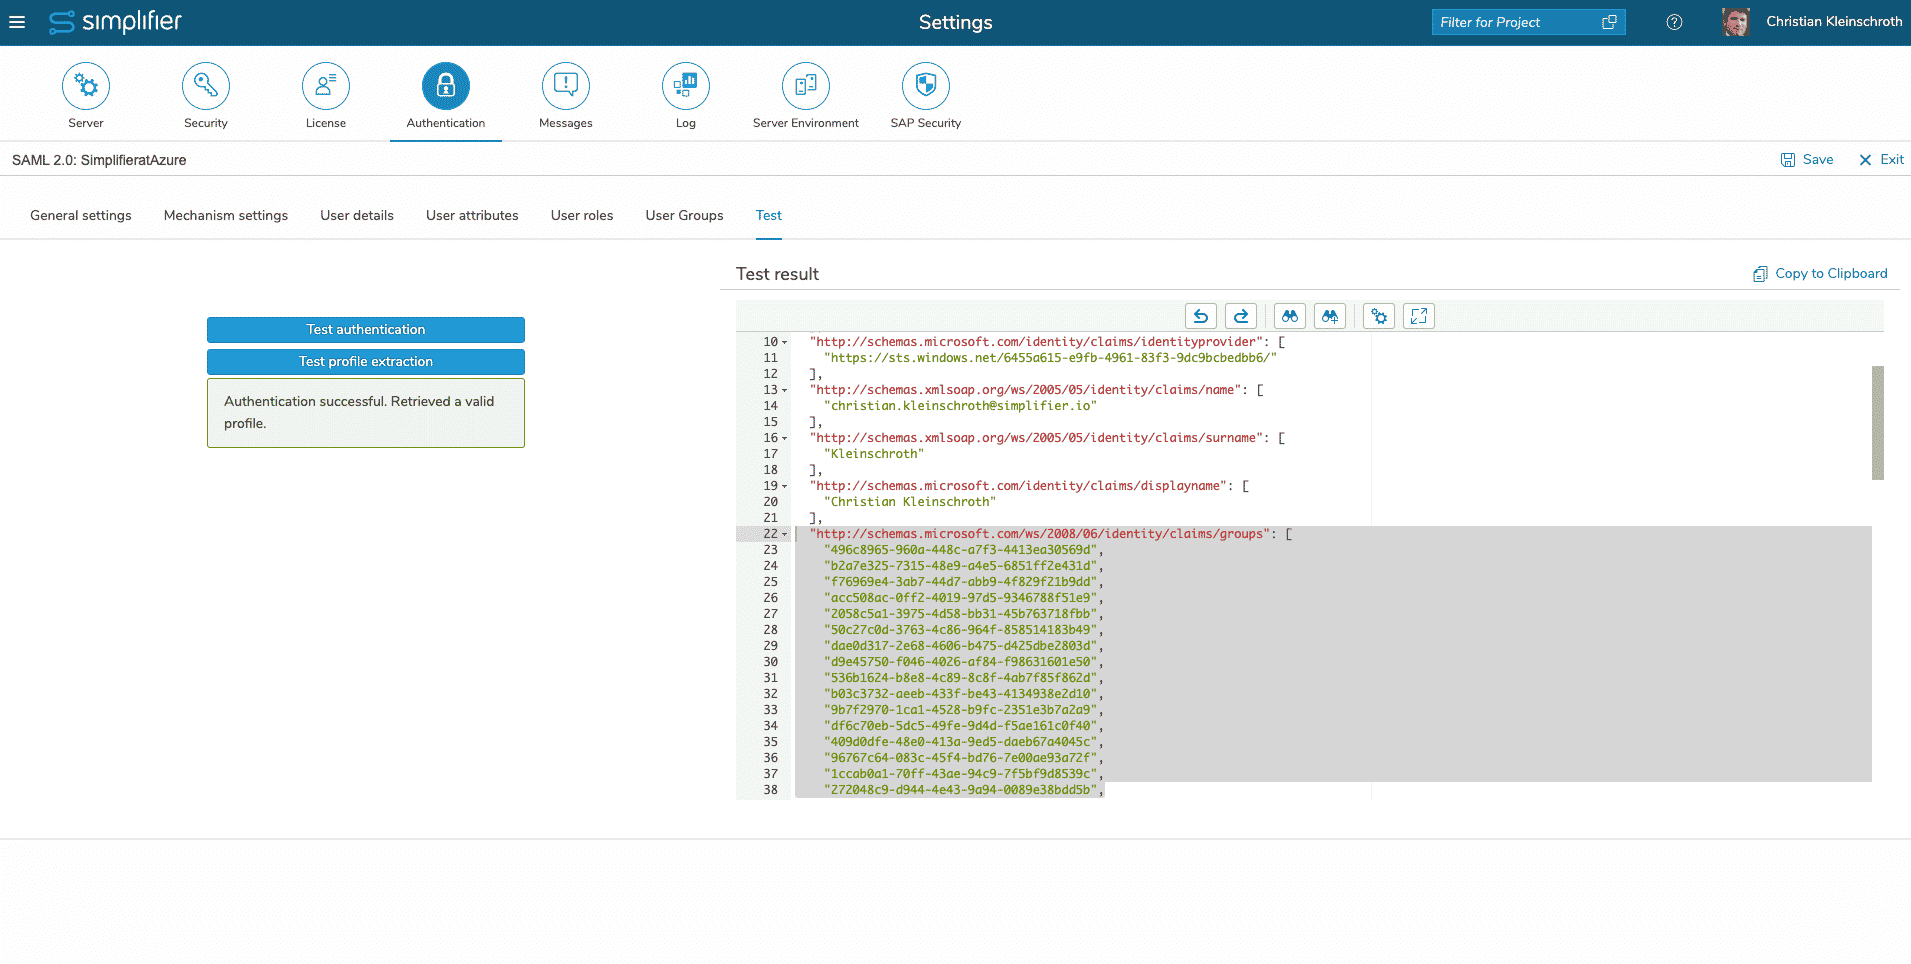
Test it within Simplifier
You can test the transfer of group ids if you use the “Profile Extraction” Button within the Simplifier Identity Management Server Settting.
Create a Simplifier Group for each AD Group
Before we can configure the Group Synchronization within Simplifier, we have to create the needed Simplifier Groups – please refer the Documentation for adding Groups in the Usermanagement.
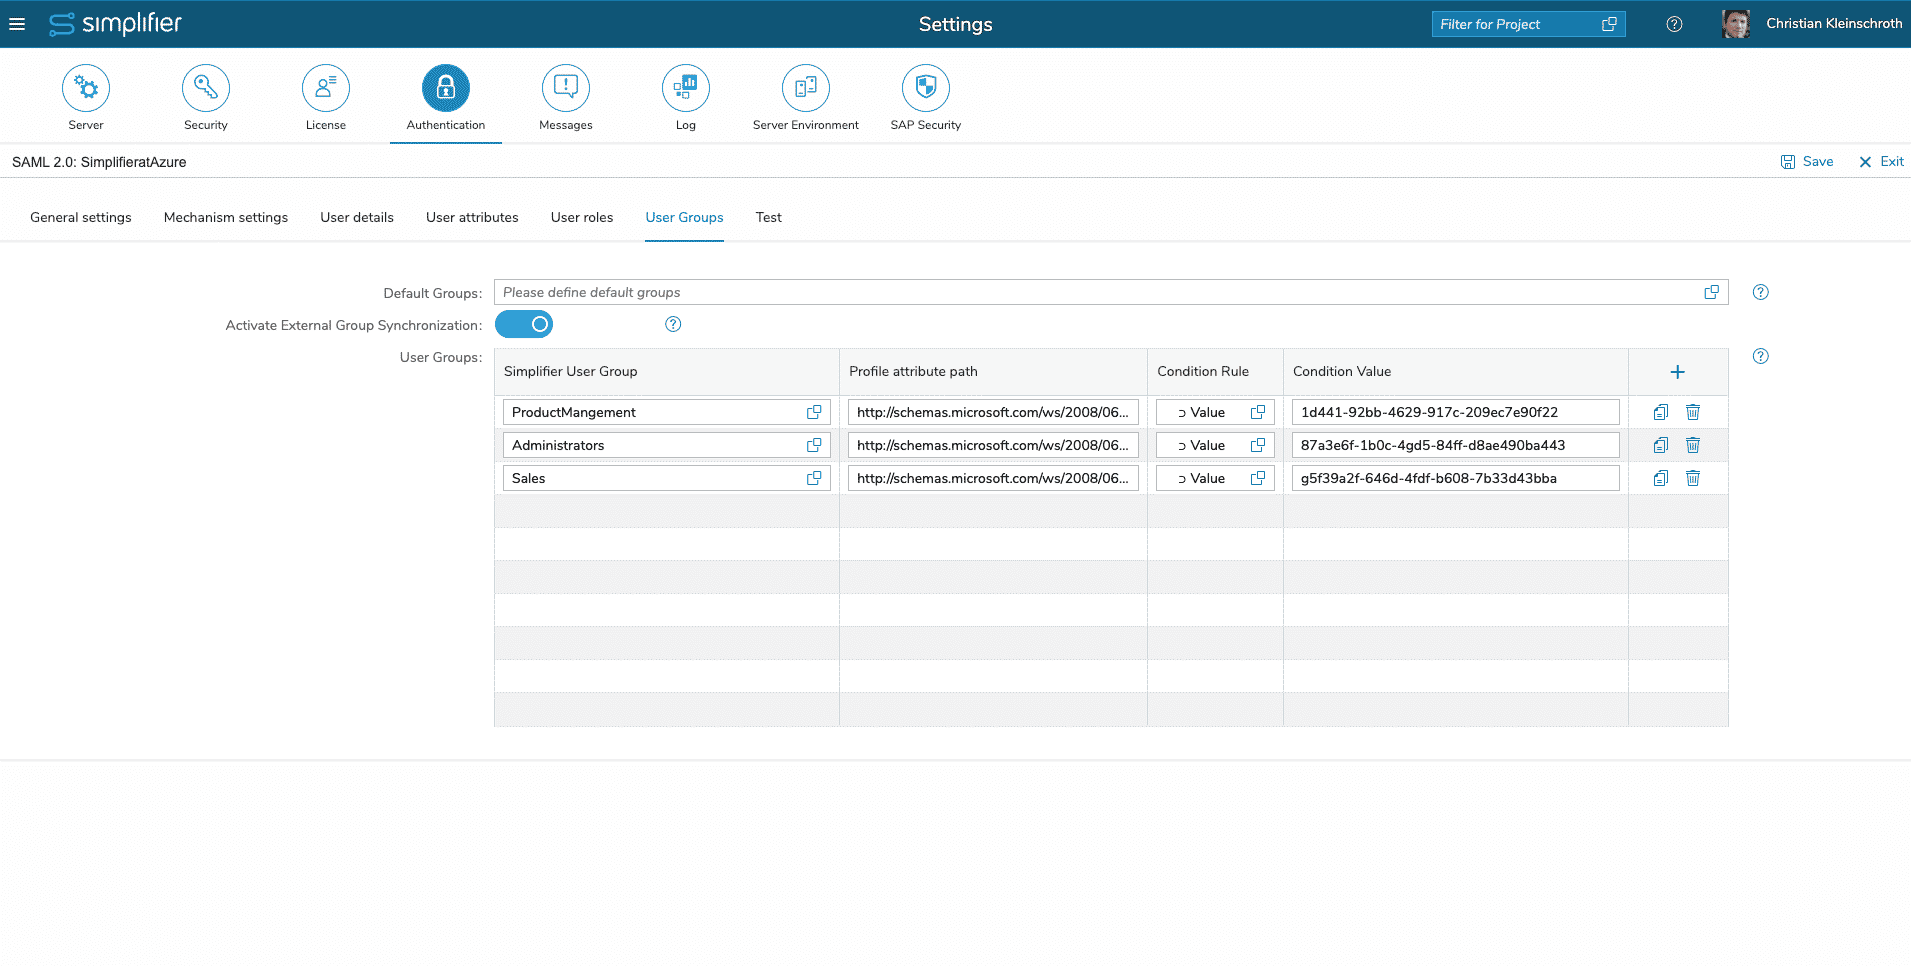
Configure the Group Synchronisation
To configure the Group Synchronisation, you have to enable the Synchronisation first, and then fill out a row for each Group
| Column | Recommended Value |
| Simplifier User Group | Select the before created User Group |
| Profile attribute Path | The Name of the Profile Attribute
http://schemas.microsoft.com/ws/2008/06/identity/claims/groups |
| Condition Rule | ⊃ Value |
| Condition Value | Object / Group ID of the (Azure) AD Group like
9d261611-92bb-4629-917c-209ec7e90f22 |
