Introduction
The simplifier plattform can be extended with core functions via its plugin architecture based on webservices. Each plugin represents a microservice that registers with the simplifier and makes its functions available through the process designer. In the following example we use the popular nodejs javascript runtime, which allows a fast development of server side functionalities. (Plugin Architectur)
Prerequisites
Step 1 – Clone Github Project
Create a folder for cloning the SimplifierNodeJSPlugin code from the Github Project. In the following, we will use /DIRECTORY as placeholder for the folder’s system path.
Enter the following code in the command line window (replacing /DIRECTORY with your folder’s path):
cd /DIRECTORY
git clone https://github.com/simplifier-ag/SimplifierNodeJSPluginExample.git
Step 2 – Modify Settings
Generate a Simplifier Plugin Secret by following the corresponding step-by-step instructions of the Simplifier Documentation.
In the following we will use 192.168.1.2 as placeholder for the Simplifier domain and 192.168.1.3 as placeholder for the plugin server domain.
Paste the generated secret in the configuration settings file (DIRECTORY/simplifierPlugin/conf/settings.json) of the SimplifierNodeJSPlugin:
{
    "registration": {
      "host": "192.168.1.2",
      "port": 8085,
      "secret": "XXX"
    },
    "http": {
      "interface": "0.0.0.0",
      "port": 9877,
      "exposedHost": "192.168.1.3"
    },
    "timeoutSeconds": 60
}
Step 3 – Create Dockerfile
Create a new file “Dockerfile” with content:
FROM node:current-stretch
#install node application
WORKDIR /usr/src/app
COPY package*.json ./
RUN npm install
COPY . .
EXPOSE 9877
#start application
ENTRYPOINT [ "node", "/usr/src/app/bin/runPlugin.js", "&" ]
Step 4 – Create Dockerignore
Create a new file “.dockerignore” with content:
.git
.gitignore
node_modules
npm-debug.log
Dockerfile*
docker-compose*
README.md
LICENSE
Step 5 – Build Container Image
Use the following command lines to build a container image of the SimplifierNodeJSPlugin (replace USER_NAME with your Docker Hub account name):
cd /DIRECTORY/simplifiernodeplugin/
docker build -t USER_NAME/simplifier_plugin .
docker push USER_NAME/simplifier_plugin:latest
Step 6 – Create Image from Container
Next, create an image from the container by entering the following command lines:
docker network create --driver=bridge --subnet=192.168.1.0/24 br0
docker run --name simplifier --network br0 --ip=192.168.1.2 -v -d /opt/simplifier/data:/opt/simplifier/data -p 80:80 -p 443:443 -p 8085:8085 -p 8090:8090  simplifierag/onpremise
docker run --name plugin --network br0 --ip=192.168.1.3 -p 9877:9877 -d -v /opt/simplifierPlugin/config:/usr/src/app/conf USER_NAME/simplifier_plugin
Step 7 – Open Simplifier Plugin UI
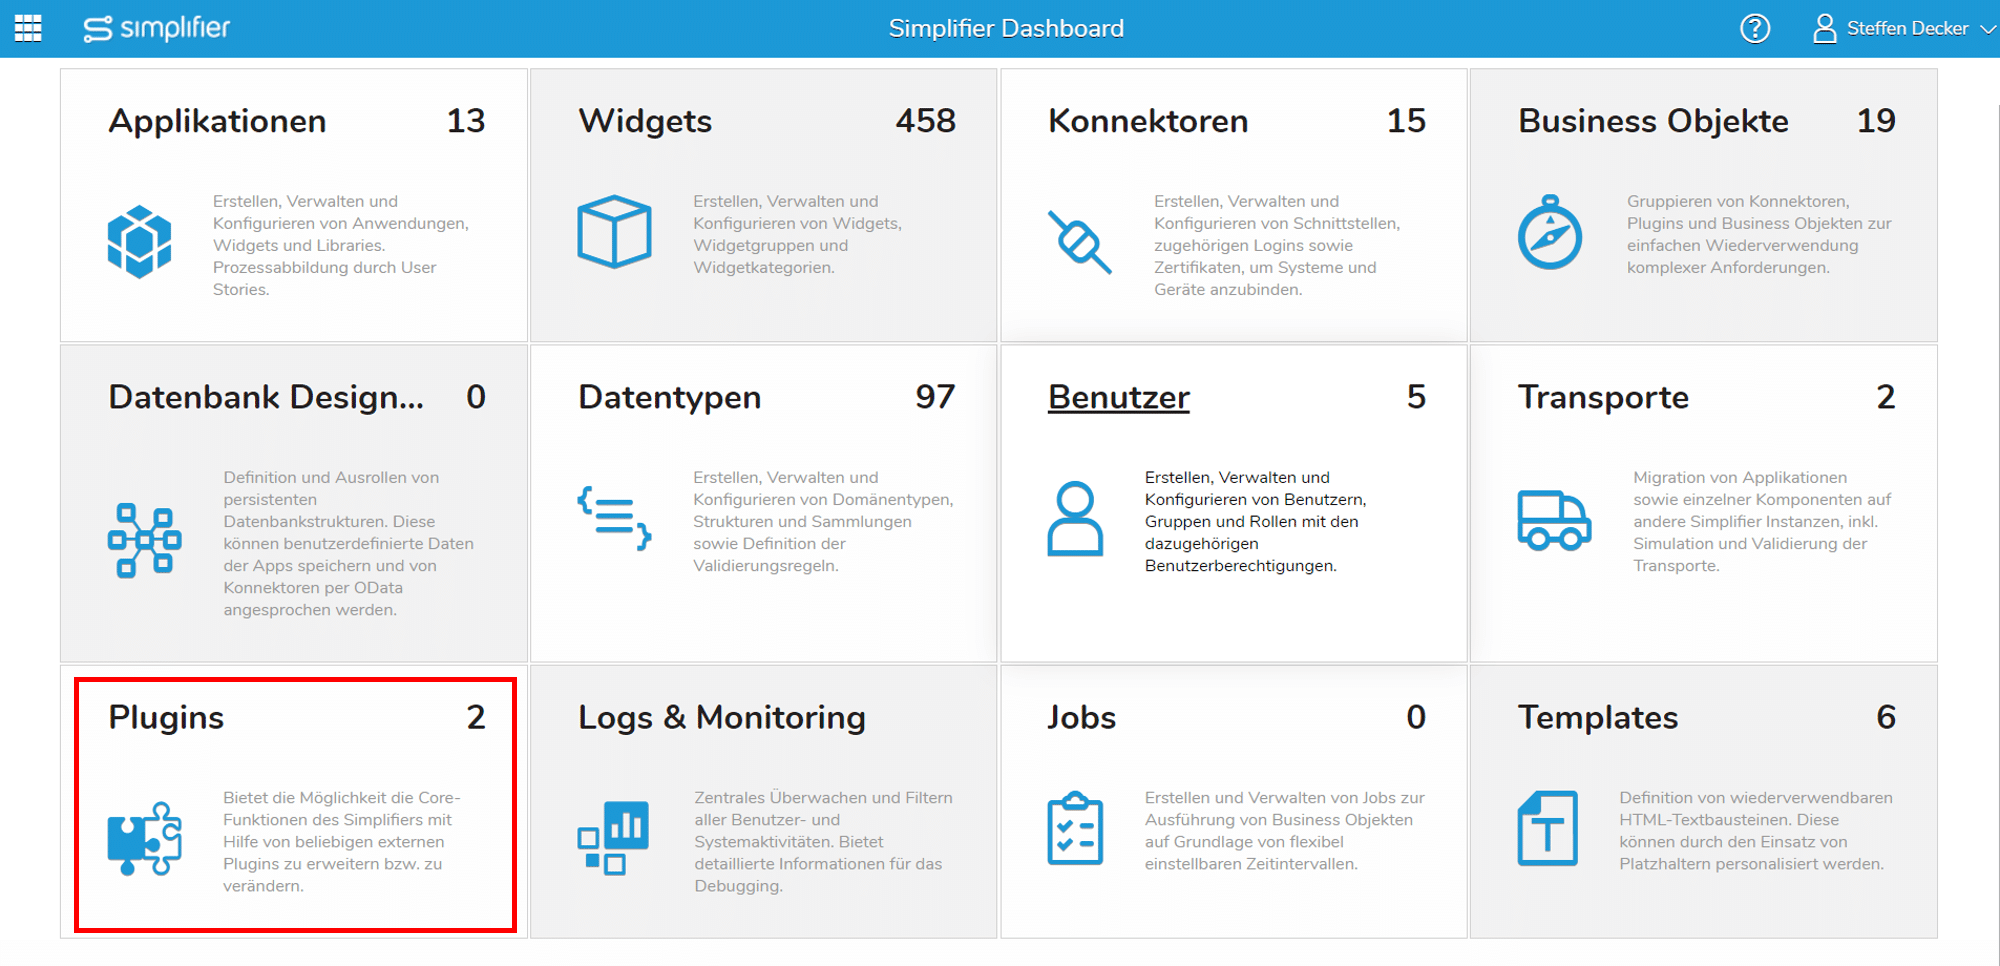
Open your simplifier plattform and select the plugin tile in the dashboard view.
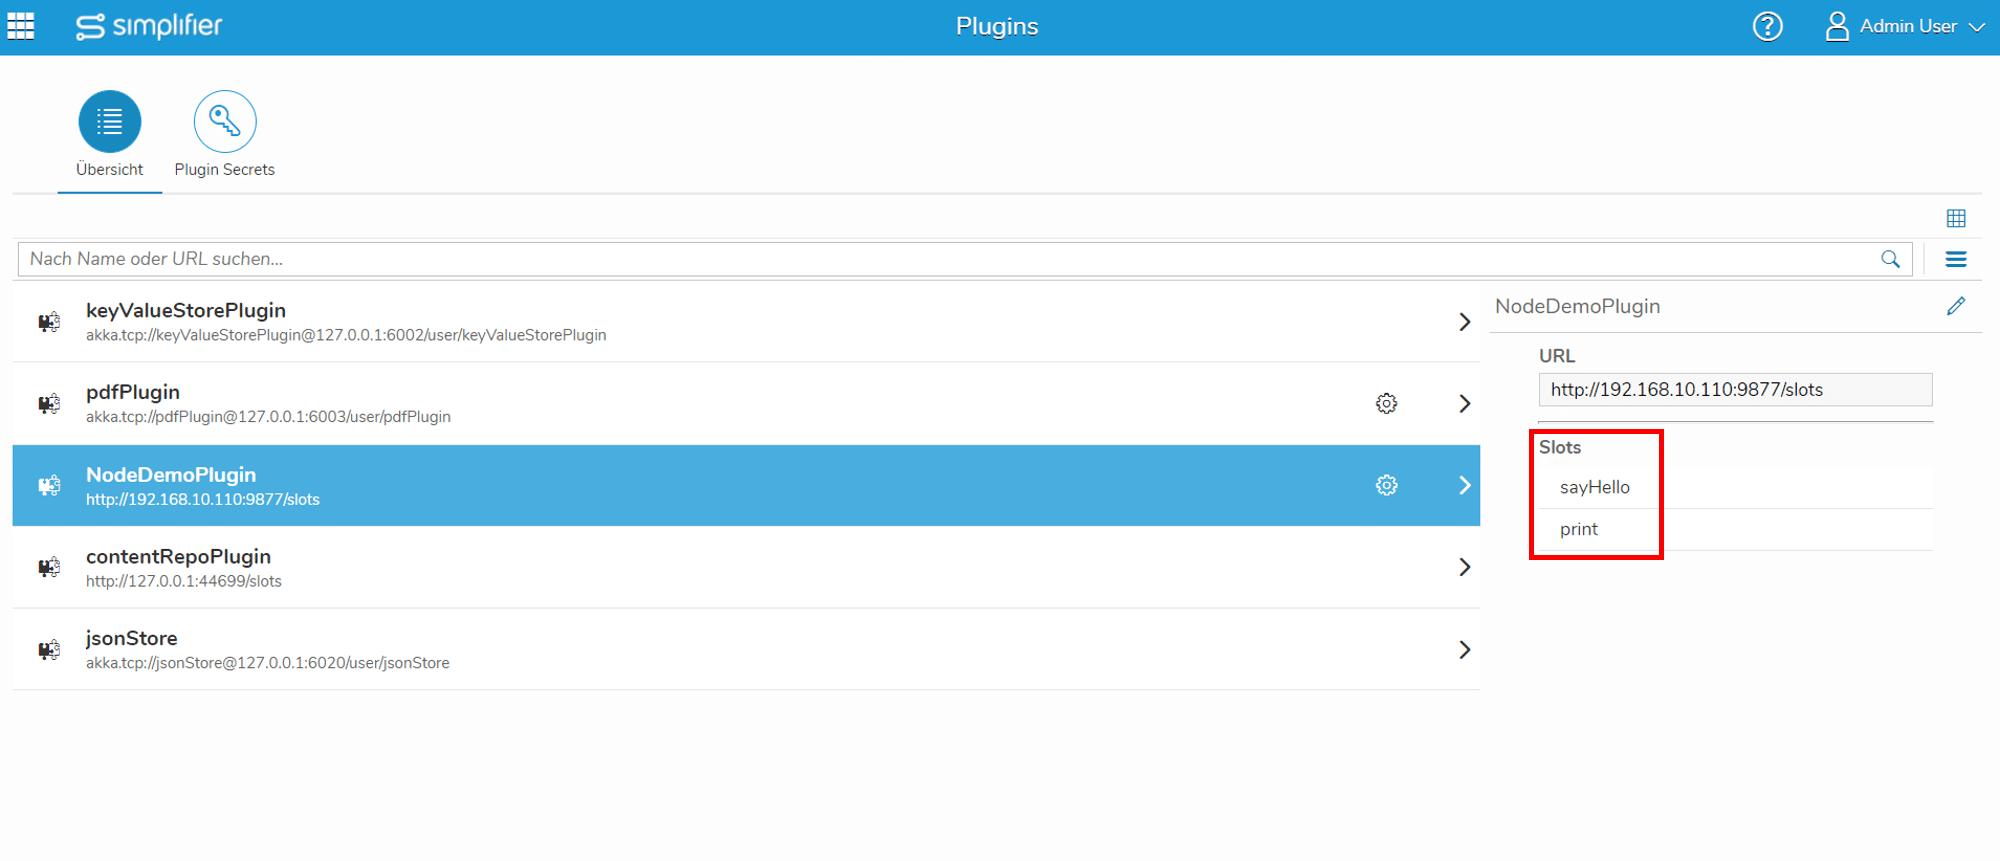
If the new plugin has registered correctly, we see the available functions as slots on the right side.
Optional Step 10 – Unregister Plugin from Simplifier
If the plugin webservice is stopped, the plugin unregistered itself automatically from the simplifier. However, it can happen that the plugin crashes unexpectedly or no longer runs correctly due to a nodejs programming error. In this case, the simplifier must be restarted or following api request has to be called:
POST: http://192.168.1.2:8080/plugin/registerPlugin
Plugin-Secret: **PLUGINSECRET**

{
 "action": "unregister",
 "plugin": {
   "hostname": "Not relevant for this request",
   "port": -1
   "actorSystemName": "Not relevant for this request",
   "pluginName": "NodeDemoPlugin",
   "slots": [],
   "httpPorts": []
 }
}

