I this article, you will learn how to use the SignaturePad Widget to draw on images. Furthermore, we will cover how to upload an image to the browser and how to download the edited image to your computer.
Prerequisites
For this tutorial, you should already know how to create Applications, set Widget properties in the UI Designer, map data from Business Objects to Widgets in the Process Designer, create Business Objects and create Global Variables. If this does not sound familiar to you at all: learn how to create an Application and read about the basic concepts (UI Designer, Process Designer, Business Objects, Global Variables).
The SignaturePad Widget
The SignaturePad is a widget that lets you draw/write on a screen area.
You can change the color and the size of the pen.
There are two common use cases for the SignaturePad:
- A digital form that allows users to digitally sign the information that they have entered
- Drawing/writing on images to emphasize important details or to make annotations
In this article, we will build an application for the second use case. The users will be able to upload an image from their computer, draw on the image and then download the edited image.
Step 1: Create the UI
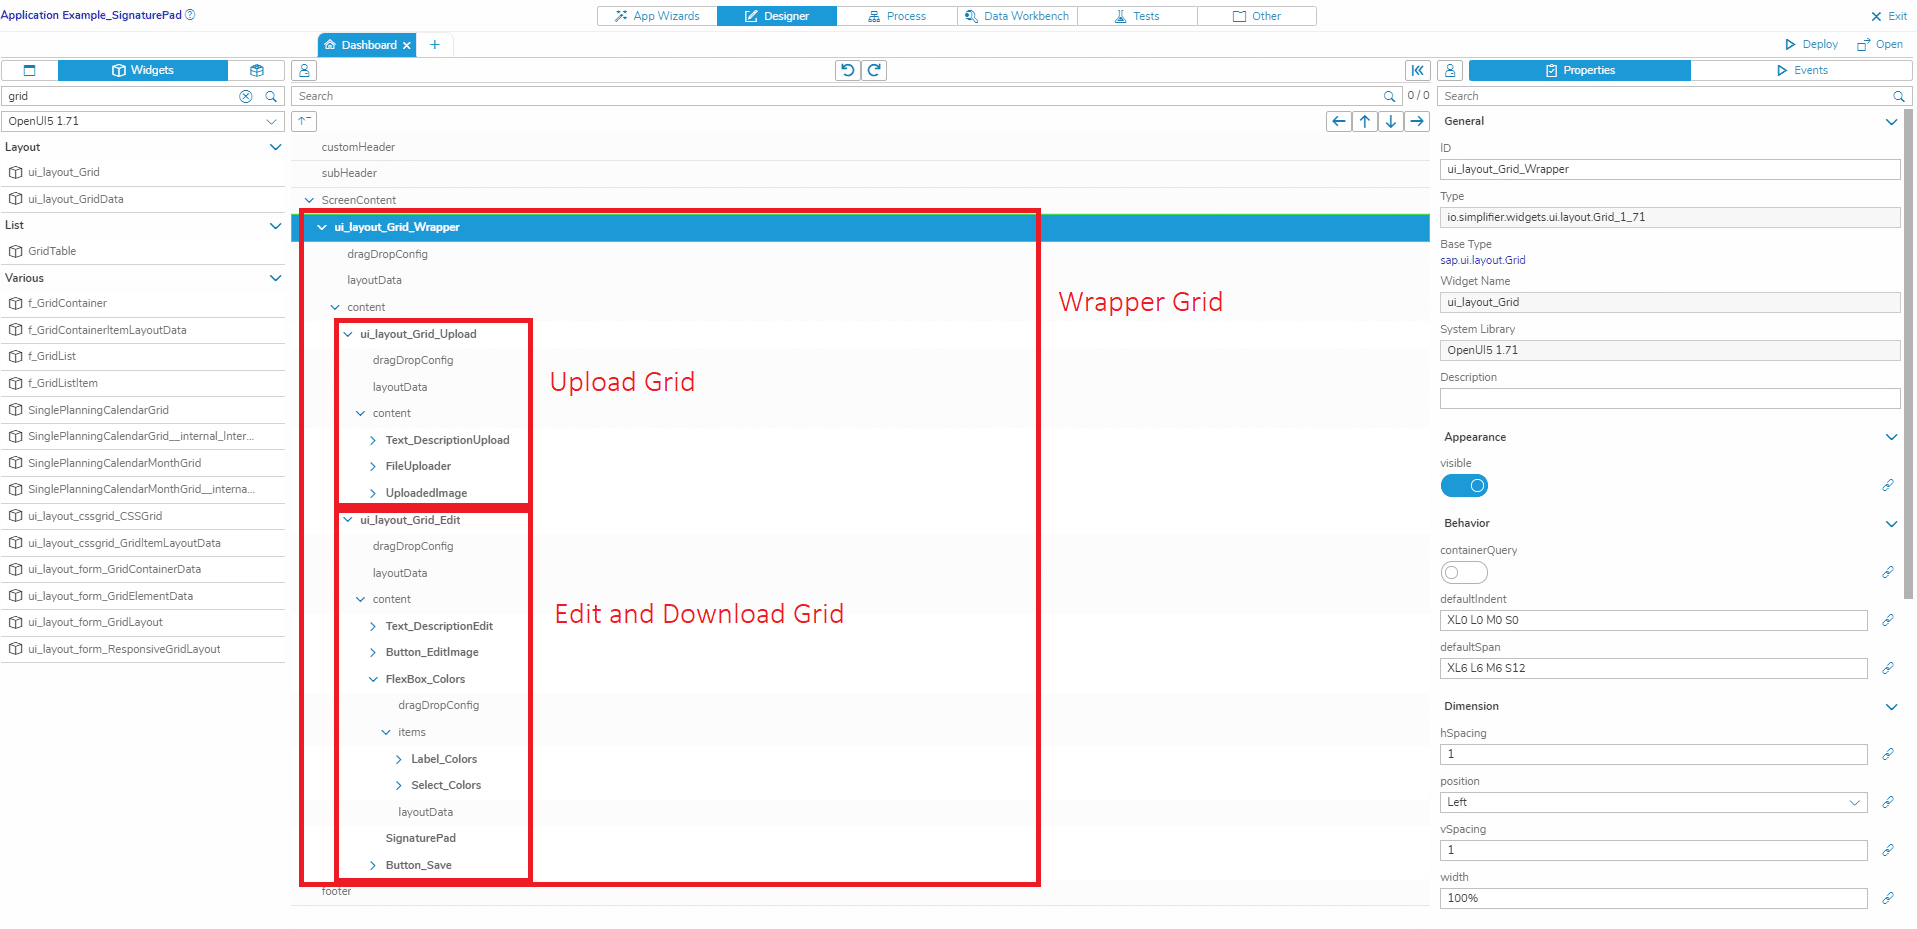
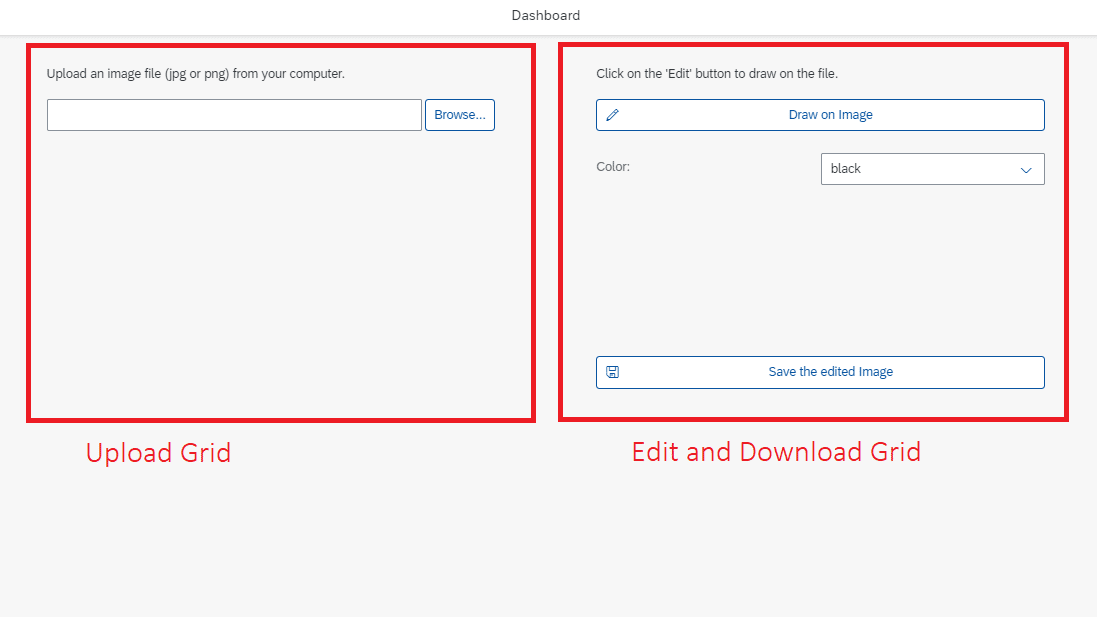
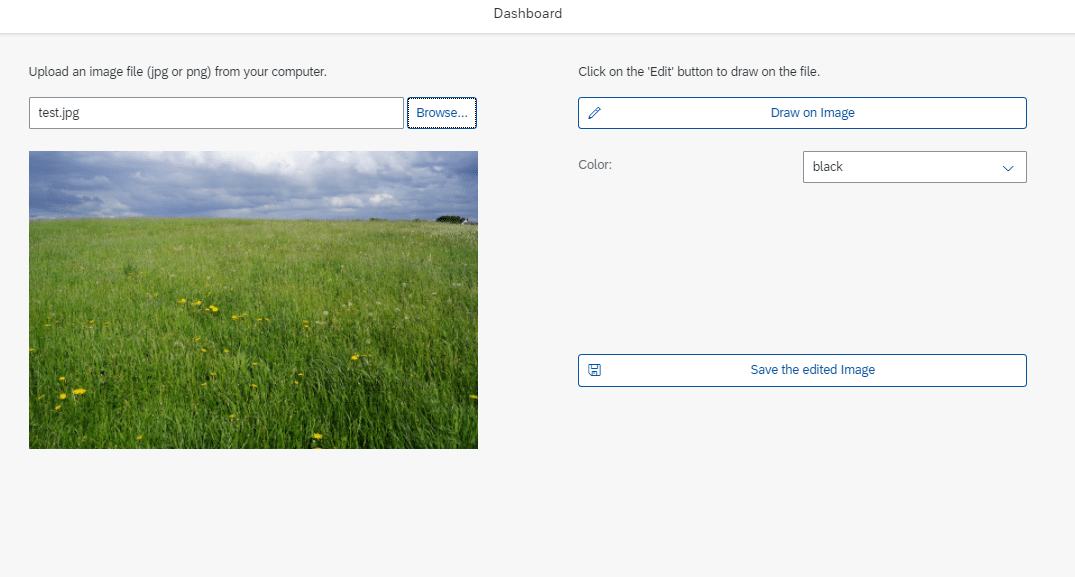
In this step, I explain the main elements that you need to implement the application’s functionality. You can of course adapt the UI to your needs, add layouts and additional elements, like we did in the example application in our marketplace:
The main elements that you need to configure in the UI Designer are:
- A ‘ui_unified_FileUploader‘ widget to upload an image
- Properties:
- ‘sameFilenameAllowed’: true
- ‘uploadOnChange’: true
- ‘useMultipart’: false
- ‘mimeType’: ‘image/png, image/jpeg’ (enter these values into the input field without the quotation marks, but with the comma)
- ‘width’: 100%
- Properties:
- An ‘Image‘ widget to display the uploaded image
- Properties:
- ‘width’: 100%
- Properties:
- A ‘Button‘ widget to enable image editing
- Properties:
- ‘icon’: sap-icon://edit
- ‘text’: Draw on Image
- ‘width’: 100%
- Properties:
- A ‘SignaturePad‘ widget where you can draw on the image
- Properties:
- ‘dotSize’: adapt to your needs
- ‘penColor’: adapt to your needs. You can use HTML color names, Hex color codes or RGB values (https://htmlcolorcodes.com/)
- Properties:
- A ‘Button‘ widget to download the edited image
- Properties:
- ‘icon’: sap-icon://save
- ‘text’: Save the edited Image
- ‘width’: 100%
- Properties:
Step 2: Create the Global Variables
Go to the Data Workbench and create two Global Variables of the type ‘String’:
- sFileName to store the name of the uploaded image
- sFileType to store the type of the uploaded image
Step 3: Create the Client-Side Business-Object functions
For this use case, you need to use code to upload the image, to display the image in the SignaturePad and to download the edited image.
You can either use Scripts in the Process Designer and put your code there, or you can create a Client-Side Business Object (CSBO) if you want to re-use the code in different applications.
For this example, I created the CSBO ‘SignaturePad’ (which is also included in the example that you can download from our marketplace) with the following functions:
- uploadFile
- editImageInSignaturePad
- saveImageOnComputer
You can find the code for the functions here:
// upload the image to the browser

var oUploader =sap.ui.getCore().byId(oPayload.uploaderId);

if (oUploader.getValue() !== "") {
    var aFiles = oUploader.oFileUpload.files;
    if (aFiles.length === 1) {
        var oFile = aFiles[0];

        const readUploadedFile = (oFile) => {
            const temporaryFileReader = new FileReader();

            return new Promise((resolve, reject) => {
                temporaryFileReader.onerror = () => {
                    temporaryFileReader.abort();
                    reject(new DOMException("Problem parsing input file."));
                };

                temporaryFileReader.onload = () => {
                    resolve(temporaryFileReader.result);
                };
                temporaryFileReader.readAsDataURL(oFile);
            });
        };
        var lo_promise = readUploadedFile(oFile);
        lo_promise.then(
            function(oResult) {
                fnSuccess({
                    fileURL: oResult,
                    fileName: oFile.name,
                    fileType: oFile.type
                });
            });
    }
} else {
    fnError("Please select a file.");
}
// show uploaded image as background of the signature pad

var oUploadedImage = sap.ui.getCore().byId(oPayload.uploadedImageId),
    sFileURL = oUploadedImage.getSrc(),
    oSignaturePad = sap.ui.getCore().byId(oPayload.signaturePadId),
    iHeight = document.getElementById(oUploadedImage.getId()).height,
    iWidth = document.getElementById(oUploadedImage.getId()).width;

oSignaturePad.setHeight(iHeight + "px");
oSignaturePad.setWidth(iWidth + "px");

setTimeout(function() {
    var oCanvas = document.getElementById(oSignaturePad.getId() + "--canvas");
    var oContext = oCanvas.getContext("2d");
    var oTempImage = new Image(iWidth, iHeight);
    oTempImage.src = sFileURL;
    // This fixes the problem with the image not showing up in the canvas
    oTempImage.onload = function() {
        oContext.drawImage(oTempImage, 0, 0, iWidth, iHeight);
        fnSuccess({});
    };
}, 10);
// save the edited image on the computer

var oCanvas = document.getElementById(oPayload.signaturePadId + "--canvas"),
    sFileName = oPayload.fileName,
    sFileType = oPayload.fileType;

oCanvas.toBlob(function(oBlob) {
    fn_saveAs(oBlob, sFileName);
    fnSuccess({});
}, sFileType, 1);

function fn_saveAs(oBlob, sFileName){
    var a = document.createElement("a");
    a.style = "display: none";
    document.body.appendChild(a);
    a.href = URL.createObjectURL(oBlob);
    a.download = sFileName;
    a.click();
    a.remove();
}
Step 4: Configure the Process
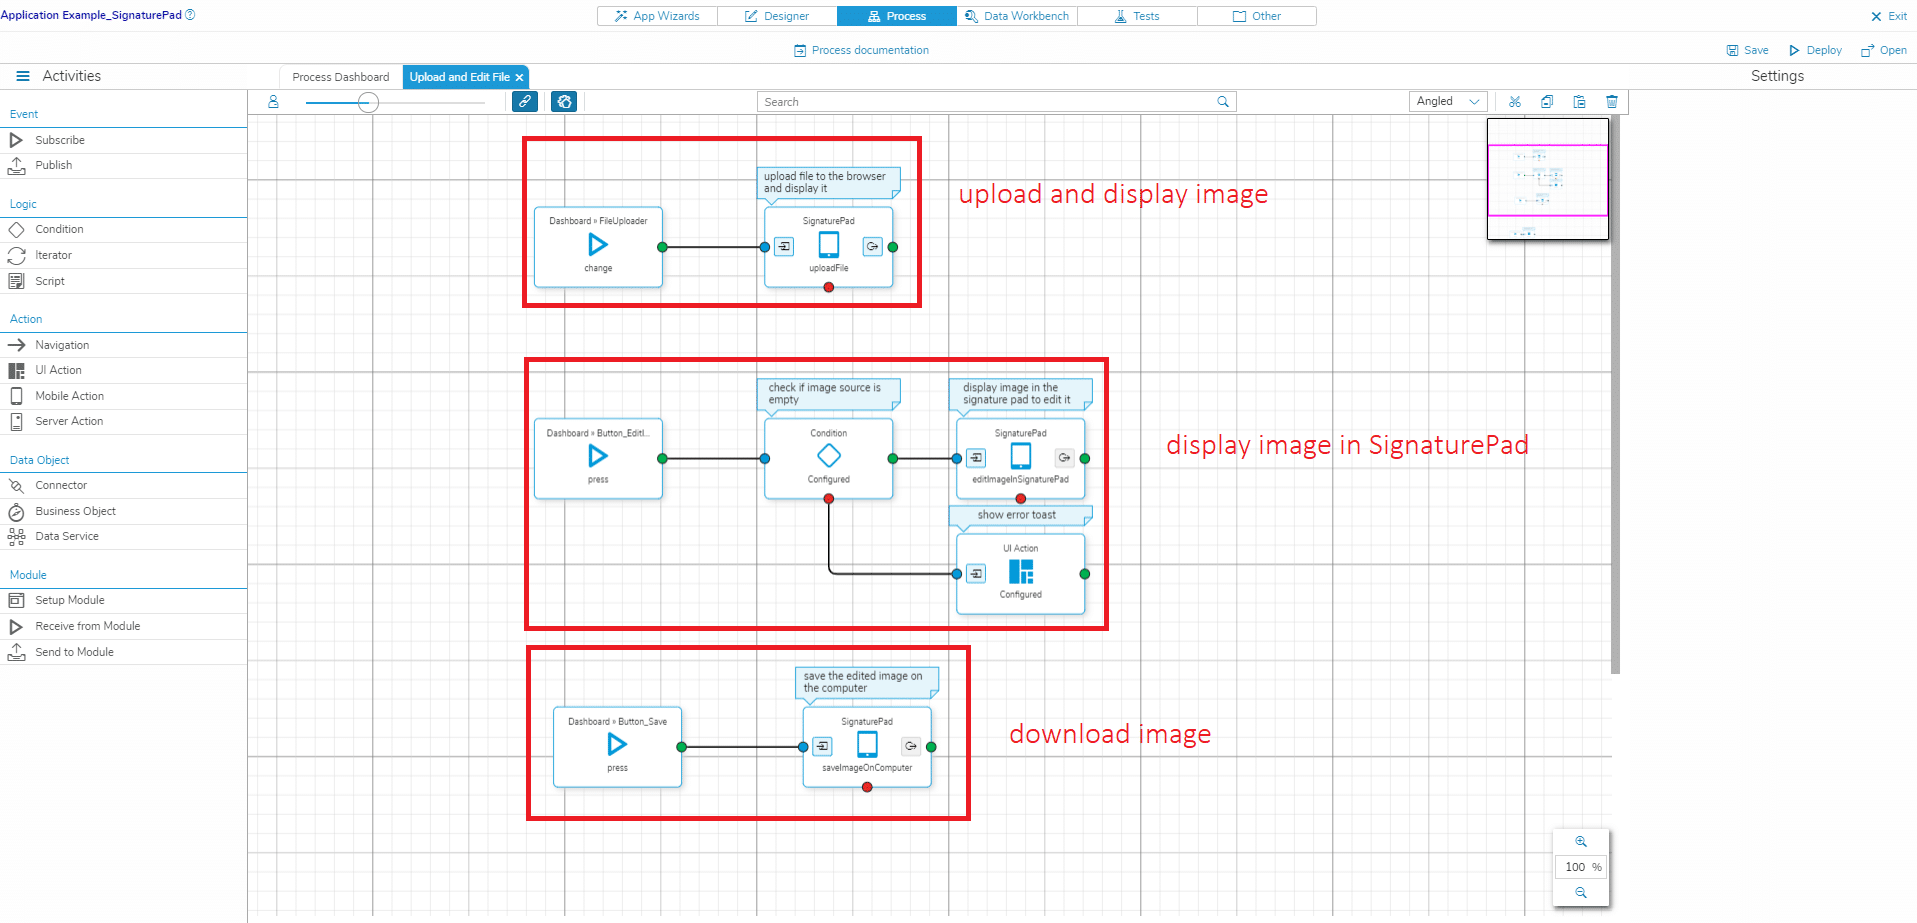
We now have to configure the logic behind the upload/edit/download process in the Process Designer. Create a new story or open an existing one. You need to configure 3 processes:
- Upload an image:
- Subscribe to the FileUploader’s ‘change’ event
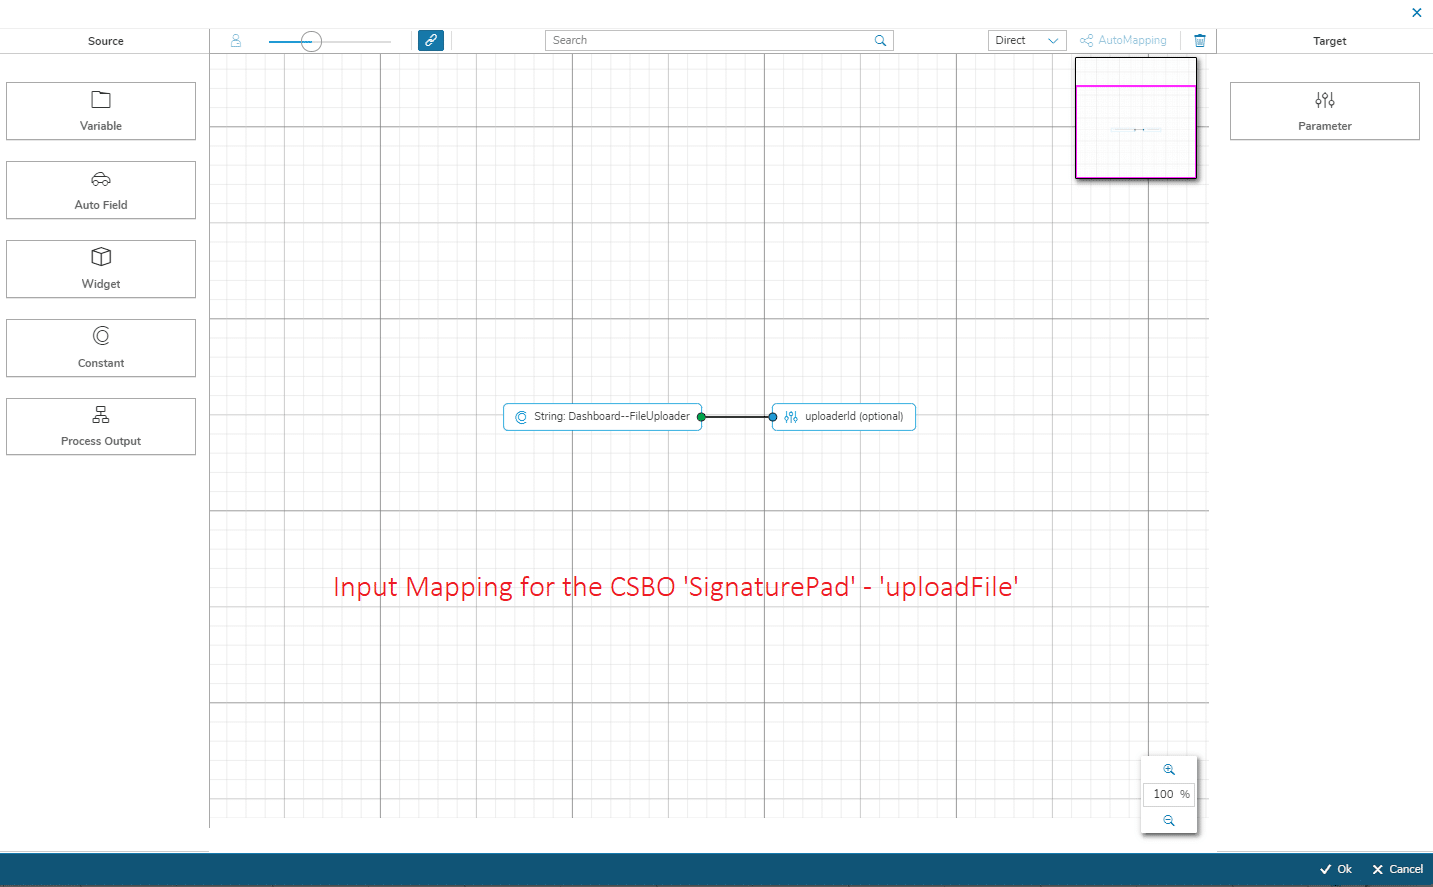
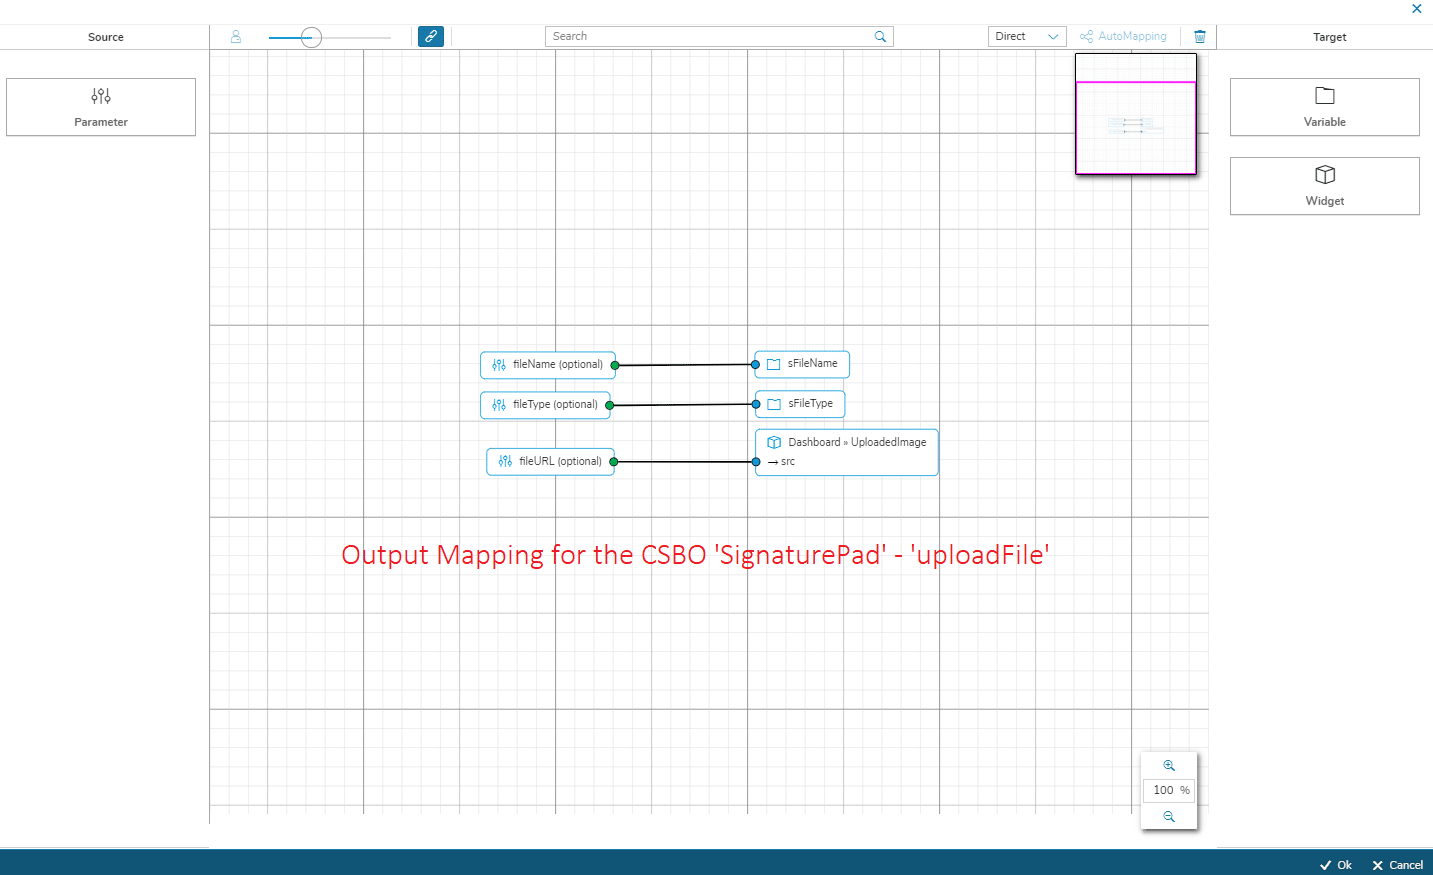
- Connect the event to the CSBO ‘SignaturePad’ – ‘uploadFile’
- Map the Input Parameters:
- Map the Output Parameters:
- Edit the image:
- Subscribe to the Edit Button’s ‘press’ event
- Connect the event to the CSBO ‘SignaturePad’ – ‘editImageInSignaturePad’
- Map the Input Parameters:
- Download the edited image:
- Subscribe to the Save Button’s ‘press’ event
- Connect the event to the CSBO ‘SignaturePad’ – ‘saveImageOnComputer’
- Map the Input Parameters:
Step 5: Adapt the security settings
Last but not least, we need to make some security adaptations because uploading an image with the FileUploader requires the users to have a special permission.
Add/edit a Role in the Simplifier Admin UI
Note: to execute this step, your user needs to have the permission to edit roles in the Simplifier Admin UI. Ask your Simplifier administrator user to give you the permission or to execute this step for you
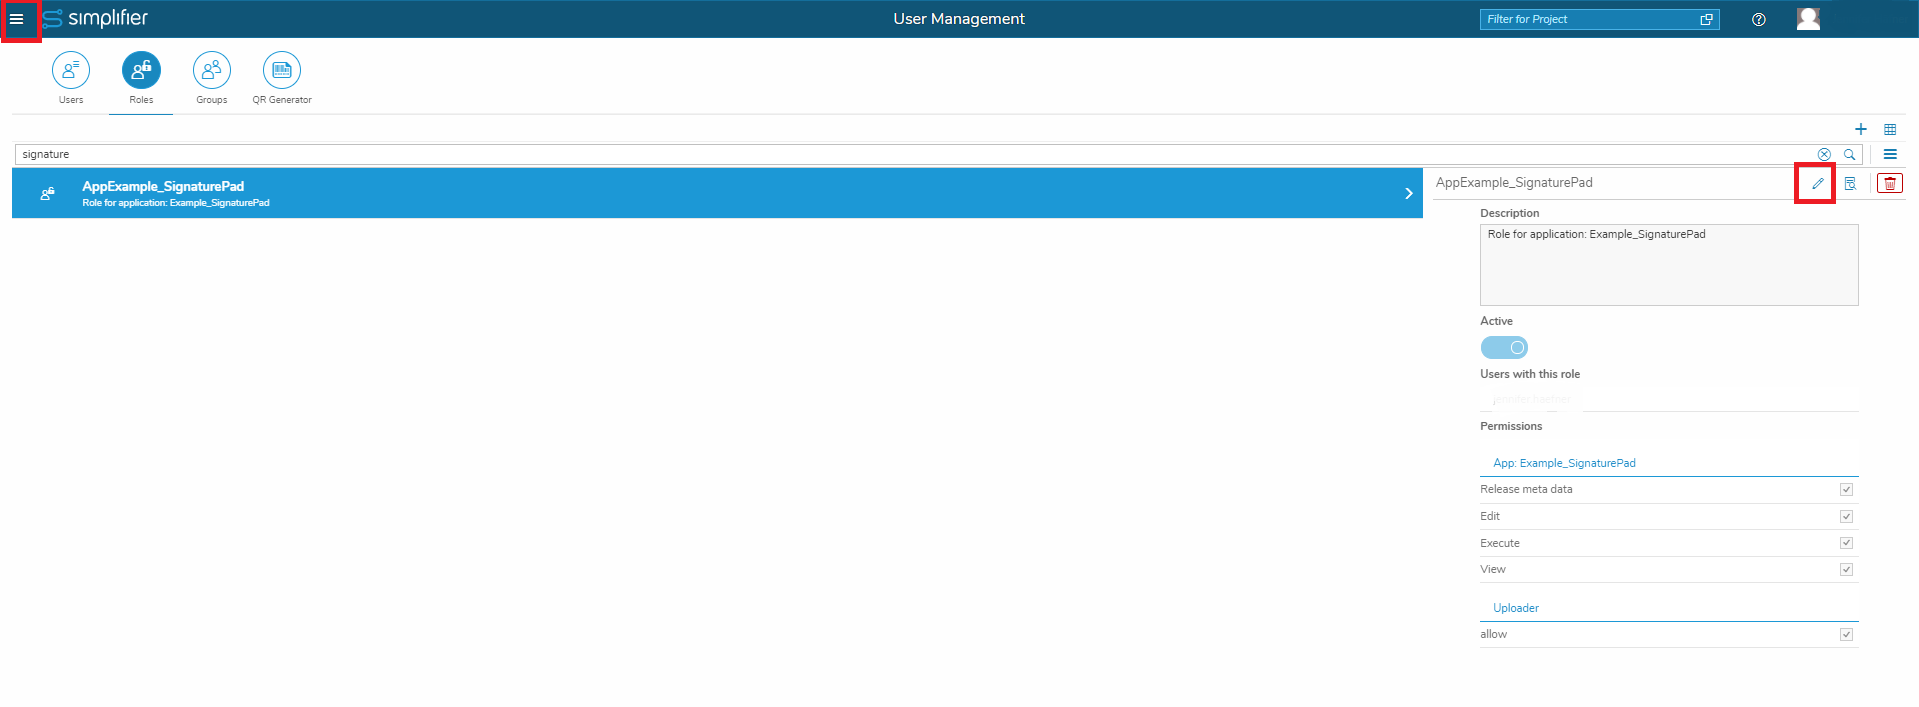
- In the Simplifier Admin UI, click on the hamburger menu (the 3 horizontal lines in the upper left corner) and select the menu item ‘Users’
- Switch to the tab ‘Roles’
- Select the role that you want to edit for the application or create a new one, click on the ‘edit’ button or double click on the role
- Add the permission ‘Uploader’ to the role and save
Add the edited Role to your application
- Open your application and click on the ‘Other’ tab, then select the item ‘Security’
- Select the checkbox ‘Allow anonymous users’
- Add the role to which you have added the permission for the Uploader
Step 6: Deploy the application
Now deploy and open the application. You should be able to upload images, edit them in the SignaturePad and download them to your computer.


