ChatGPT – let’s build something great on top of it
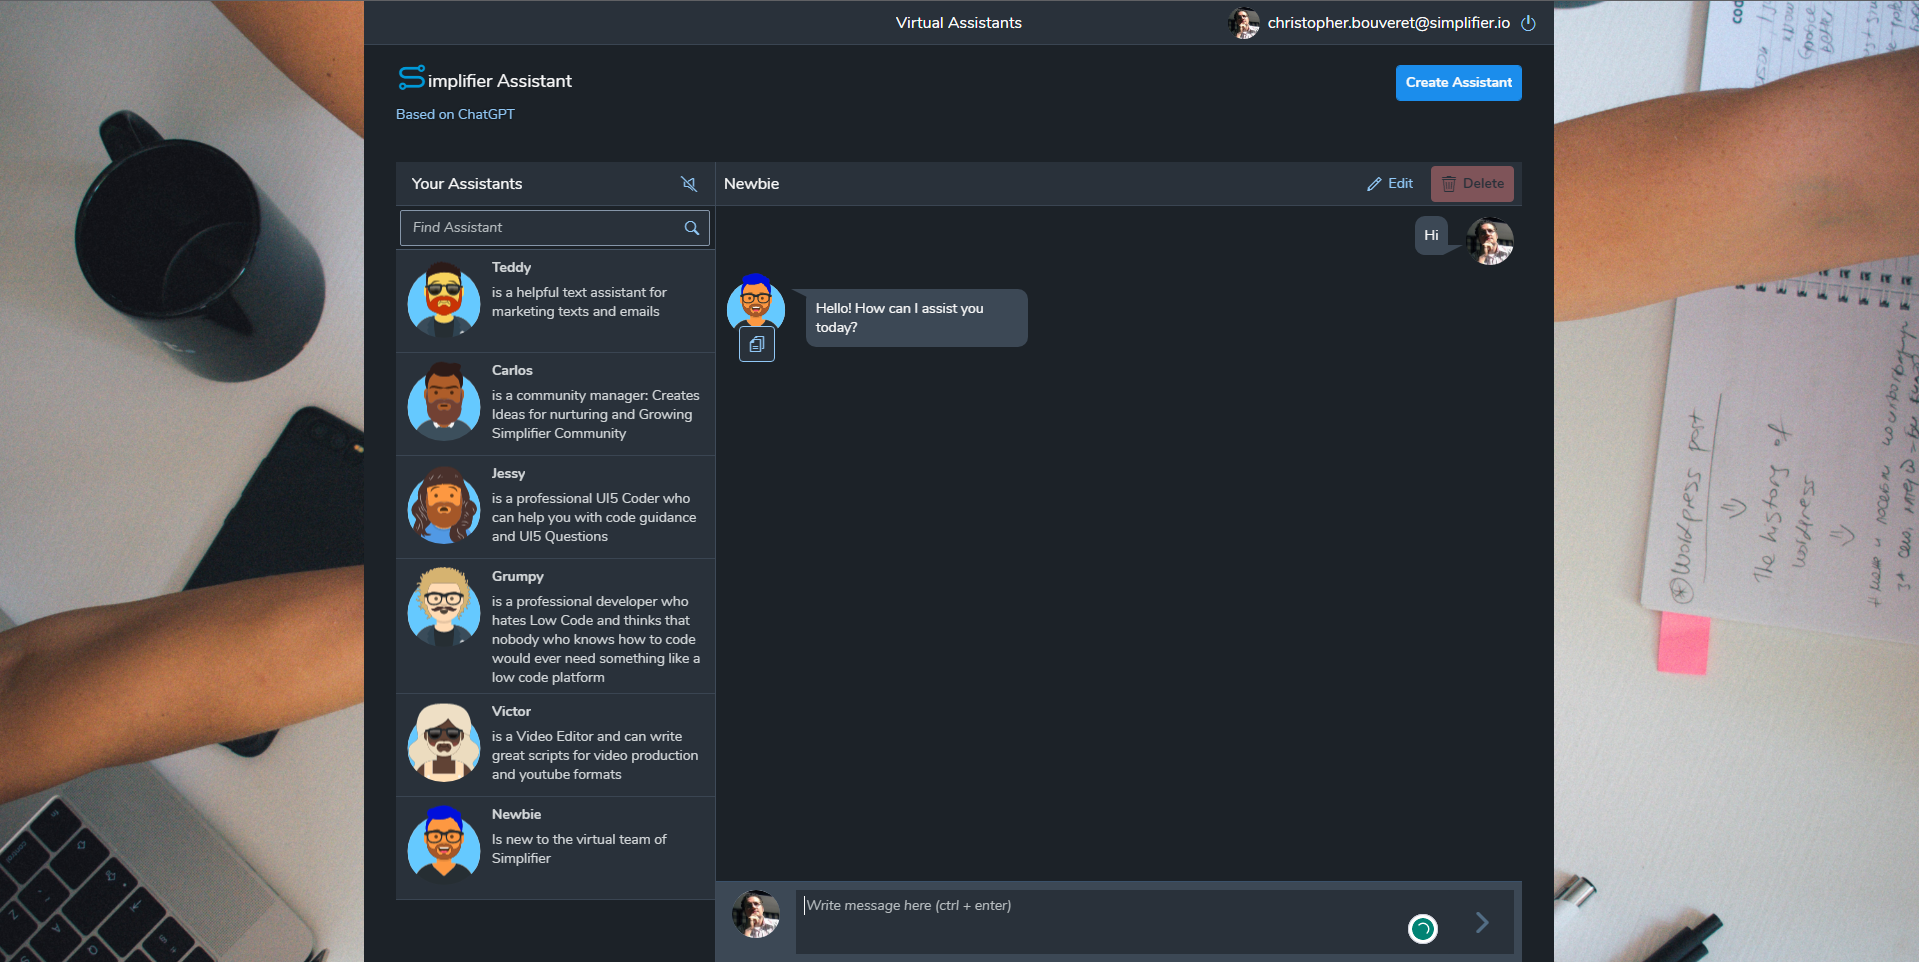
ChatGPT is a popular language model that uses artificial intelligence to generate human-like responses to text input. In this article, I will share how I created a custom ChatGPT client using Simplifier Low Code Platform.
The chatbot from https://chat.openai.com/ is developed by OpenAI and based on the GPT-3 architecture. It has a range of features that make it one of the most advanced and sophisticated chatbots available today.
- Natural Language Processing: The chatbot uses natural language processing (NLP) to understand and interpret user input. It can recognize and analyze the meaning and context of words and phrases, allowing it to generate human-like responses.
- Multi-Turn Conversations: The chatbot supports multi-turn conversations, allowing users to have extended and natural conversations with it. The chatbot can keep track of the context of the conversation and respond accordingly, making it feel like users are chatting with a real person.
- Multiple Languages: The chatbot supports multiple languages, including English, Spanish, French, and German, making it accessible to a global audience.
- Open-Ended Questions: The chatbot can handle open-ended questions and generate detailed responses based on the user’s input. It can also provide additional information and context to help users better understand the topic.
- Knowledge Base: The chatbot has access to a vast knowledge base that it can use to provide answers to user queries. It can use this knowledge to provide detailed and accurate responses to a wide range of topics.
- Customizable Responses: The chatbot’s responses can be customized to fit the tone and style of the user’s brand or application. This allows users to create a unique and personalized experience for their customers.
- Learning Capabilities: The chatbot has machine learning capabilities that allow it to learn and improve over time. It can analyze user interactions and adjust its responses to better meet the user’s needs.
Nevertheless, I intensively used the Chat available at https://chat.openai.com/ and found it very useful but also identified some features I would like to have in addition to enhancing the Experience of interacting with ChatGPT.
Features that I was missing
Working with a larger number of Chats is kind of messy, as the only reference is a Chat Name in the Left Sidebar which makes previously used chats hard to find
There is no search option to search for chats 🙁
Sometimes the Chat History takes some time to load, especially at high capacities, and it happened frequently that the History could not be loaded temporarily, what if one day my precious valuable chats are gone for some reason?
As the Chats represent a conversation with Artificial Intelligence, I would prefer Names and Avatars for my Chat to have a more visual and personal Chat Experience
I often missed the feature to delete certain answers or questions from a chat history
I wanted to use predefined prompts for my chats, based on a role description for the Chat
I wanted to have the possibility to reuse the answers from ChatGPT in other integration scenarios, e.g. sending a generated text directly to a third party system like WordPress without having to Copy and Paste from the Chat
And, of course, I was asking myself how long it would take and what It would need to build a Chat Client with Simplifier that fulfills the above mentioned requirements and features.
So my Journey began…
First I wanted to have a nice visual representation of the Chats resembling a virtual team member that I can have conversations with. Pictures speak louder then words, so I decided to use comic avatars and after a short research I stubled upon avaaatars.
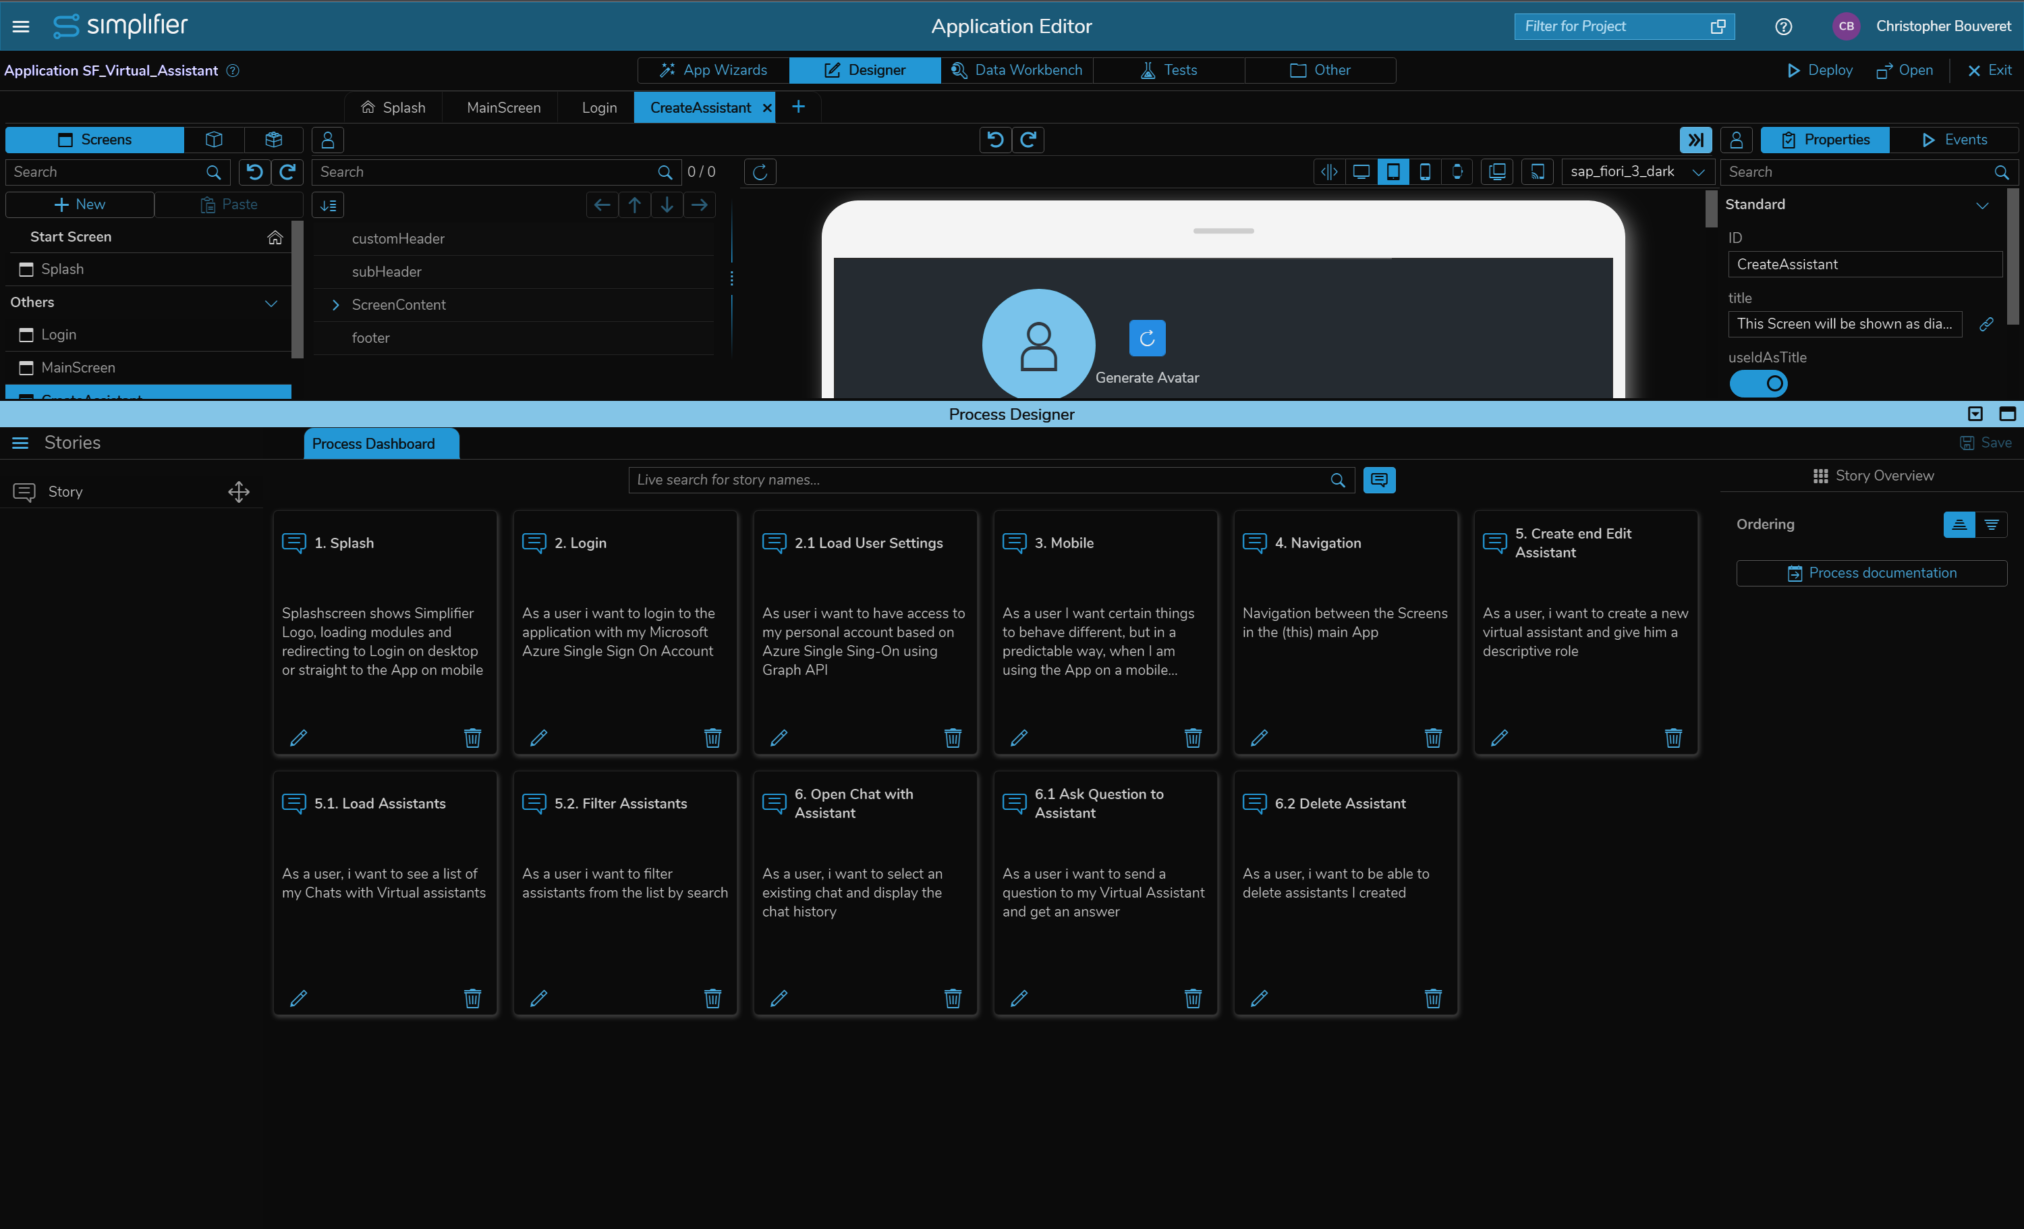
High-Level Backlog for the Chat Client
- As a user I want to see a Splashscreen and be redirected to Login on desktop or straight to the App on mobile
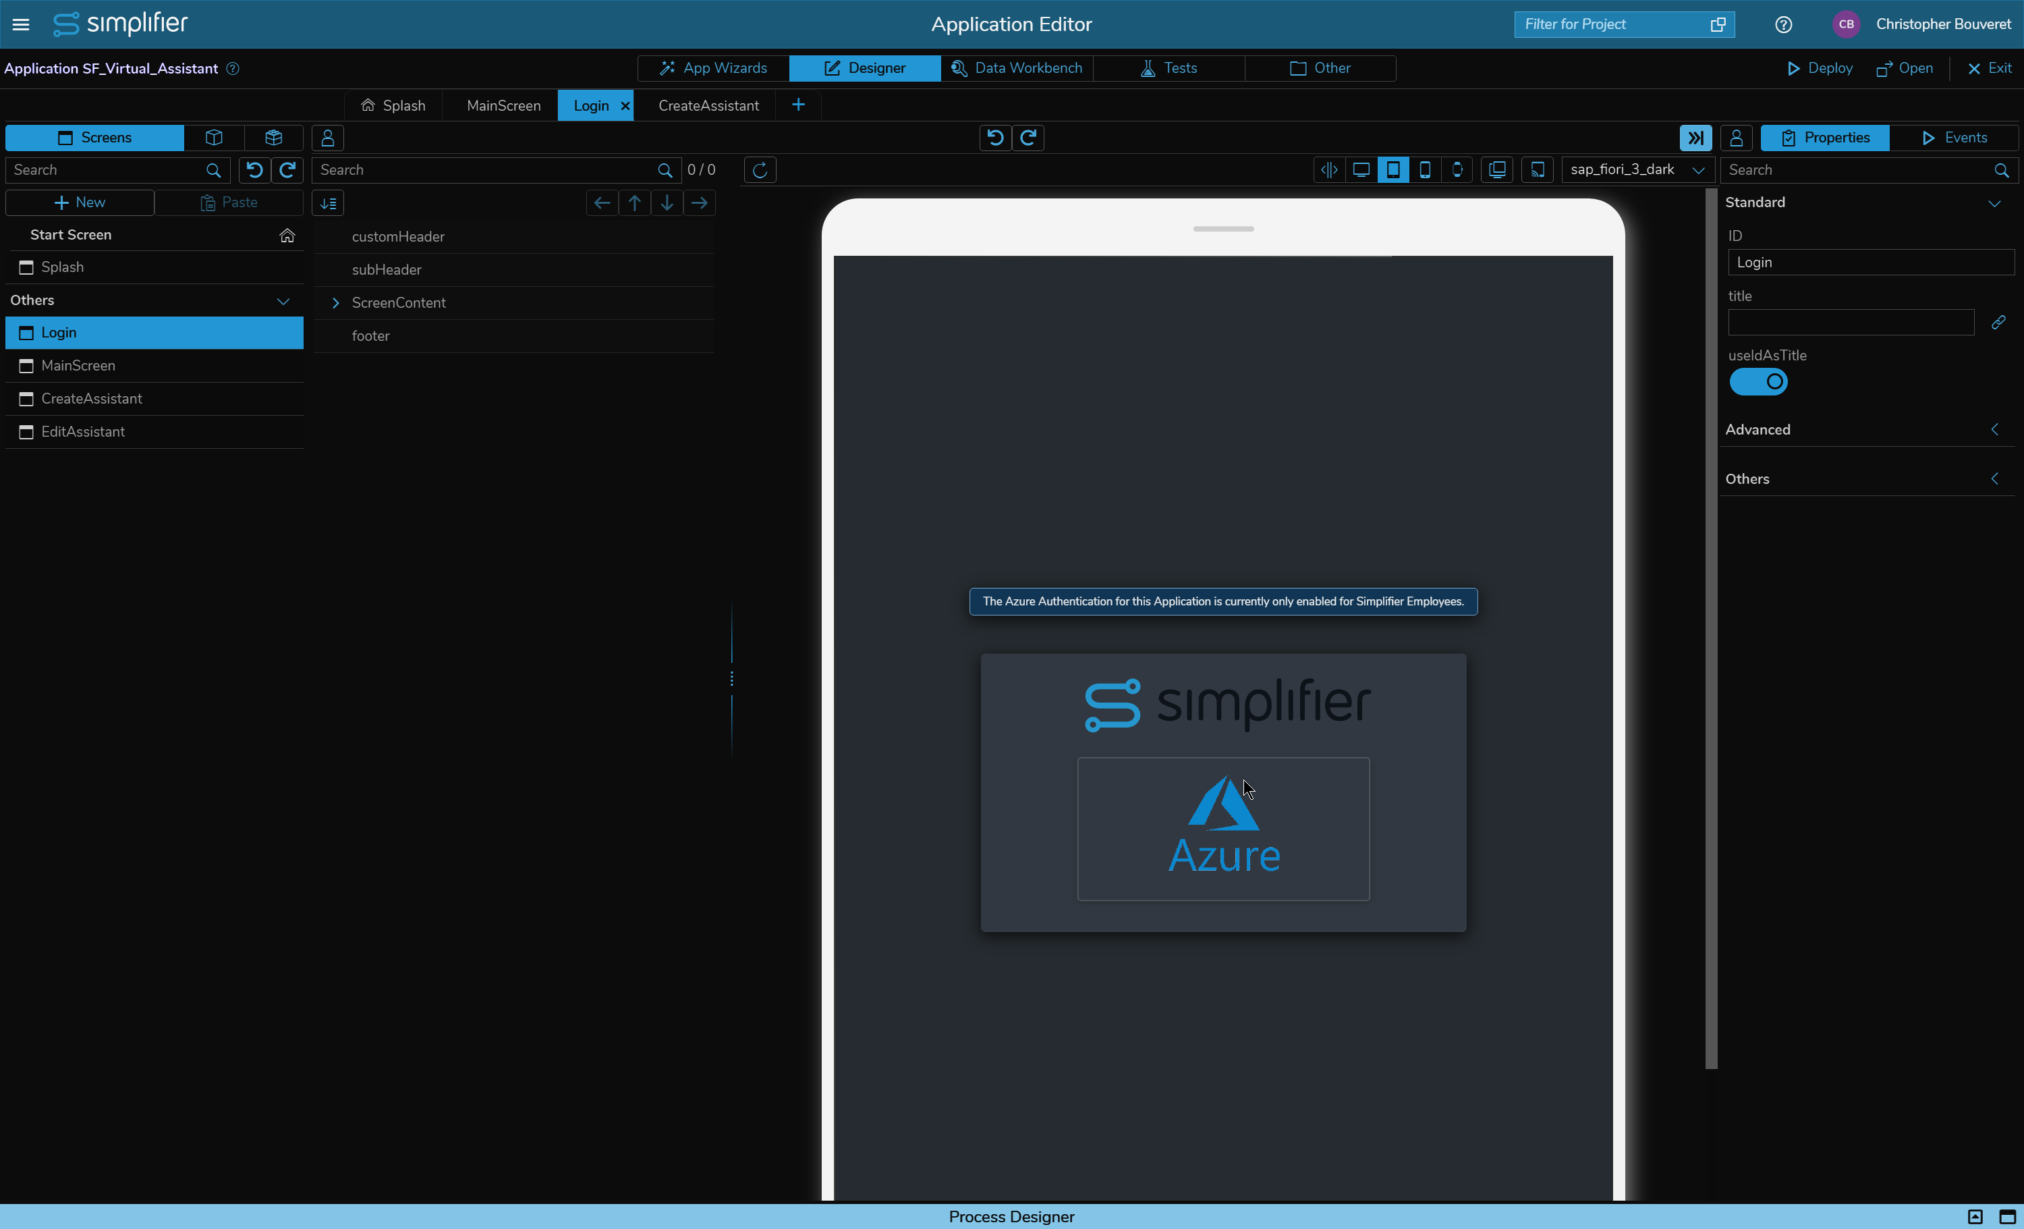
- As a user i want to login to the application with my Microsoft Azure Single Sign On Account
- As user i want to have access to my personal account based on Azure Single Sing-On using Graph API
- As a user I want certain things to behave different, but in a predictable way, when I am using the App on a mobile device
- As a user I want to navigate between the Screens in the App
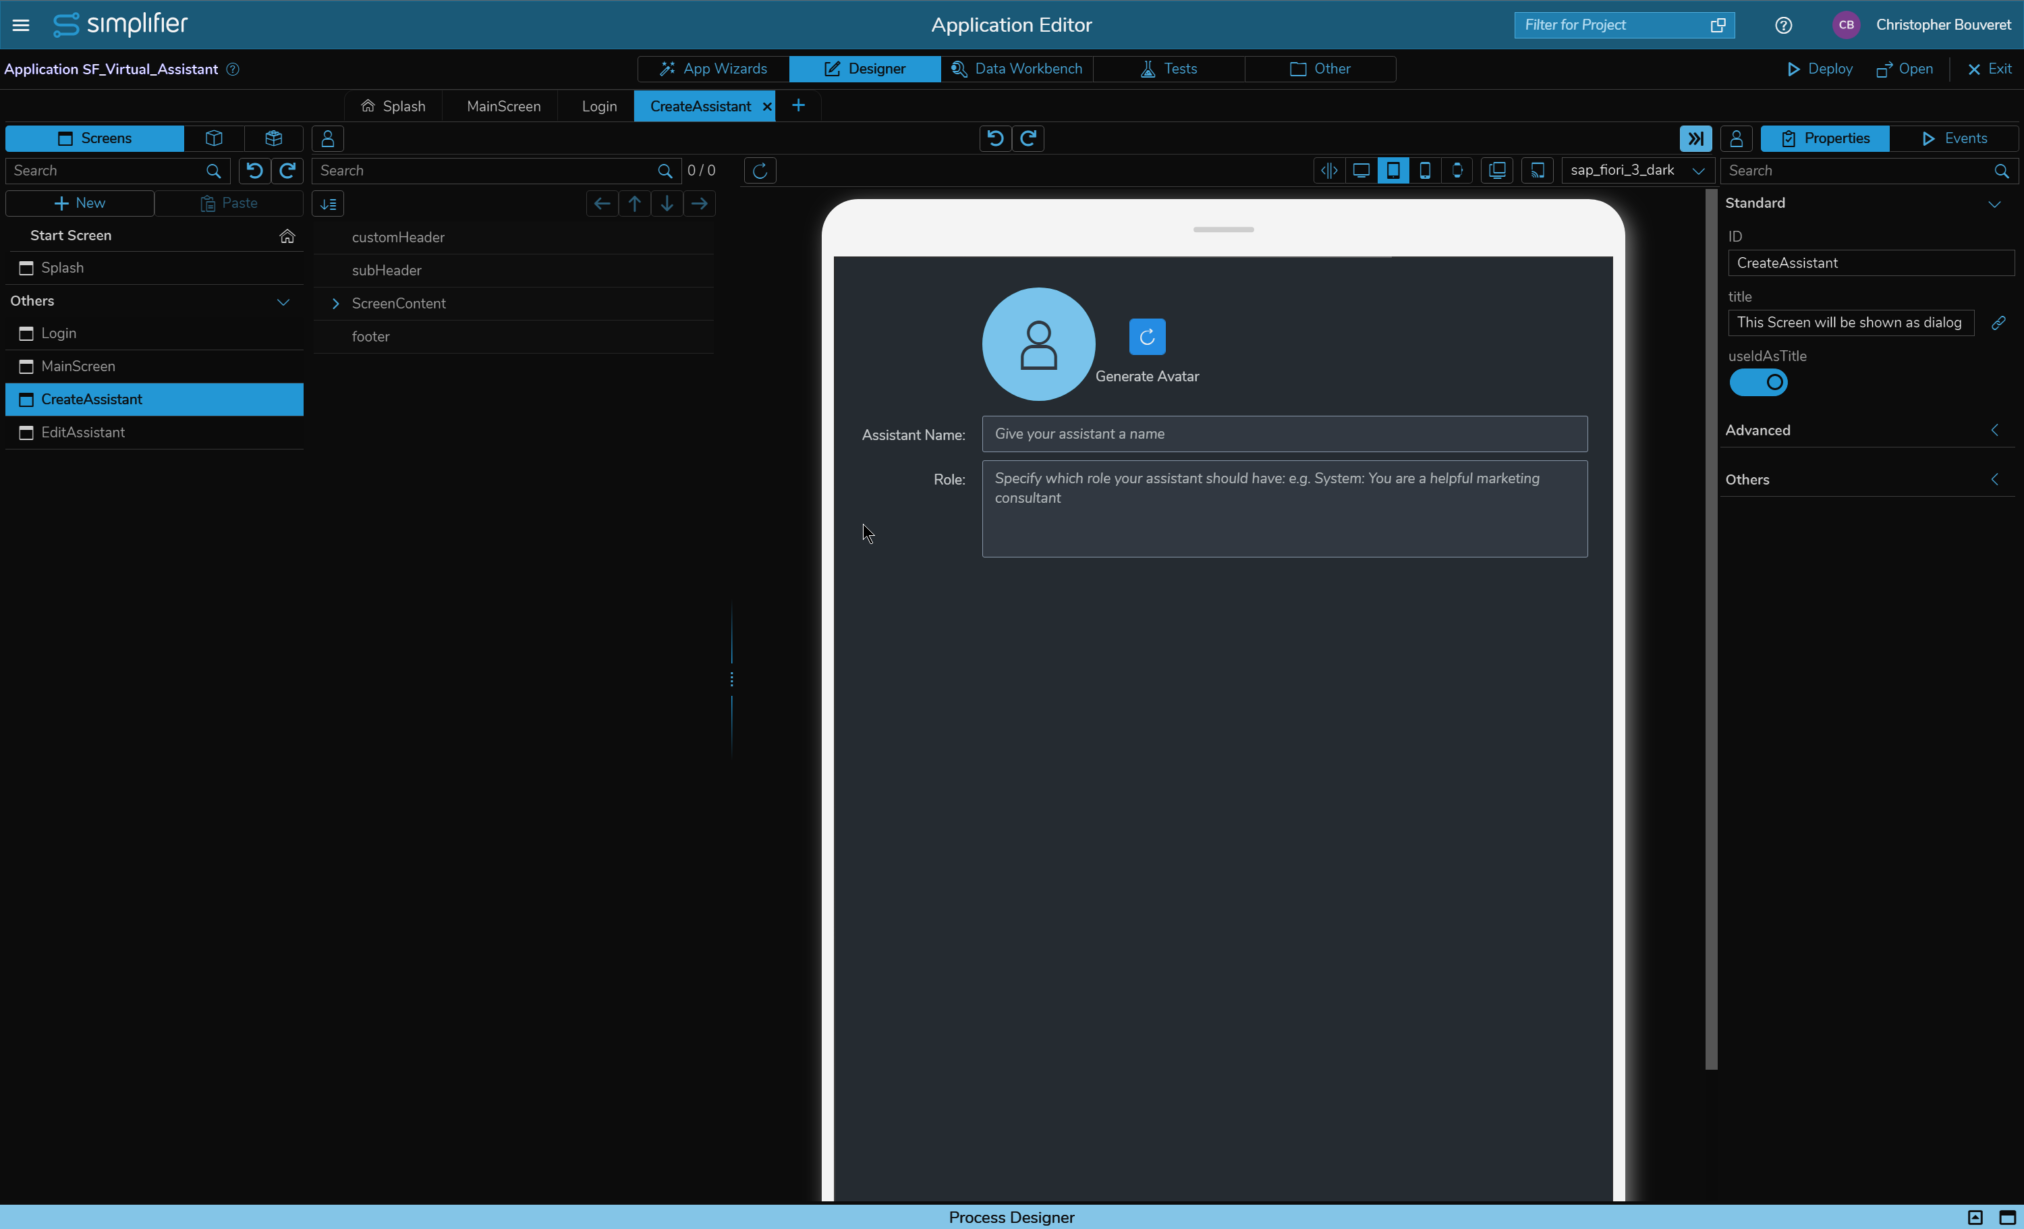
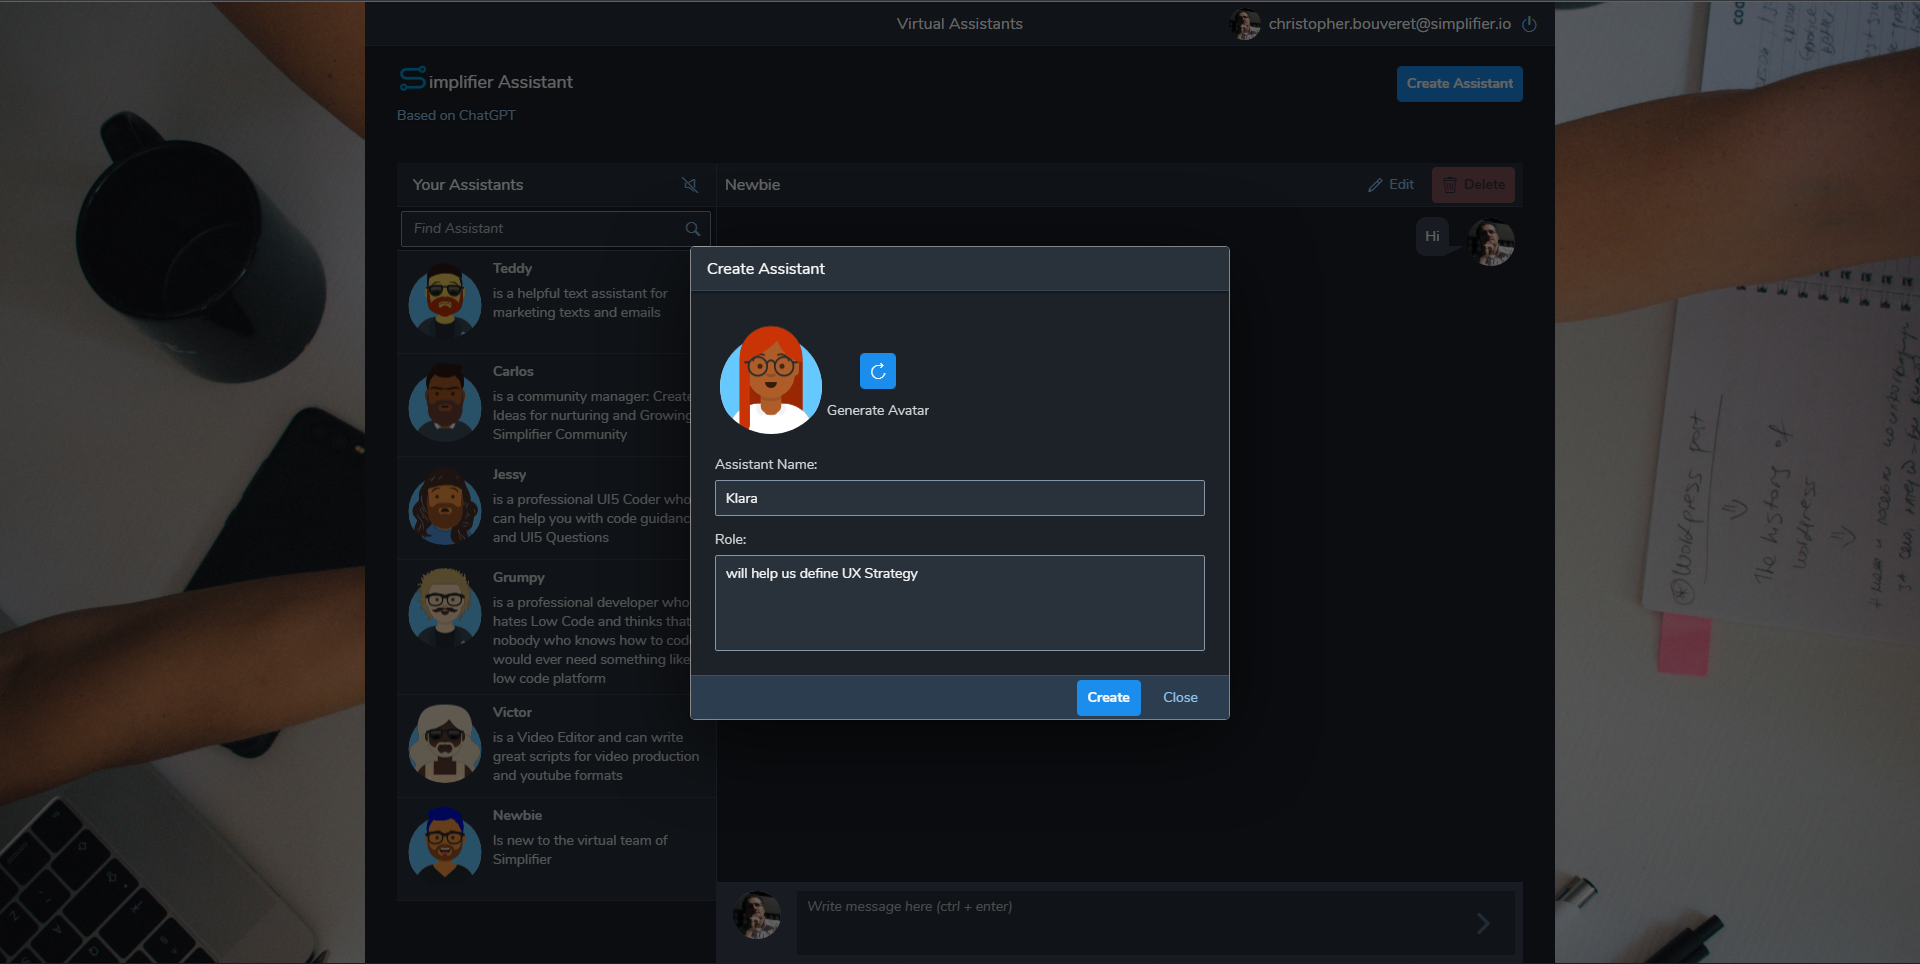
- As a user, i want to create a new virtual assistant and give him a descriptive role and avatar image
- As a user, i want to see a list of my Chats with Virtual assistants
- As a user i want to filter assistants from the list by search
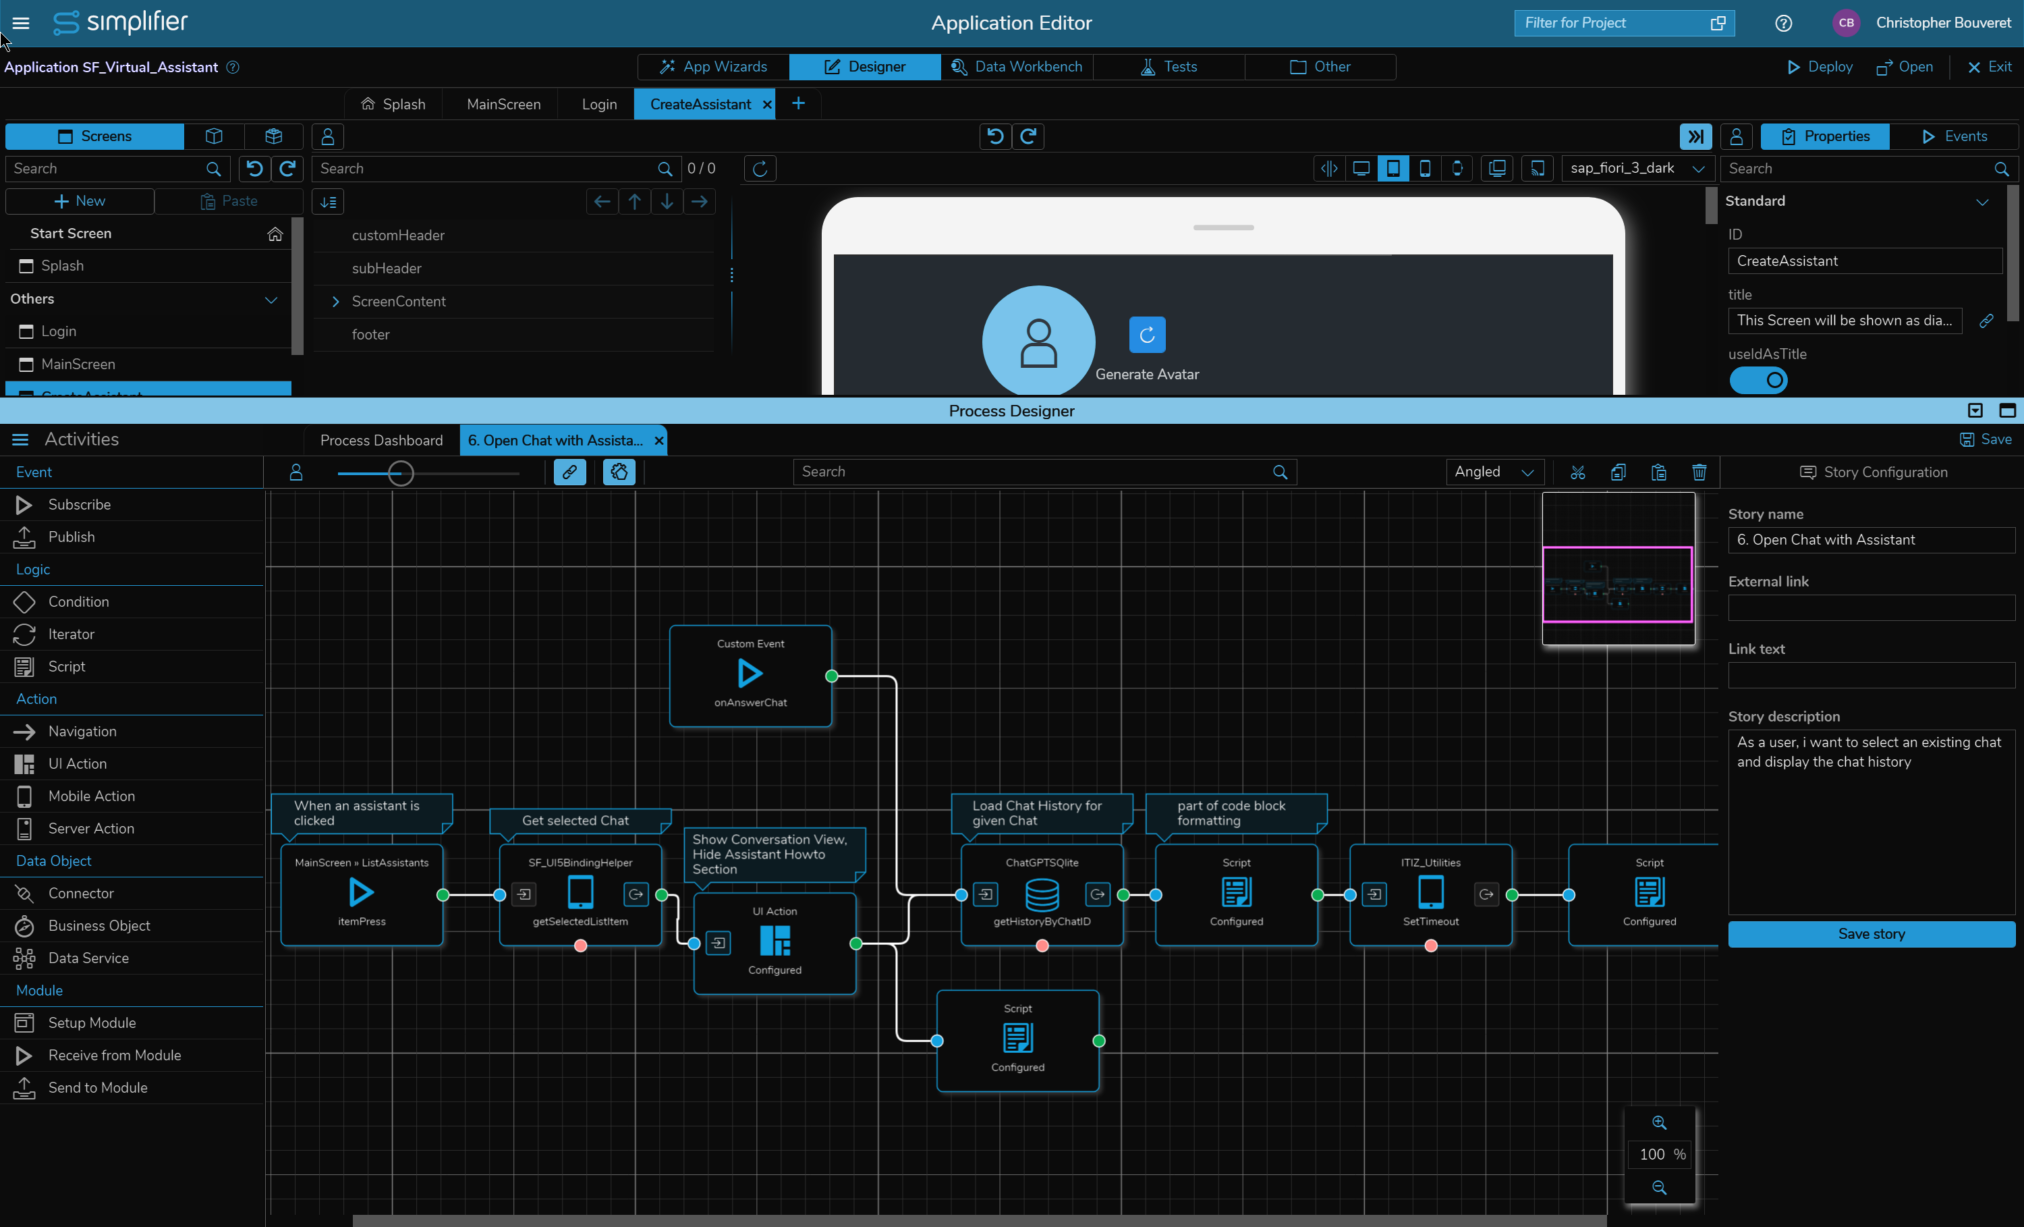
- As a user, i want to select an existing chat and display the chat history
- As a user i want to send a question to my Virtual Assistant and get an answer
- As a user, I want to hear the answer of my Virtual Assistant via Text-to-Speech Audio
- As a user, i want to be able to delete assistants I created
Creating a Connector for the OpenAI API
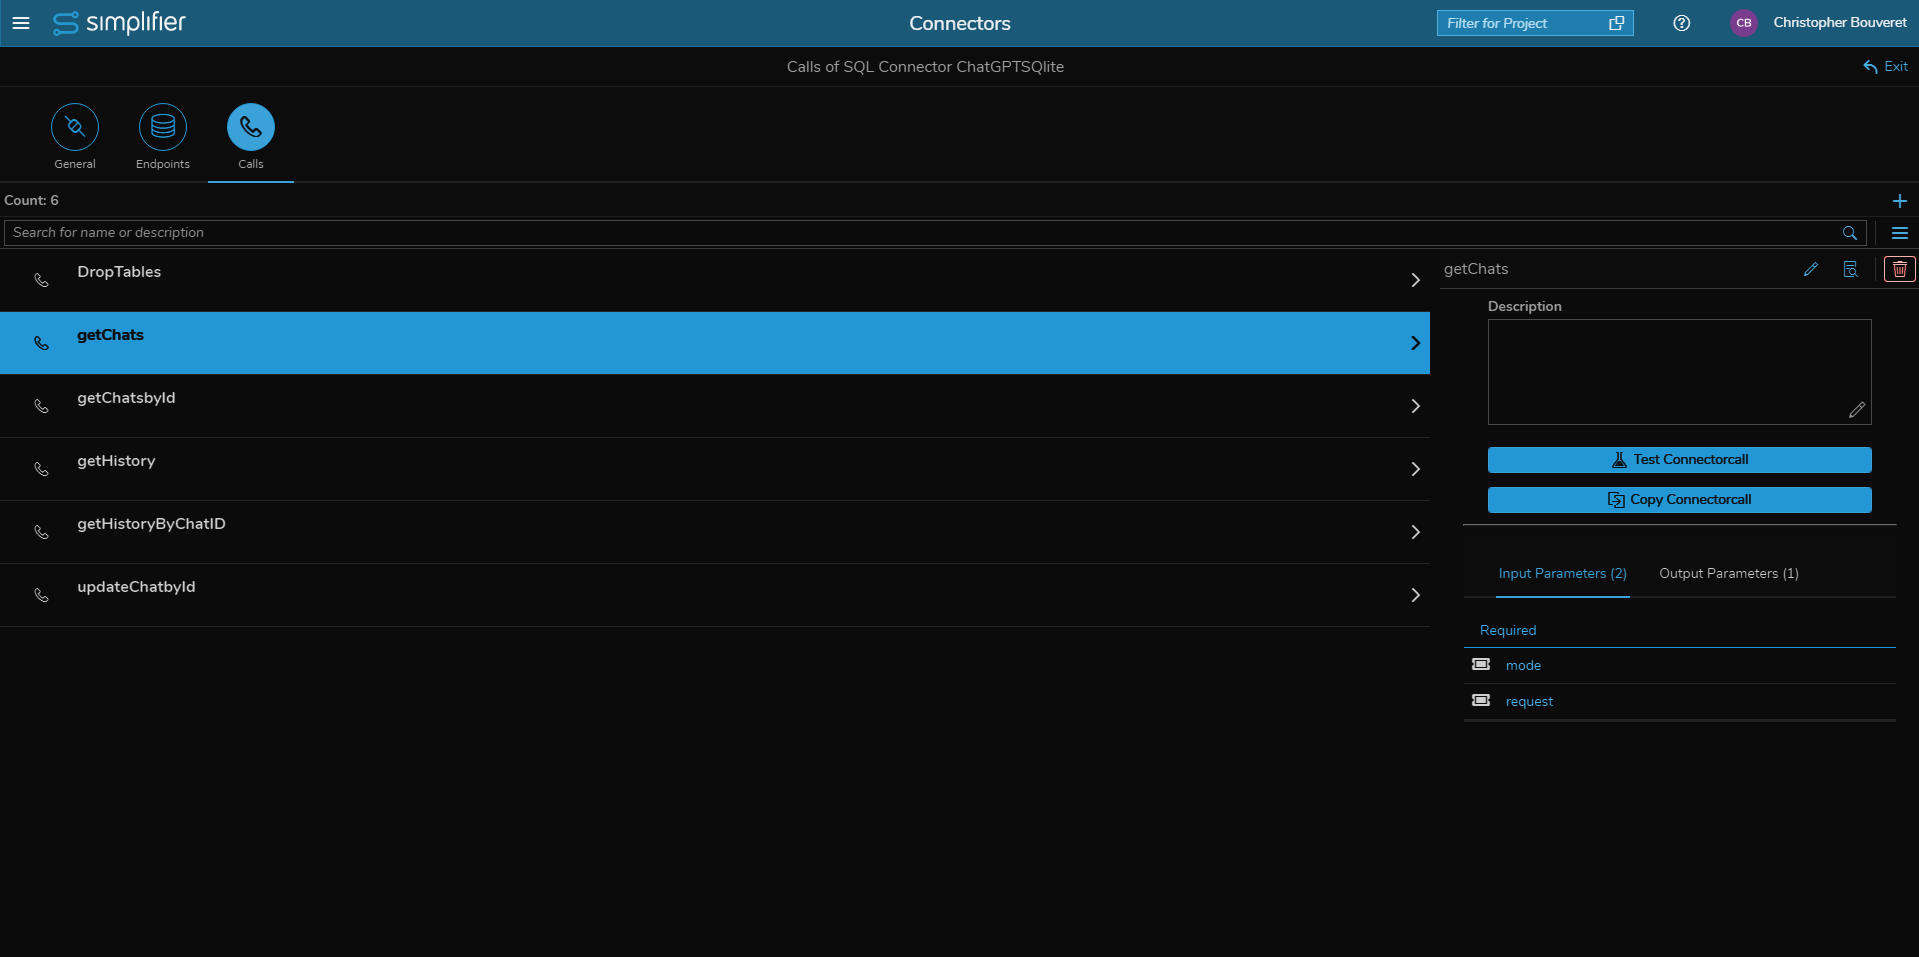
The creation of a Simplifier connector to the OpenAI API using the REST Connector Assistant is a straightforward process that involves following a few simple steps.
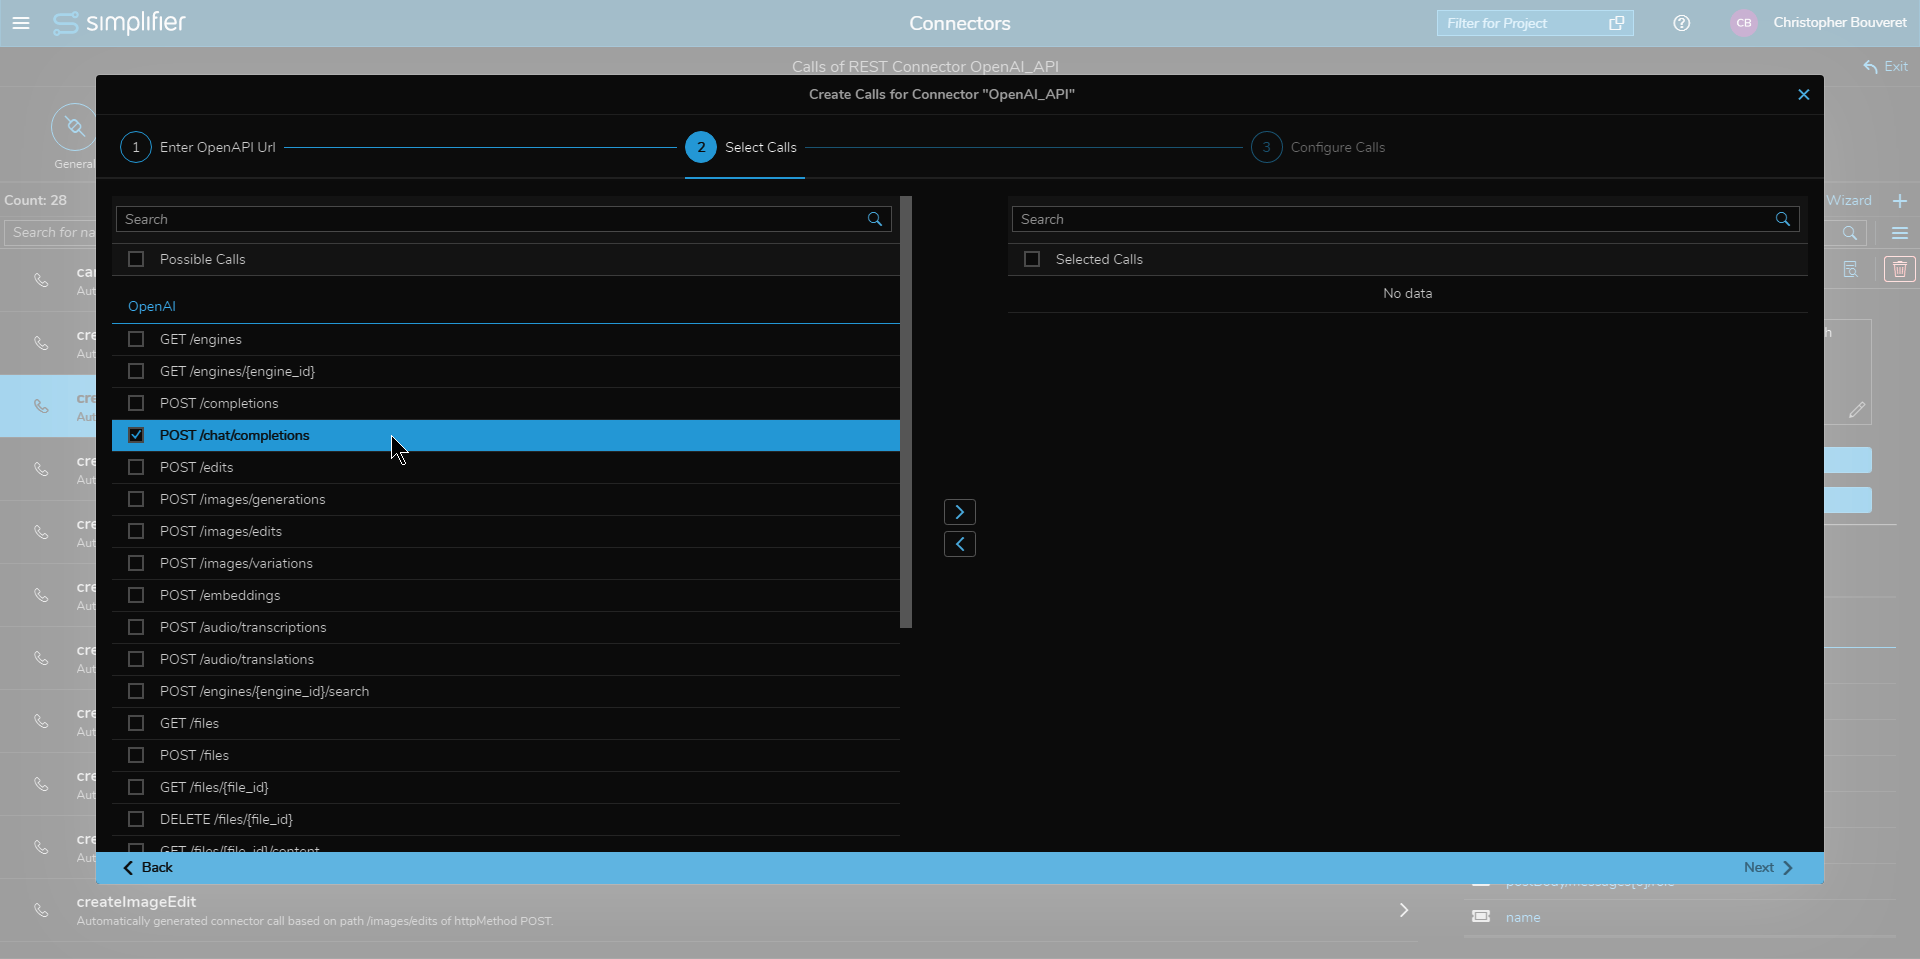
First, we need to obtain a link the OpenAPI spec from the OpenAI GitHub repository. We can do this by navigating to the repository and finding the OpenAPI spec file, which is usually named openapi.yaml and copy the URL of the File.
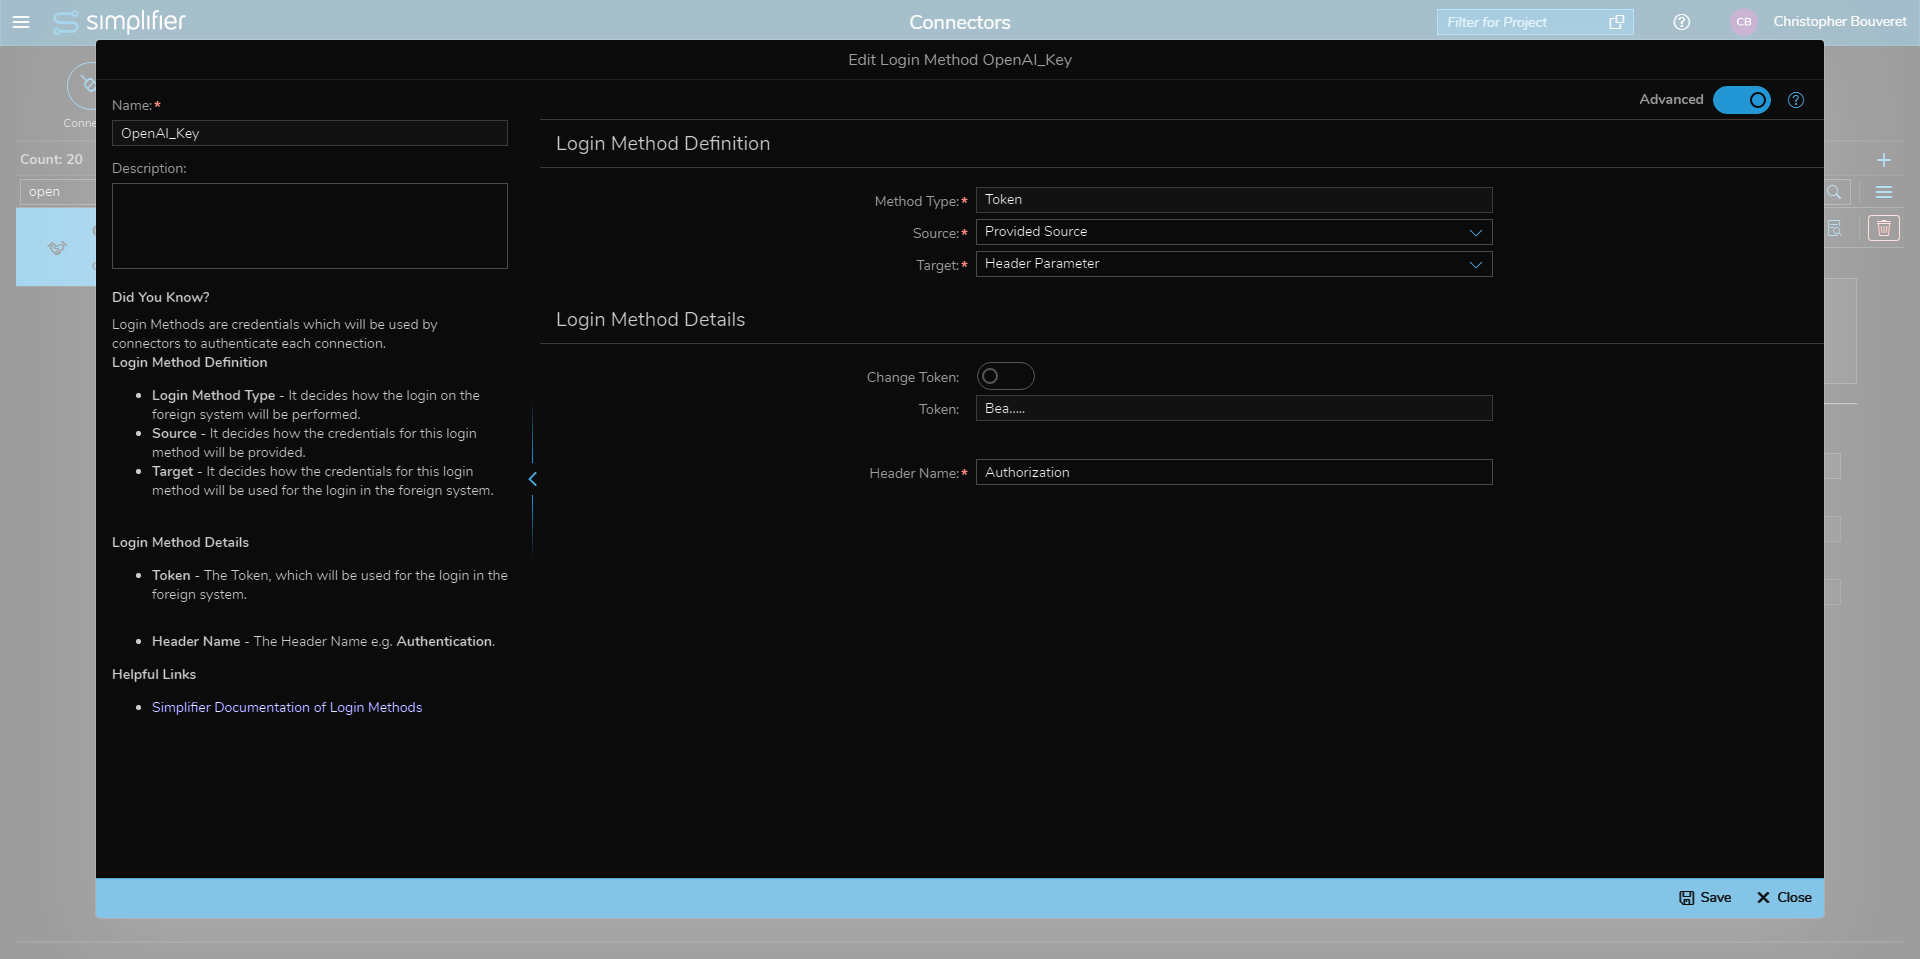
Next, we need to create a New REST Connector and give it a name, an Endpoint with the base URL and the authentication method, which in this case is a Login Method that holds the API Key, obtained from your OpenAI Account.
Now we will use the REST Connector Assistant, which is a user-friendly tool that can help us create connectors to RESTful APIs. In the REST Connector Assistant, we’ll be prompted to provide the URL to the API Spec mentioned above and can now access the API endpoints. In our case we just need a single API endpoint called “create Chat Completion”.
Once we’ve provided all the required information, the REST Connector Assistant will automatically generate the Simplifier connector call based on the OpenAPI spec.
Finally, we can save our Simplifier connector and start using it to interact with the OpenAI API. With our Simplifier connector, we can easily send requests to the OpenAI API, receive responses, and work with the data returned by the API. This can help us streamline our workflow and save time and effort when working with the OpenAI API.
Avataars for the Chat Client
First Quest:
Allow users to create a personalized avatar that looks like a person, making the conversation feel more natural and personal.
The Avataaars Generator is a simple and free online tool that allows users to easily create their own beautiful avatar. Whether you have a clear idea of the style you want or are unsure of where to start, the generator offers a range of options to help you create the perfect avatar. For those who prefer a more spontaneous approach, the random button at the top of the page can be clicked until a desired style is achieved.
In order to use random Avataars we will add another script to our User Story “5. Create and Edit Assistant” that will generate a random avatar URL and set it as a global variable, which can be used to display the avatar image in our application.
var generateRandomAvatar = function() {
    var avatarData = {
        "topType": "NoHair,LongHairBigHair,LongHairBob,LongHairBun,LongHairCurly,LongHairCurvy,LongHairDreads,LongHairFrida,LongHairFro,LongHairFroBand,LongHairNotTooLong,LongHairShavedSides,LongHairMiaWallace,LongHairStraight,LongHairStraight2,LongHairStraightStrand,ShortHairDreads01,ShortHairDreads02,,ShortHairFrizzle,ShortHairShaggyMullet,ShortHairShortCurly,ShortHairShortFlat,ShortHairShortRound,ShortHairShortWaved,ShortHairSides,ShortHairTheCaesar,ShortHairTheCaesarSidePart",
        "accessoriesType": "Blank,Kurt,Prescription01,Prescription02,Round,Sunglasses,Wayfarers",
        "hairColor": "PastelPink,Auburn,Black,Blonde,BlondeGolden,Brown,BrownDark,Blue,Platinum,Red,SilverGray",
        "facialHairType": "Blank,BeardMedium,BeardLight,BeardMajestic,MoustacheFancy",
        "facialHairColor": "Auburn,Black,Blonde,BlondeGolden,Brown,BrownDark,Platinum,Red",
        "clotheType": "BlazerShirt,BlazerSweater,CollarSweater,GraphicShirt,Hoodie,Overall,ShirtCrewNeck,ShirtScoopNeck,ShirtVNeck",
        "clotheColor": "Black,Blue01,Blue02,Blue03,Gray01,Gray02,Heather,PastelBlue,PastelGreen,PastelOrange,PastelRed,PastelYellow,Pink,Red,White",
        "graphicType": "Skull",
       // "eyeType": "Close,Cry,Default,Dizzy,EyeRoll,Happy,Hearts,Side,Squint,Surprised,Wink,WinkWacky",
        "eyeType": "Default",
        //"eyebrowType": "Angry,AngryNatural,Default,DefaultNatural,FlatNatural,RaisedExcited,RaisedExcitedNatural,SadConcerned,SadConcernedNatural,UnibrowNatural,UpDown,UpDownNatural",
        "eyebrowType": "Angry,AngryNatural,Default,DefaultNatural,FlatNatural,RaisedExcited,RaisedExcitedNatural,SadConcerned,SadConcernedNatural,UnibrowNatural,UpDown,UpDownNatural",
        //"mouthType": "Concerned,Default,Disbelief,Eating,Grimace,Sad,ScreamOpen,Serious,Smile,Tongue,Twinkle,Vomit",
        "mouthType": "Default,Disbelief,Eating,Serious,Smile,",
        "skinColor": "Tanned,Yellow,Pale,Light,Brown,DarkBrown,Black",
        "avatarStyle": "Circle"
    };
    var randomAvatar = {};
    for (var key in avatarData) {
        if (avatarData.hasOwnProperty(key)) {
            var values = avatarData[key].split(",");
            randomAvatar[key] = values[Math.floor(Math.random() * values.length)];
        }
    }
    return randomAvatar;
};

function buildAvatarUrl(avatarData) {
    var baseUrl = "https://avataaars.io/";
    var queryParams = [];
    for (var key in avatarData) {
        queryParams.push(key + "=" + avatarData[key]);
    }
    var url = baseUrl + "?" + queryParams.join("&");
    return url;
}
var sUrl = buildAvatarUrl(generateRandomAvatar());
console.log(sUrl);

this.getGlobals().setVar("NewAssistantAvatarUrl", sUrl);
This code generates a random avatar using the Avataaars.io API and stores the URL of the generated avatar in a global variable called “NewAssistantAvatarUrl”.
The generateRandomAvatar function initializes an object called avatarData that contains various properties related to avatar appearance, such as hairstyle, accessories, facial hair, clothing, and skin color. Each property has a string value that contains a comma-separated list of possible values.
The function then creates an empty object called randomAvatar and loops through each property of avatarData. For each property, it splits the string value into an array of values, chooses a random value from the array using Math.floor(Math.random() * values.length), and assigns the chosen value to the corresponding property of randomAvatar.
The buildAvatarUrl function takes the randomAvatar object as input and builds a URL for the Avataaars.io API that includes query parameters for each property of the randomAvatar object.
The sUrl variable is assigned the URL returned by the buildAvatarUrl function, and the URL is logged to the console using console.log.
Finally, the NewAssistantAvatarUrl global variable is set to the sUrl value using the setVar method of this.getGlobals().
Using a database to save the Chat History and Virtual Assistants
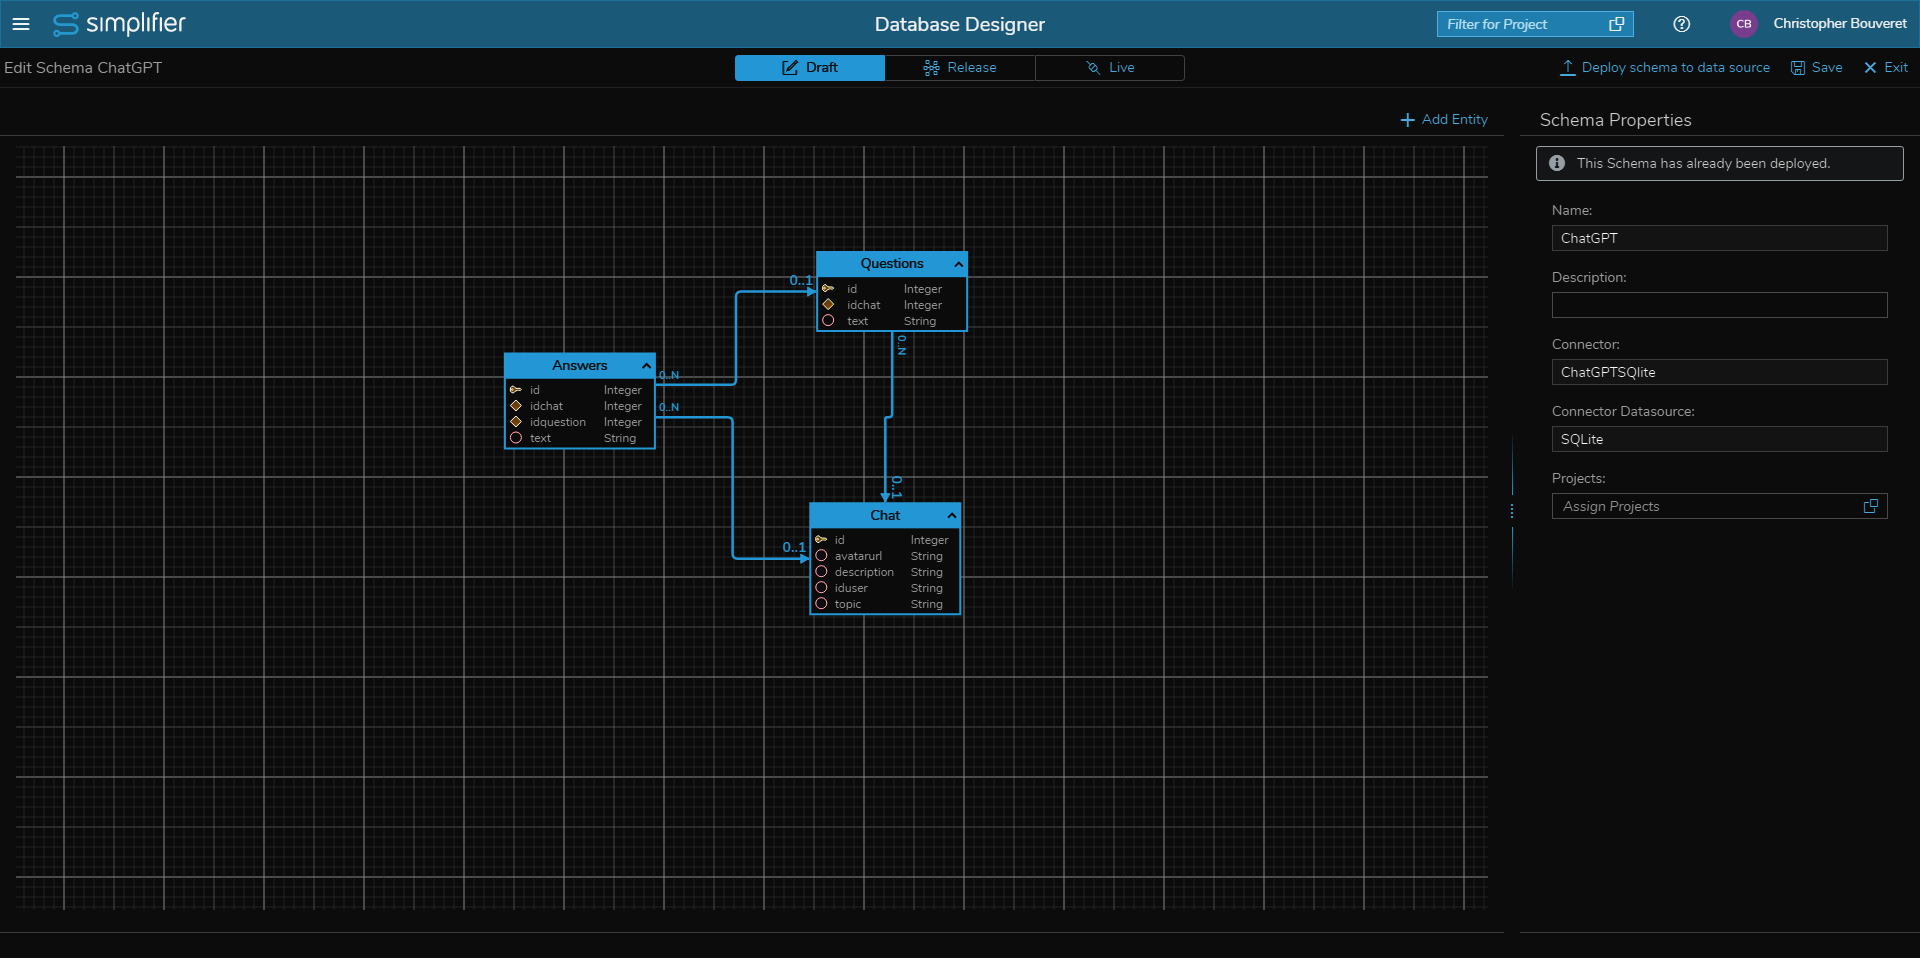
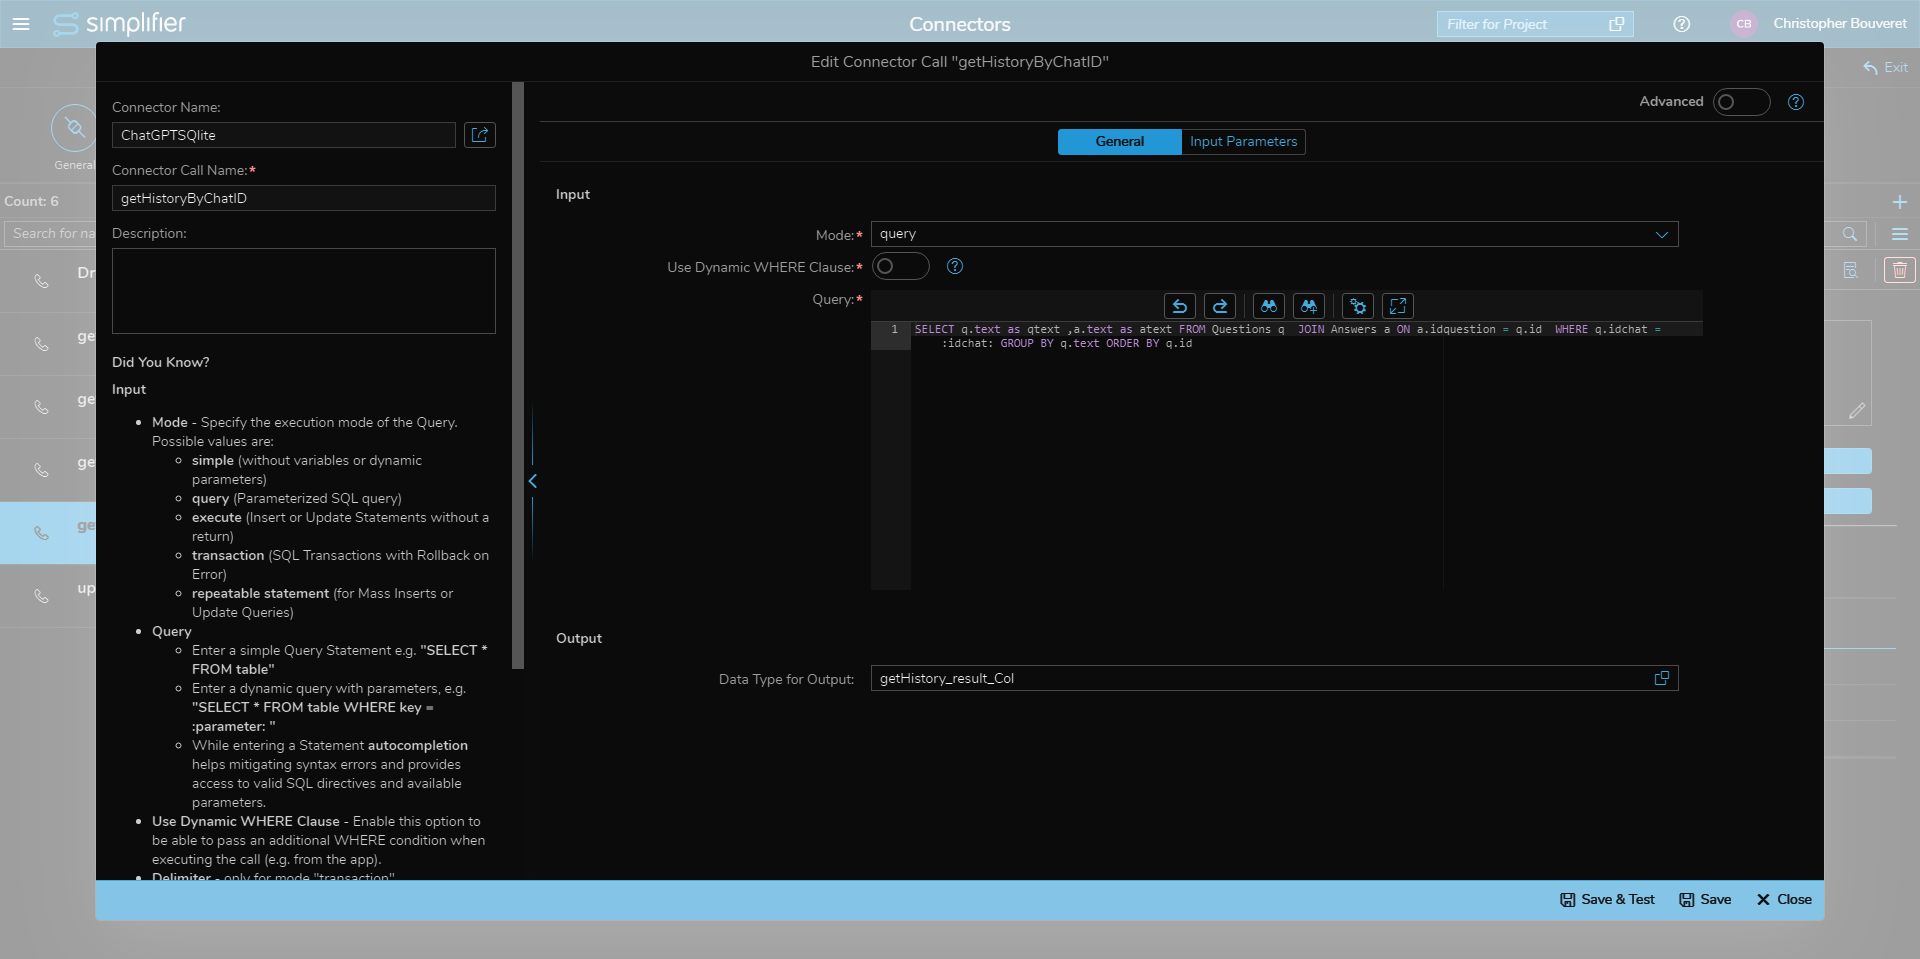
To store our chat history and assistants, I have created a simple SQLite Database Schema with the Database Designer:
Using Text-to-Speech Audio
As we want to hear the answers of our Assistants as spoken audio, we will use a small Script Block within our User Story “6.1 Ask Question to Assistant” and add the following code:
if (this.getGlobals().getVar("soundOn")) {
var aVerbs = ["says", "answers", "suggests", "replies", "responds", "asserts", "claims", "mentions", "tells"];

var sAnswer = this.getGlobals().getVar("answer");
var oChat = this.getGlobals().getVar("chatSelected");

var utterance = new SpeechSynthesisUtterance();
utterance.text = oChat.topic + " " + aVerbs[Math.floor(Math.random() * aVerbs.length)] + " " + sAnswer;

utterance.lang = "en-US";
speechSynthesis.speak(utterance);
}
Within the UI of our application, we have added a button with a speaker icon on our MainScreen within the Application Editor. When a user clicks the button it will toggle the Global Variable “soundOn” between true and false.
This code checks if the “soundOn” variable is true. If it is, it generates a random verb from the array “aVerbs” and combines it with the “answer” and “topic” variables to create a text message. Then, it creates a new SpeechSynthesisUtterance object and sets the “text” property to the generated message.
The “lang” property of the utterance is set to “en-US”, indicating that the text message should be spoken in US English. Finally, the “speak” method of the speechSynthesis object is called with the utterance as its argument, which causes the message to be spoken aloud using text-to-speech synthesis.
Overall, the code is a simple implementation of text-to-speech functionality that generates a random phrase and speaks it aloud if the “soundOn” variable is true.
To get an impression of the Chat Client App, watch the video.
If you want to try it for yourself you can download and install the App Template from the Marketplace:
 ChatGPT is a popular language model that uses artificial intelligence to generate human-like responses to text input. In this article, I will share how I created a custom ChatGPT client using Simplifier Low Code Platform.
